
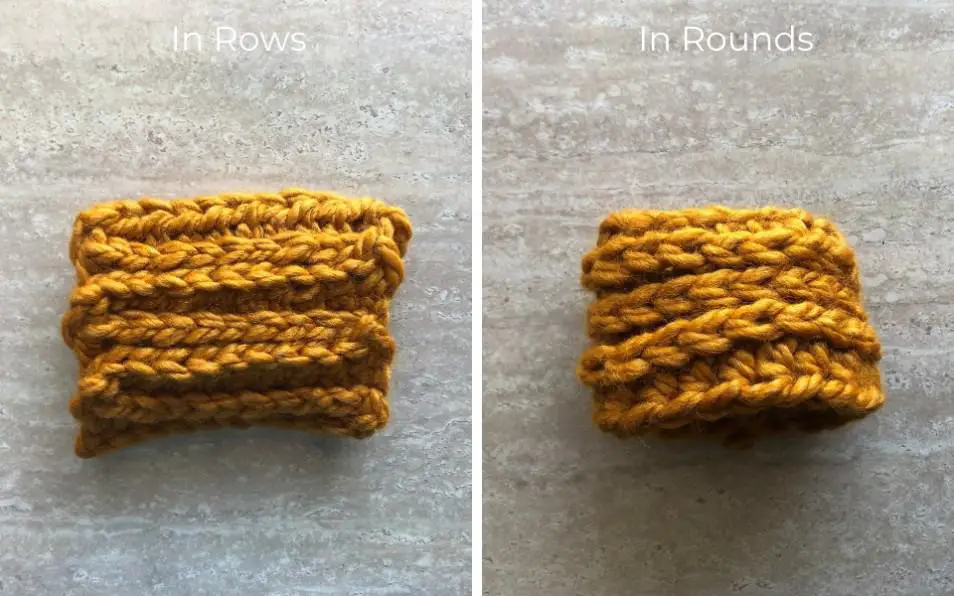
The camel stitch is also known as half double crochet (hdc) in the third loop. It can be crocheted in both rounds and rows.
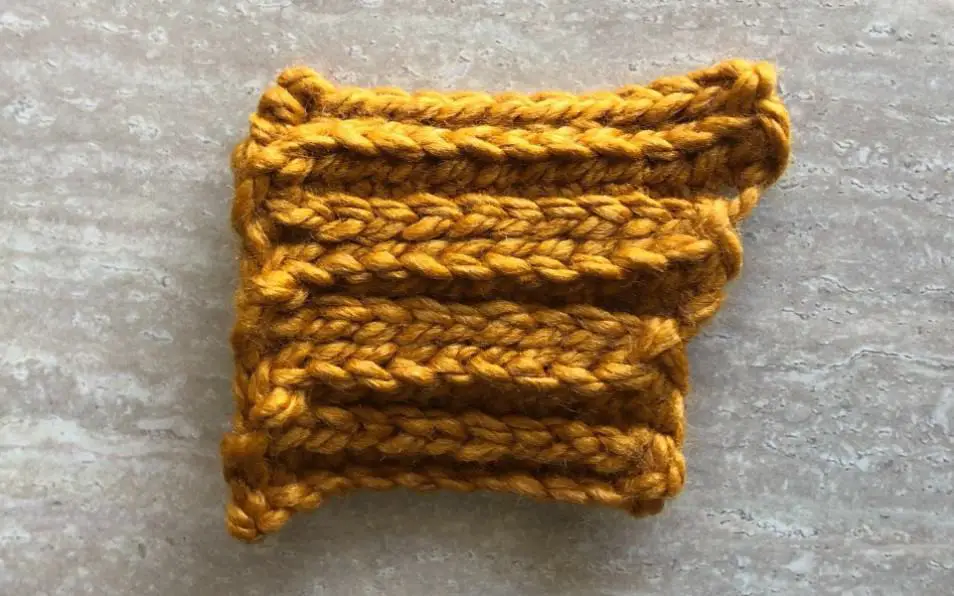
The camel stitch pushes the top v’s of each row to the front, creating a knit-like fabric. When crocheted in rows, the result is a ribbing that looks similar to a knit 2, purl 1. When crocheted in rounds, the result looks like stockinette along the horizontal.
To learn how to make this stitch, see what it looks like and learn more about the stitch itself, please continue reading.
US Abbreviations
Click the links to gain access to my tutorials for each of the stitches on my YouTube channel.
- hdc – half double crochet
- sl st – slip stitch
- ch – chain
- st(s) – stitch(es)
- RS – right side
- WS – wrong side
*UK equivalent to a hdc is half treble (htr)
Camel Stitch Pattern Notes
- Review the above stitches before starting.
- Any multiple of stitches can be used.
- RS and WS do matter.
- Not Reversible – however, the reverse side can be used (it will look totally different though)
Basic Camel Stitch Pattern
The camel stitch / hdc in 3rd loop can be made in either rows or rounds, which yields different results. The instructions for both are provided below.
How to crochet the camel stitch IN ROWS:
Begin with any number of chain stitches. (the swatch has 10 sts)
Row 1: Skip the first st and hdc in each st across. Ch 1, turn.
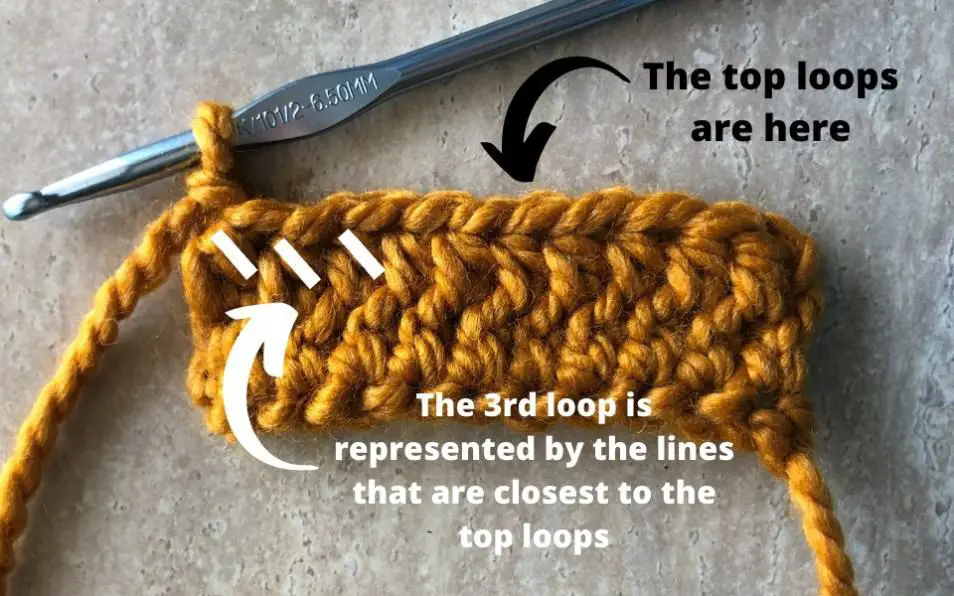
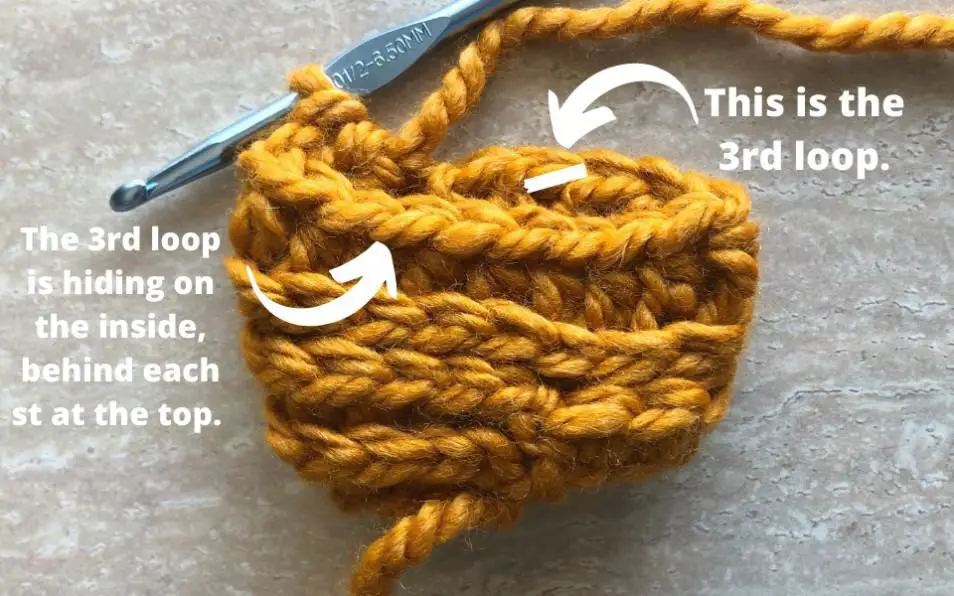
Row 2: Working on the WS, hdc in the 3rd loop in each st across. ch 1, turn. For guidance, refer to the photo below on how to find the 3rd loop.
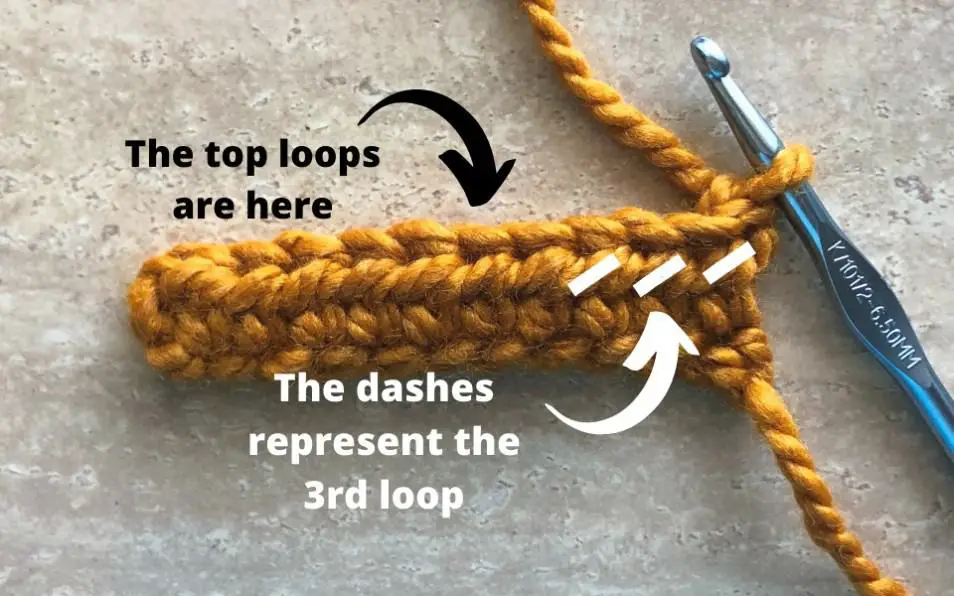
Row 3: Working on the RS, hdc in the 3rd loop in each st across. ch 1, turn. For more guidance, refer to the photo guides below.
The RS looks like the photo below. The top stitches from the first row were pushed forward and you want to do the same to the tops of Row 2.
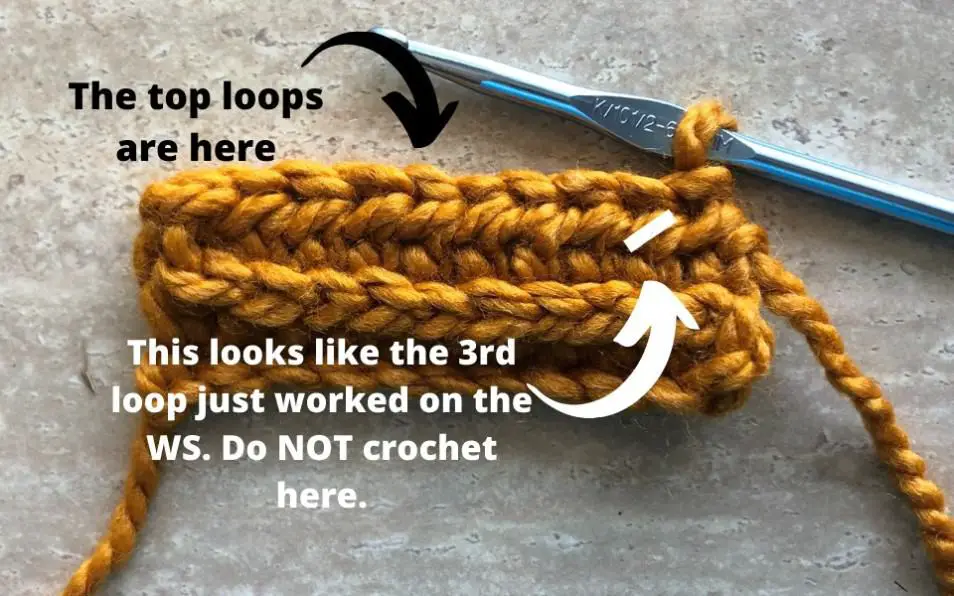
Flip the fabric to the WS. Find the 3rd loop (pictured below) and hdc in each st across. By crocheting into this 3rd loop, the tops of the row get pushed to the front to make the braid.
Repeat rows 2 and 3 until it is the length you want.
How to crochet the camel stitch IN THE ROUND:
Begin with any number of ch sts. sl st into the first ch to join the round. (the swatch has 16 sts)
Rnd 1: Ch 1, hdc in each ch across. Join with a sl st to complete the round. Ch 1.
Rnd 2: Working on the RS, hdc in the 3rd loop in each st across. Join with a sl st to complete the round. Ch 1. For guidance, refer to the photo below on how to find the 3rd loop.
Repeat Rnd 2 until it is the height you want.
Note: you are always working with the RS facing you.
Shaping with the Camel Stitch
In order to achieve different shapes, increases make the fabric bigger and decreases make the fabric smaller. There are two ways to do this: edge shaping or internal shaping.
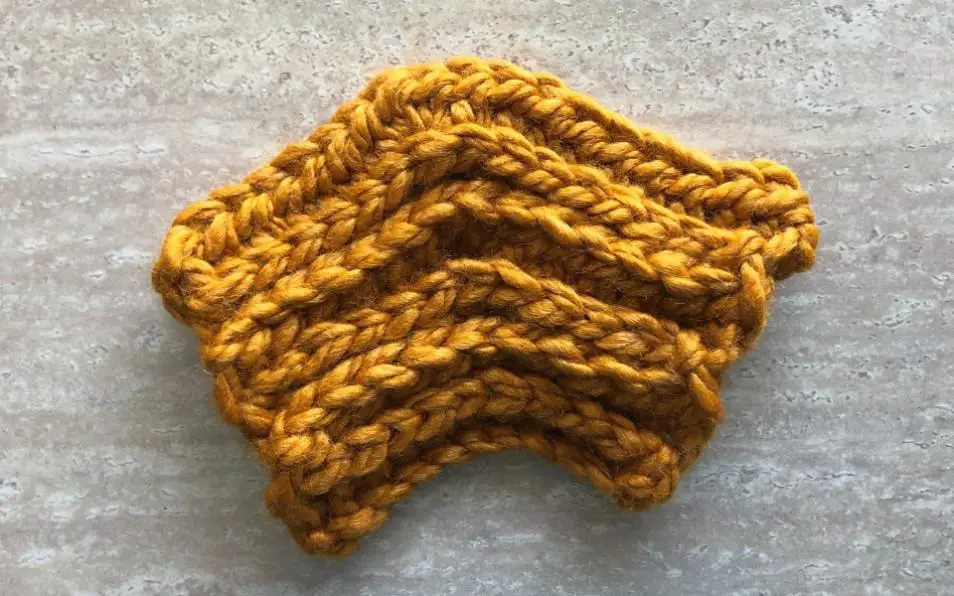
Edge shaping means you add increases or decreases to the edge of the piece for several rows and you end up with a straight slanted line. For an example of what this looks like with the camel stitch, take a look at the photo below. There is no disrupt to the stitch pattern. It continues as normal.
Increasing Along the Edge
Inc Row 1: ch 1, 2 hdc in 3rd loop in first st, continue in pattern (hdc in 3rd loop) across.
Inc Row 2: ch 1, continue in pattern (hdc in 3rd loop) across until last st, 2 hdc in 3rd loop in last hdc, turn.
Internal shaping means that stitches are added or subtracted in the middle of a row. This is typically used for garments, to create a seamless piece of fabric. The photo below illustrates what internal shaping looks like with the camel stitch.
Increasing Internally
Row 1: hdc in 3rd loop in each ch across. Place st marker in the center st of the row.
Inc Row 1: ch 1, hdc in 3rd loop until st marker, 3 hdc in 3rd loop in marked st (move marker to center st), continue in pattern (hdc in 3rd loop) across.
Rep Inc Row 1 to continue increasing.
Best Yarn Weights Paired with the Stitch
The camel stitch is a great stitch for any yarn weight. I haven’t tested it on all yarn weights (yet), but the ones I have I’ll tell you about!
The photos throughout the tutorial of the stitch pattern use Lion Brand Thick & Quick, which is a super bulky (#6) weight yarn. The result is very defined, chunky stitches. Patterns work really fast and easy.
I also have tested it out on super fine (#1) and DK (#3) weight yarn when held double. The stitches look the same, but are much smaller. Patterns tend to go slower since the yarn is much thinner. To see examples of these 2 yarn weights worked in the special stitch, check out the ‘Project Ideas’ section.
Project Ideas
This stitch pattern was new to me, but now I have used it on so many projects! I wanted a knit-like ribbing for a hat and I became obsessed with the stitch and designed many more items.
Honestly, I didn’t find many patterns that use the camel / hdc in 3rd loop stitch. So all I have listed here are my own patterns. I’m not that conceited, I promise! I just want you to see the stitch for all it’s glory!
Hats
Decorations
Placemat
Headbands
Border for blankets
Ribbing for garments
Recent Posts
The Sole Hat: A Classic Knit-Look Hat Crochet Style | Free Pattern + Tutorial
If you're a crochet enthusiast looking for a timeless, cozy hat pattern with a unique twist, you're in the right place! Introducing Sole, the crochet version of the classic, chunky 2x1 knit ribbed...
Twofold is the Sew Homey take on a classic, chunky knit-ribbed hat with a folded brim. It features the same unique stitch combination and short rows as the Sole hat, but with a modification of stitch...