
The Weminuche Wilderness Trail Toboggan is a free pattern here on the blog! The simple construction of the hat makes it an easy, beginner-friendly crochet pattern.
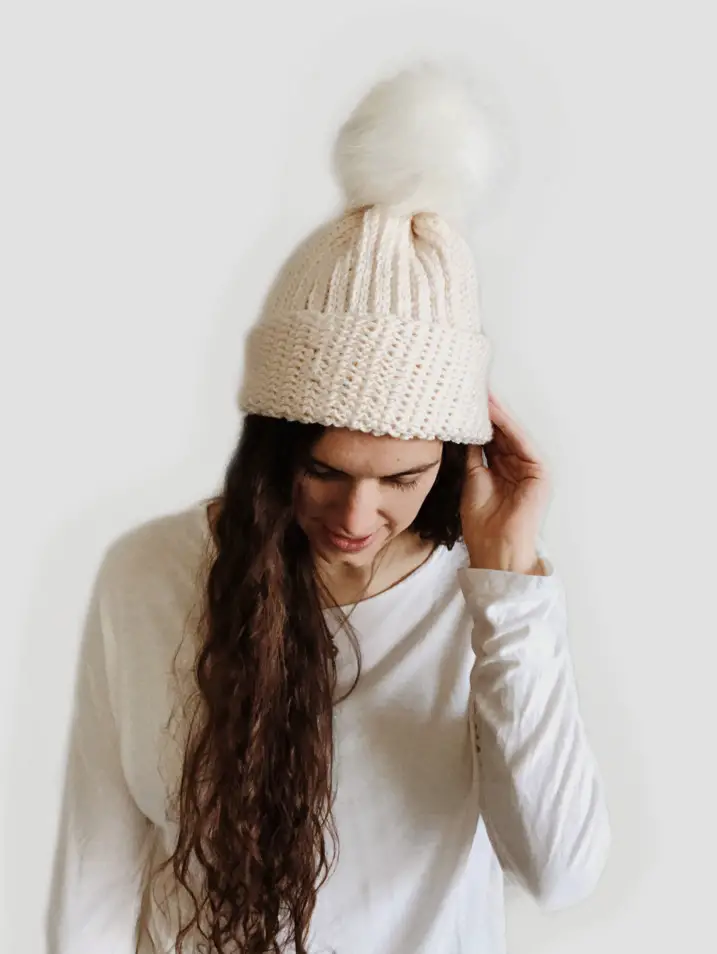
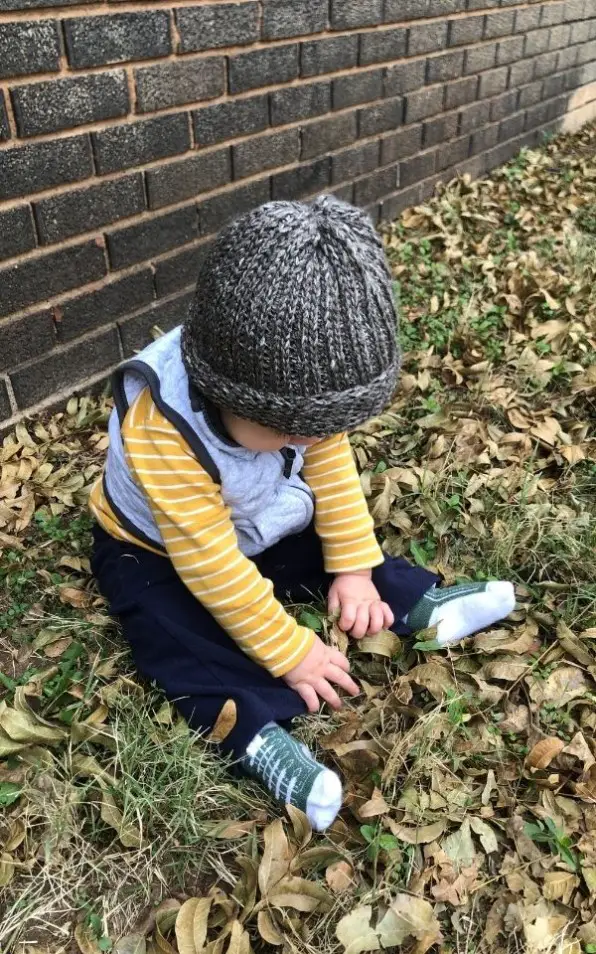
A crochet hat that looks knit. The ribbing is created by using a special crochet stitch called hdc in 3rd loop (or camel stitch) and mimics a knit 2×1 ribbing.
The hat is warm, but not bulky. It’s a classic ribbed beanie to add to your capsule wardrobe for those cold winter months. Read through to learn more about the inspiration, the yarn used, and how to get your hat to fit perfectly. Or scroll on down to the free pattern and/or follow along with the tutorial.
The Inspiration
This summer, the summer of 2020, my dad and I went on a Father Daughter trip, carrying on our tradition of camping in the mountains. When my dad and I were planning the trip, I got the idea for the design of this hat pattern. I wanted a new hat to sport in the beautiful mountains of Colorado.
The design inspiration came from my love of knit ribbed hats. There is just something about them that is so simple and classic. So I put forth a challenge for myself: to crochet a hat that looks knit.
In my research phase, I found a stitch pattern called the camel stitch, or hdc in the 3rd loop. It makes a fabric that looks like a knit 2 purl 1 ribbing (2×1), if you are familiar with knitting terms.
The inspiration for the pattern name came from the hiking adventure that my dad and I went on in the Weminuche Wilderness. We took a day hike that was uphill for almost the entire first half of the day (ugh), but the view was so worth it.
My dad took me to that specific trail because (years ago) he backpacked up there several years in a row. My dad has great memories on that trail and I will forever cherish the time I was able to spend with my dad on the hike (and the whole trip), so I dedicated this hat to him and our memories in the Weminuche Wilderness.

Techniques Used – All Beginner Friendly
There are a few unique methods for constructing this hat. I used techniques that were all new to me. I used the magic circle in a never before seen way (at least to me), double stranded crochet and the camel stitch. Keep reading this section to learn more details.
Technique #1 – Magic Circle
The hat begins with a magic circle then a long chain is crocheted and the rest of the pattern is worked in rows. Each time the circle is reached, a slip stitch is used to attach the row to the center of the circle. At the end, the sides are seamed together and the magic circle is pulled closed and the hole is sewn shut.
The magic circle at the beginning is used for 2 reasons:
- The process of seaming the top together is sped up because you don’t have to weave the yarn through the top. The rectangle is already held together by yarn from the top slip stitches.
- I found that the top of my hat looked more uniform when using this method.
Don’t let any of that scare you. It was a new technique to me as well, so I detail (slowly) how to do everything. Check out my free video tutorial on YouTube by scrolling down to the written instructions or click here.
I need to give credit where it is due. I got the inspiration for using a magic circle from Rich Textures Crochet who uses a chain loop instead of a magic circle to start her hat. You can find her video tutorial here.
Technique #2 – Double Stranded Crochet
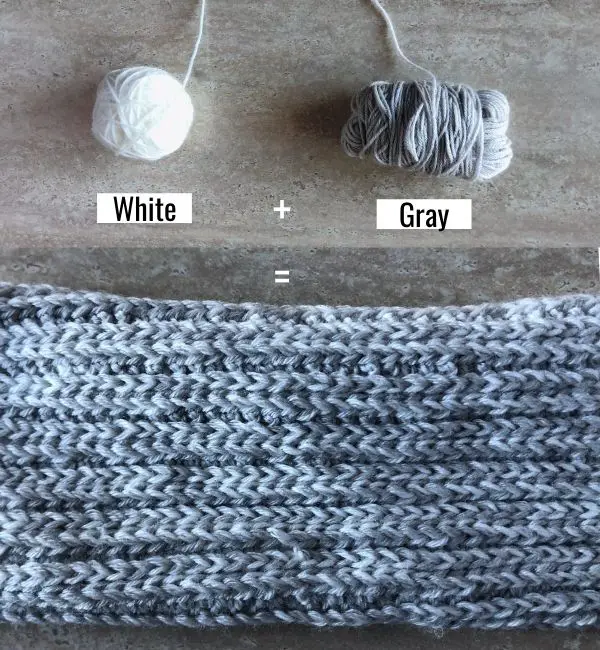
Doesn’t this technique sound complicated? Well, good news. It’s not! All double stranded means is that you hold 2 strands of yarn together and crochet them as if it is one strand.
I used this technique because I found some yarn on clearance that I loved. However, the yarn weight was a #1 Super Fine. It would take forever to crochet an adult sized hat with that, not to mention the fabric would be very thin. I held 2 strands together to make it thicker and easier to work with. Plus, I played with color combos to create a marbling effect of the yarn. Let me show you what I mean.
Technique #3 – Camel Stitch
The camel stitch is also known as hdc in the 3rd loop. Sounds complicated, but it’s not. It’s a traditional hdc, but you insert the hook in a different loop, the 3rd loop. What happens is the tops of the stitches, the “v” shapes are pushed forward to the outside of the hat. This is how the hat gets the ribbing.
This was a new stitch for me to learn, but it is so easy to catch on. Once you know where to put the hook, the 2 row repeat is so mindless. Again, I show you exactly how to make the camel stitch in my tutorial.
Make the Perfect Size (for Everyone) Every Time
Two measurements are important: head circumference and length from the crown of your head to the bottom of your ear lobe. Once you have these two things, you can crochet the perfect size hat.
The hat has a lot of stretch, so in order for the hat to fit snugly on your head, you must subtract the negative ease. I suggest 2-4 inches as negative ease. The more negative ease, the tighter the hat will fit.
For reference, the hat in the photographs has a circumference of 20″ and the actual head circumference is 21.5″. The hat fits, not too loose, not too tight.
Also, the pattern is written to include a folded brim that measures about 2.5″. So the hat will be longer than your actual head length.
I added the following to summarize what was just said. Take note of your own measurements.
- Head Circumference – Negative Ease = ________
- Crown to Ear Lobe Length + Brim Length (2.5 inches) = ________
Yarn + Substitution
I chose Yarn Bee Pigment + Fiber merely because I found an awesome deal since some colorways were on clearance. Any yarn weight 1 held double stranded that meets gauge requirements will work.
I also experimented with Yarn Bee Soft & Sleek DK which is a weight 3 and found that the gauge is similar to the weight 1 if held double as well. Just make sure gauge requirements are met.
Both yarn weights work and information for both are included in the pattern. The weight 3 yarn will result in a slightly heavier hat.
Pattern
- Get the ad-free, printable PDF version (with 7 sizes) on Etsy HERE.
Description
A ribbed beanie that looks knit, but is made effortlessly with a crochet hook. Tons of stretch allows the hat to fit comfortably on your head. Choose to add a pom pom, or not. It’s a classic hat to add to your capsule wardrobe.
Yarn
Yarn Bee Pigment + Fiber (554 yards)
Or substitute with:
Yarn Bee Soft & Sleek DK (542 yards)
Tools
- Hook size G / 4.25 mm
- Tapestry Needle
- Scissors
- Pom Pom (optional)
Gauge
- Weight 1 held double: 13 rows x 19 sts = 4″ in hdc in 3rd loop
- Weight 3 held double: 13 rows x 18 sts = 4″ in hdc in 3rd loop
Abbreviations
Click the links to watch the tutorials for the corresponding stitches on my YouTube channel.
ch – chain
sl st – slip stitch
hdc – half double crochet
st(s) – stitch(es)
RS – right side
WS – wrong side
hdc in 3rd loop – special stitch, watch tutorial HERE.
Notes
- Pattern is written using US standard terms.
- Hold 2 strands of yarn throughout.
- The pattern includes sizing information for adult small only. Finished size is 20″ in circumference and 10.5″ long (with folded brim, it will measure about 8″ long). For more sizes, 7 to be exact, purchase the pattern. Includes sizes for preemie to adult large.
- The hat can be modified by adding more or less rows to make the hat fit a larger/smaller head. To make the hat longer or shorter, add or subtract stitches from the initial chain row.
- Try the hat on as more rows are added for a more customizable fit.
- Weight 3 yarn directions are in ( ).
- The sl st and ch 1 do not count as a stitch.
- Always make hdc in 3rd loop on the WS of the hat. The notation “working on RS/WS” was used to help determine where to place the special stitch.
- End with an even number of rows so that when the rows are stitched together, the pattern continues and the seam is invisible.
Weminuche Wilderness Trail Toboggan
Begin: Make magic circle, leaving approximately an 15 inch tail.
ch 51 (49) + 1
Row 1: hdc in the second ch from hook and in each st across; sl st into the center of the magic circle. ch 1, turn. (51, 49 sts)
Row 2: Working on the WS, hdc in 3rd loop all the way across. ch 1, turn. (51, 49 sts)
Row 3: Working on the RS, hdc in 3rd loop all the way across. sl st into the center of the magic circle. ch 1, turn. (51, 49 sts)
Repeat rows 2-3 66 times, or until it reaches the length of your head circumference (minus the negative ease).
Finish: In the last row, do not ch 1. Cut the yarn approximately 20-25 inches and draw through the loop on the hook. Using the yarn tail, mattress stitch the first and last rows together. Fasten off.
Pull the magic circle closed with its yarn tail. Sew the hole shut. Fasten off.
Weave in all the ends.
Sew a pom pom to the top of the hat (optional).
It is recommended to steam block the hat along the bottom to erase curling.
2 thoughts on “Knit-Like Ribbing Crochet Hat | Free Pattern + Tutorial”
Comments are closed.
Recent Posts
The Sole Hat: A Classic Knit-Look Hat Crochet Style | Free Pattern + Tutorial
If you're a crochet enthusiast looking for a timeless, cozy hat pattern with a unique twist, you're in the right place! Introducing Sole, the crochet version of the classic, chunky 2x1 knit ribbed...
Twofold is the Sew Homey take on a classic, chunky knit-ribbed hat with a folded brim. It features the same unique stitch combination and short rows as the Sole hat, but with a modification of stitch...
I’m extremely pleased to discover this website. I wanted to thank you for ones time just for this fantastic read!! I absolutely enjoyed every part of it and i also have you bookmarked to see new stuff in your site.
Aww thank you! I’m pleased that you enjoyed this post! I had so much fun with this pattern and it means a lot to me. Can’t wait for you to see the new things I have planned!