
It’s fall y’all! And that means, pumpkins are in style again. Learn to crochet your very own pumpkin (or pumpkins!) to add a homemade touch to your fall decor. Think rustic farmhouse.
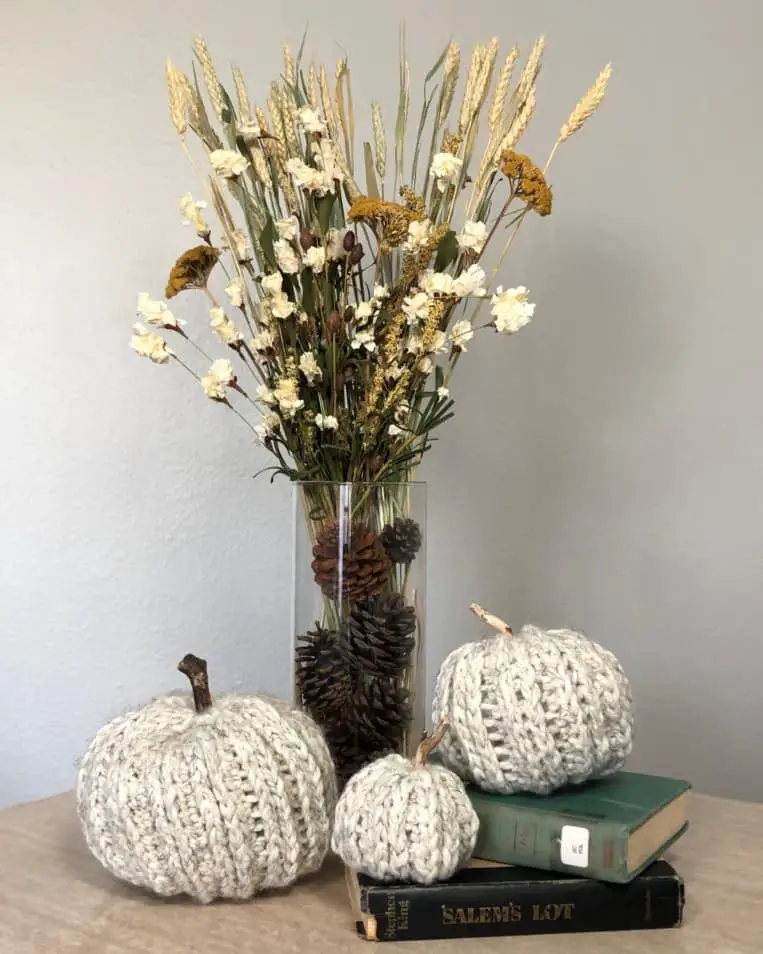
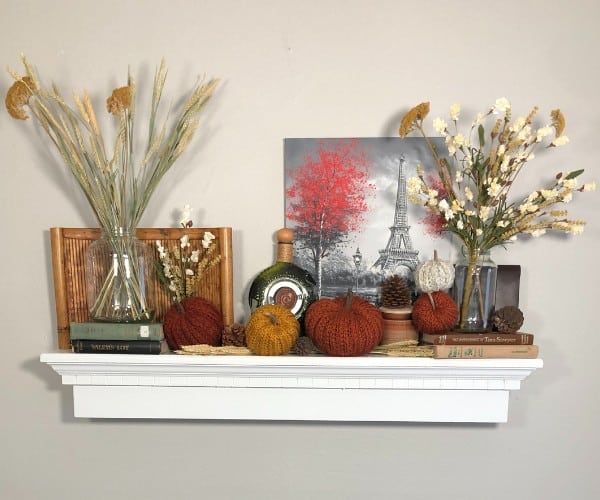
The Farm Fresh Pumpkins are chunky, knit-like crochet pumpkins that can be mixed and matched in size and color to match any theme. They are perfect to decorate the Thanksgiving table, mantel, shelves and even porch.
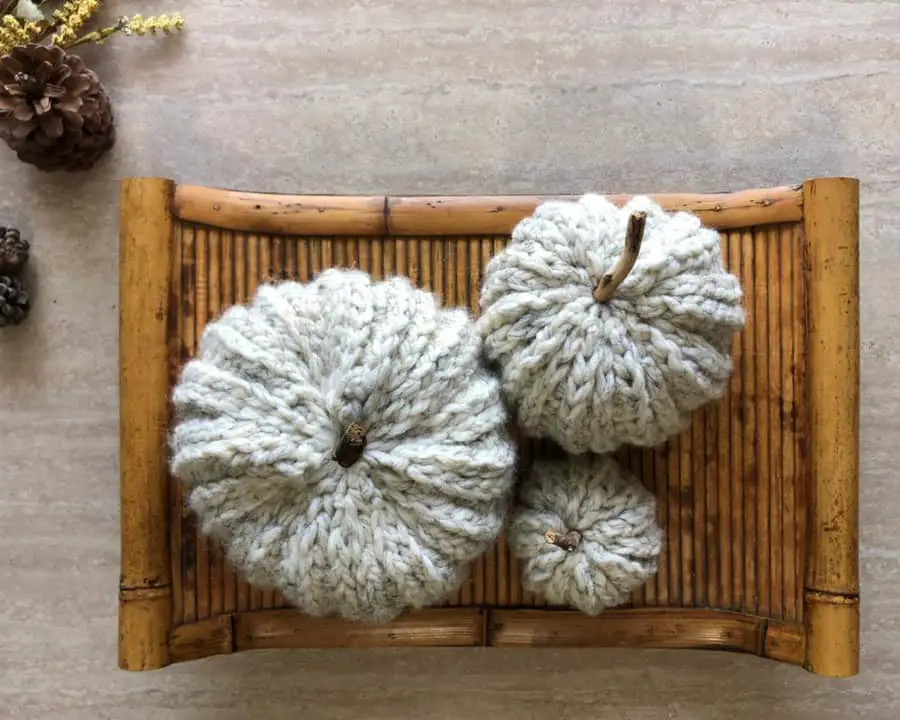
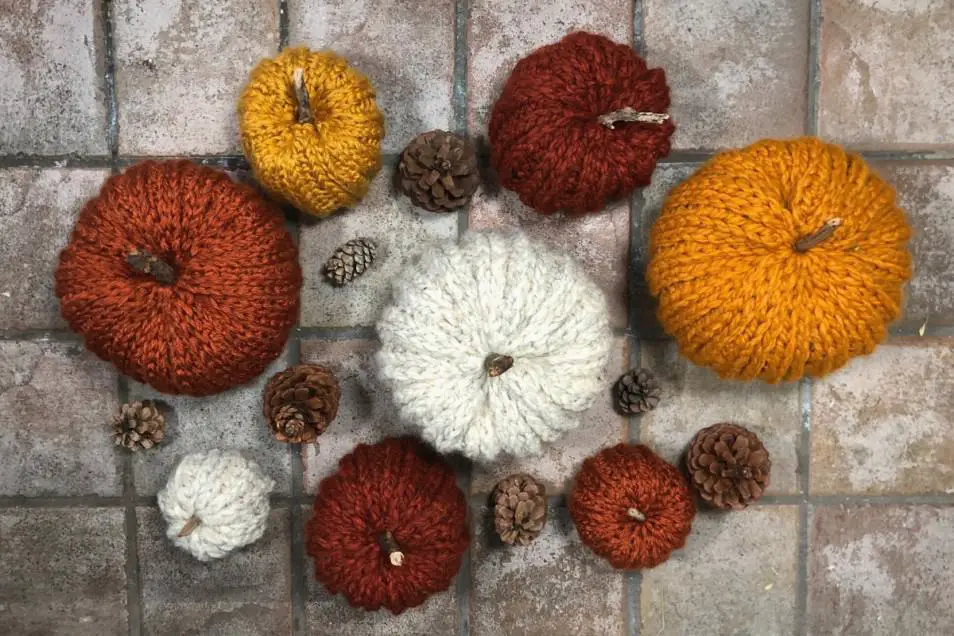
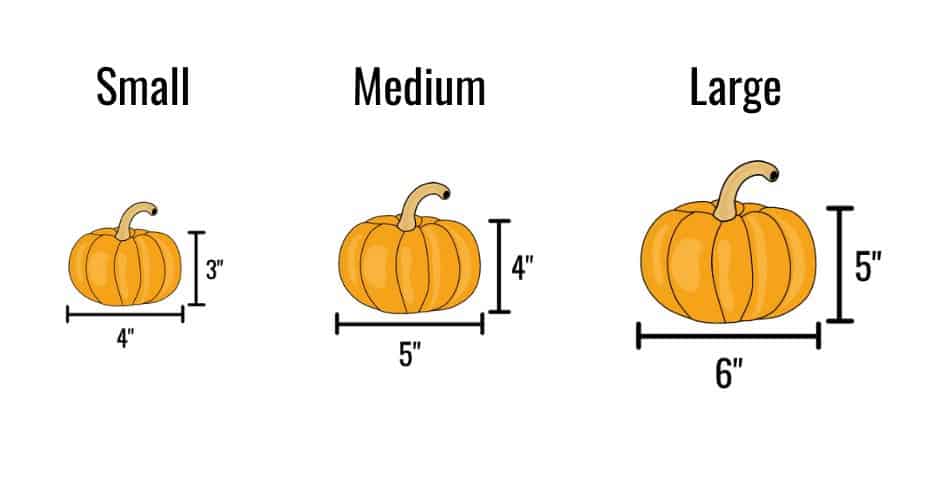
There are three different sizes of pumpkins to choose from AND there are endless color choices. You are sure to find a color or colors to pair well with your fall color scheme.
Keep reading to find the free crochet pattern included in this post. Or follow along with me as I make a pumpkin in the tutorial that follows the pattern. As always, if you choose to make this pattern, tag me on Instagram (@sew.homey) so I can see your projects!
Thanks for stopping by. I can’t wait for you to create your very own pumpkins!
Inspiration
Fall is my favorite time of year. And never having decorated for fall myself, pumpkins were at the top of the list as must have decorations. They are so perfect for the fall season! And I had seen people in the past make their own out of fabric or yarn. I wanted to give it a try myself.
For these pumpkins, I wanted a chunky knit look where the stitch pattern created the ridges so there was no tying yarn around the pumpkins. I’ve seen crochet pumpkins made with this technique that look so cute, but I wanted a pattern that was super simple with no extra steps. Just crochet and seam the sides closed.
It was not hard to think of a stitch to use because I have fallen in love with hdc in the third loop (camel stitch) because it makes the crochet fabric look knit. My first pattern that uses this stitch, the Weminuche Wilderness Trail Toboggan, will be released soon.
With those criteria, the Farm Fresh Pumpkins pattern was born. It was designed with the beginner in mind. Choosing a bulky yarn makes the pumpkins work up fast for instant gratification. Also, the thick yarn is super easy to manage since it pairs with a large hook size.

Choose from 3 different sizes or go rogue and make yours as big or small as you want. And choose any color to match your theme at home (or work). Whatever you choose, you are sure to have a fun crochet experience.
Construction
These pumpkins are made lengthwise, held together by a magic circle at the top. Once the pumpkin is crocheted, the two sides are seamed together. Next, the magic circle is pulled closed and tied securely in place.
On the opposite end, a strand of yarn is woven through the top stitches and the pumpkin is stuffed with poly-fil fiber. Finally, the strand of yarn is pulled tight to close the bottom of the pumpkin.
To finish, a stick found outdoors is placed in the center of the pumpkin. Alternatively, use a cinnamon stick for the stem.
Video resources are included!
Yarn Choices
The number one yarn choice for this project is Lion Brand’s super bulky (#6) weight yarn called Wool-Ease Thick & Quick. This yarn creates a chunky, squishy pumpkin with very prominent ridges.
There are other substitutions though. Most everyone will have a worsted weight yarn (#4) in their stash already. In this case, hold two strands of worsted weight yarn together and the results will be similar. In the pattern, I used Lion Brand Heartland yarn, but any worsted weight yarn will do.
The gauge is different for worsted weight yarn, so more stitches and rows are necessary compared to a super bulky yarn. The resulting pumpkin will be slightly smaller since the fabric is not as thick.
There are instructions for both yarn weights in the pattern.
Pattern
- Get the ad-free, printable PDF version on Ravelry HERE.
- The tutorial on YouTube is coming October 12th and it will be available on my channel here.
Description
It’s finally fall and y’all know what that means, pumpkin time. These chunky crochet pumpkins look knit, but are made effortlessly with a crochet hook. The perfect centerpiece for a Thanksgiving spread or an autumn themed mantel.
Yarn
Lion Brand Thick and Quick (see yardage in the table below)
Or substitute with:
Lion Brand Heartland (see yardage in the table below)
Tools
- Hook size K / 6.5 mm
- Tapestry Needle
- Scissors
- Poly-fil
- Stick from outdoors (or cinnamon stick)
Gauge
- Weight 6: 8 rows x 9 sts = 4″ in hdc in 3rd loop
- Weight 4 held double: 9 rows x 12 sts = 4″ in hdc in 3rd loop
Abbreviations
ch – chain
sl st – slip stitch
hdc – half double crochet
st(s) – stitch(es)
RS – right side
WS – wrong side
Notes
- Pattern is written using US standard terms.
- Prior to beginning, find your pumpkin size below.
- Pattern lists the sizes in order from small to large. The ( ) at the end of each row denote the stitch count for each size.
- One skein of Lion Brand Wool Ease Thick & Quick and Heartland will yield approximately a small and large pumpkin, or 2 medium and one small pumpkin, or 3 small pumpkins. Results will vary though.
- Other yarns will work, but gauge may vary.
- The final size of the pumpkin will not measure the same as the starting height. Approximately 3-5 inches gets lost depending on the chosen pumpkin size.
- The pumpkin has a lot of stretch. Be careful not to overfill with stuffing.
- A stick from outside is only a suggestion for the stem. Cinnamon sticks also work great (and smell delightful)!
- For additional help with the techniques and stitches used in this pattern, click the links to watch the corresponding videos that I made: magic circle, hdc, hdc in 3rd loop.
Size & Yardage
Use the schematic below to find the size of pumpkin you want.
Then use the chart to determine the yardage and skeins necessary to complete the chosen pumpkin size.
For weight 6 yarn:
| Yardage | # Skeins | |
| Small | 30 | 1 |
| Medium | 48 | 1 |
| Large | 96 | 1 |
For weight 4 yarn held double:
| Yardage | # Skeins | |
| Small | 62 | 1 |
| Medium | 98 | 1 |
| Large | 198 | 1 |
Farm Fresh Pumpkins
Begin: Make magic circle, leaving approximately 12-18 inch tail.
ch 11 (16,22)
Row 1: hdc in the third ch from hook and in each st across; sl st into the center of the magic circle. ch 1, turn. (9, 14, 20)
Row 2: Working on the WS, hdc in 3rd loop from front all the way across. ch 1, turn. (9, 14, 20)
Row 3: Working on the RS, hdc in 3rd loop all the way across. sl st into the center of the magic circle. ch 1, turn. (9, 14, 20 sts)
Repeat rows 2-3 for 18 (20, 34) rows, or until it reaches the length you want your pumpkin.
Finish: In the last row, do not ch 1. Cut the yarn approximately 15-18 inches and draw through the loop on the hook to tie off. Using the yarn tail just cut, mattress stitch the first and last rows together.
Pull the magic circle closed, leaving a tiny hole at the top for the stem. Tie in a knot to secure in place.
Weave through the bottom stitches of the opposite side with one of the yarn tails. Stuff the pumpkin with poly-fil before pulling the bottom closed. Sew along the center to hide the hole (if there is one).
For a flatter, more pumpkin-like look, proceed with the following directions. Otherwise, hide the yarn tails inside the pumpkin and cut the excess yarn.
Take the yarn tail that was left at the top and take it through the center of the pumpkin, ending at the bottom. Pull the yarn tail tight. The pumpkin will squish down in size and flatten. Once you like the look, tie the two yarn tails together to secure in place. Then hide the yarn tails inside the pumpkin and cut the excess yarn.
Cut or break a stick into the desired size (approximately 2-3 inches). Poke it into the hole and position it into place. If using a cinnamon stick, cut in half then proceed in the same manner.
Thanks for stopping by! Let me know how your pumpkins turned out, tag me on insta! Happy crocheting.
Recent Posts
The Sole Hat: A Classic Knit-Look Hat Crochet Style | Free Pattern + Tutorial
If you're a crochet enthusiast looking for a timeless, cozy hat pattern with a unique twist, you're in the right place! Introducing Sole, the crochet version of the classic, chunky 2x1 knit ribbed...
Twofold is the Sew Homey take on a classic, chunky knit-ribbed hat with a folded brim. It features the same unique stitch combination and short rows as the Sole hat, but with a modification of stitch...