
I used to skip blocking my knit and crochet projects because of my concern for time, my lack of knowledge, and the cost of equipment. Looking back, this was silly of me, especially worrying about the cost, because with a little research and a few household items, blocking was only one step away.
Blocking knit items can be done inexpensively with a towel and flat surface. The surface can be a table, floor, desk, etc. Cover the surface with a towel and pat the piece into shape. Use cushioned surfaces, such as carpet, cushions, or a yoga mat for items (like lace) that need to be pinned out.
Eventually you may want to invest in a set of blocking mats, but for starting out, this way of blocking will work just fine. Most everyone has a spare towel and a little space to dedicate for the blocking process.
At this point, you’ve seen the word “blocking” about a dozen times already, so if you are not familiar with this topic, it gets explained in the next section. Then keep reading to find out the 10 ways to block without mats, ONLY using household materials.
Blocking and Why You Should Care
Blocking is the process of applying water to a knit or crochet piece of fabric, shaping the piece and then letting the fabric dry. This is the final step to any knit or crochet project. Blocking is done for a few reasons:
- The piece looks more professional because stitches even out.
- The piece matches the size stated in the pattern.
- The edges straighten out, which is beneficial for seaming.
- For lace, the fabric goes from a lumpy blob of yarn to a piece of fabric with a lot of drape and the stitches are clearly seen.
- For some yarn, blocking makes the fibers softer.
Types of Blocking
There are 3 main types of blocking. Each one has its purpose and can be used on a variety of projects.
- Wet blocking: The fabric is fully submerged in water and soaks for several minutes. Once removed from the water, a towel is used to press out excess water. Next, the fabric is shaped and pinned (or just pressed) into the desired shape and dimensions. The fabric must be completely dry before use.
- Spray blocking: The fabric is spritzed with water, generally with a spray bottle, until saturated. The fabric is then pressed with fingers to get the water into all the fibers. Usually, the fabric is pinned into the correct size and shape first. Finally, the fabric is left alone to dry.
- Steam blocking: The process is similar to spray blocking. The fabric is shaped and pinned to size first. Next, steam is applied to the fabric. This may be done with a steamer or the steam setting on an iron. Pressing on the fabric after steam is applied helps get the fibers saturated. Then the fabric is left to dry.
These blocking methods work for both animal and synthetic fibers. The one recommendation I have is to steam block fabrics made from acrylic yarn. I did a study on blocking 100% acrylic yarn (read about it here) and found steam yields the best results.
11 Ways to Block With Materials at Home
Blocking knits (and crochet) can be done anywhere with just a few items. No expensive blocking mats required. I’ve listed several options that substitute blocking mats, using materials from your own home. Oh, and you want to grab sewing pins if you don’t have those on hand. They are useful for items that need to be pinned.
1. Yoga Mat
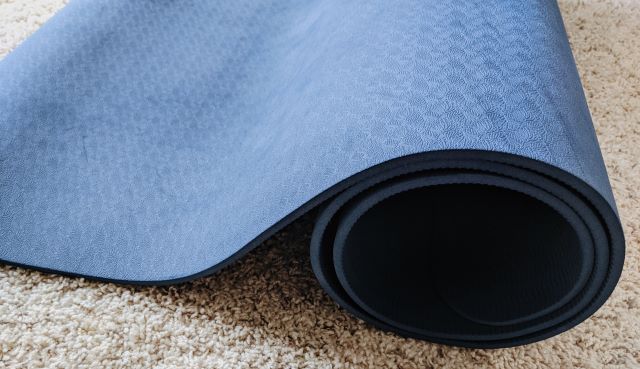
Many yoga mats are made out of waterproof material, making them a great solution for blocking at home. If you choose to place the fabric directly onto the yoga mat, dry time will be similar to that of actual foam blocking mats. But if you choose to place a towel in between, the dry time might be longer. Either way, the floor will remain dry so blocking can be done nearly anywhere.
Yoga mats are also a great solution because the material is squishy, meaning it can imitate foam. The fabric can be pinned easily to a yoga mat and left to dry. A word of caution though, pins will leave marks. Pinning is best done on a yoga mat that you don’t use any more.
2. Clothesline + Clothespins
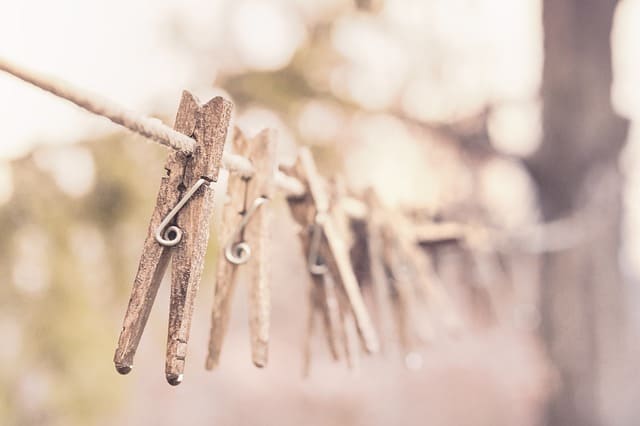
While a clothesline is not ideal for all projects, this is a great way to block shawls. Simply pin the top of the damp shawl to the clothesline with clothespins. Use more clothespins to clamp onto the rest of the shawl. The weight of the fabric + clothespins will pull the stitches down and open them up. The result is similar to pinning the shawl into place on a blocking mat. Bonus, if it’s hot outside, your shawl will be blocked and dry in no time. For more information on this method, I found a guide on how to do the washing line method on this blog post.
3. Wood + Nails
If you knit or crochet pieces that are the same shape and size all the time, like granny squares, take a look at this video. This lady hammered several nails into a piece of wood in the shape of a square and made her own blocking board.
The nails are used instead of pins. All she must do is place the damp square onto the nails in order to block. The main benefit of this is that your pieces will always be blocked to the exact size you want, without measuring.
4. Bowl
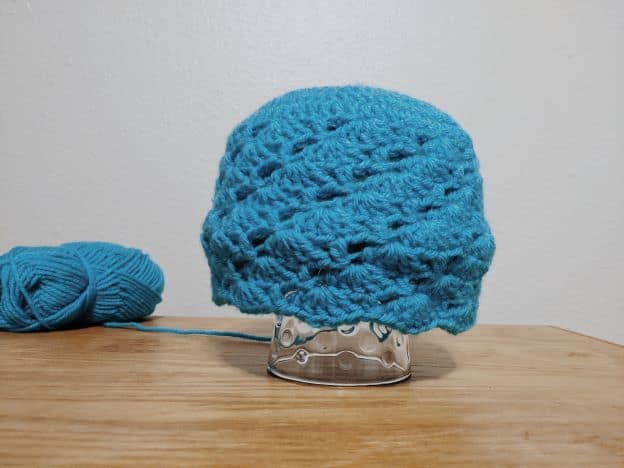
Bowls are the perfect shape for blocking hats. This works best if the bowl is placed upside down on top of a cup or something of the like (pictured above). Make sure that it is sturdy. Then the hat can be placed on top of the bowl and left to dry. It’s okay, and probably best, if the hat hangs off of the bowl by a few inches. Doing so will ensure that the hat brim does not get stretched out, but the crown stitches get smoothed out.
Just a couple of things to keep in mind about the bowl. It should be smooth. You don’t want the hat to take on ridges or odd shapes. And measure the circumference of the bowl to make sure the hat will be blocked to the proper dimensions. If you don’t have a bowl that will work, a blown-up balloon, mannequin head, or ball will do the same thing.
5. Bath Mat

A bath mat is made of materials that can withstand water and resist mold. Perfect for use as a blocking mat, just make sure it lays flat. The damp fabric can be placed directly on the bath mat and left to dry. The water will be absorbed by the bath mat, so it may take time for the fabric to dry. However, this is typical of blocking anyway. I would recommend spray and wet blocking only if you still use your bath mat. Steam might damage the bath mat, depending on the material it is made of.
I’ll leave it up to you whether or not you want to stick pins into it. My bath mat is made of foam and I’m not worried about ruining it (plus it’s old). And of course, the bath mat restricts the size of the pieces that can be blocked. However, the bath mat is a great solution in a pinch or for small projects.
6. Sewing Cutting Mat
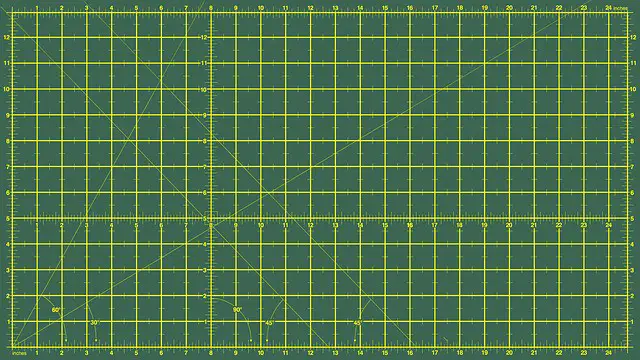
There is a good chance that you have a sewing cutting mat at home with you already. Whether you inherited it or purchased it for yourself, put it to use (if it’s been sitting in the closet like mine) and use it as a blocking mat. Wet, spray, or steam block your fabric then press the piece into shape and leave it to dry on the cutting mat.
There are a couple of reasons sewing cutting mats are a great option for blocking.
- Gridlines. This makes shaping fabric so much easier. You can press the fabric into the correct dimensions by following the gridlines, which saves time since you don’t have to whip out a ruler.
- Variety of sizes. Sewing cutting mats come in all different shapes and sizes which means a variety of projects can be blocked. It just depends on what you have at home.
Before blocking though, make sure your mat is water-resistant. My mom has an old cutting mat that is made from cardboard. Obviously, that wouldn’t hold up during the blocking process. However, I have a hard plastic cutting mat that would work nicely. The self-healing cutting mats that quilters use are popular as well. This type of mat would work because it is made to withstand water (that’s how they get cleaned).
The only issue with sewing cutting mats is that items cannot be pinned down. Pins leave holes in self-healing mats that will either take a while to disappear or remain permanently. I don’t recommend you stick pins into yours. And other mats are made of hard materials that don’t allow pins to stick. You are a little more limited on what you can block, but if you have a cutting mat on hand, this would do in a pinch.
7. Bed + Sheet

If you like to knit or crochet big items, such as shawls or blankets, then this is an option for you. Spread an old sheet over the bed. Make sure to tuck in the sheet really tight, like if you dropped something it would bounce back to you. Then you can pin the damp fabric to the sheet and let it dry. Or, pin the fabric then spray or steam block and let dry.
The sheet will protect whatever is underneath it from the pins. Also, if your project bleeds dye, the sheet will absorb it, not the bed. Towels can also be used in place of a sheet for the same reasons.
Do make sure you block in this manner on a spare bed. Drying will take some time. Wouldn’t want your project to kick you out of your own bed!
8. Corkboard
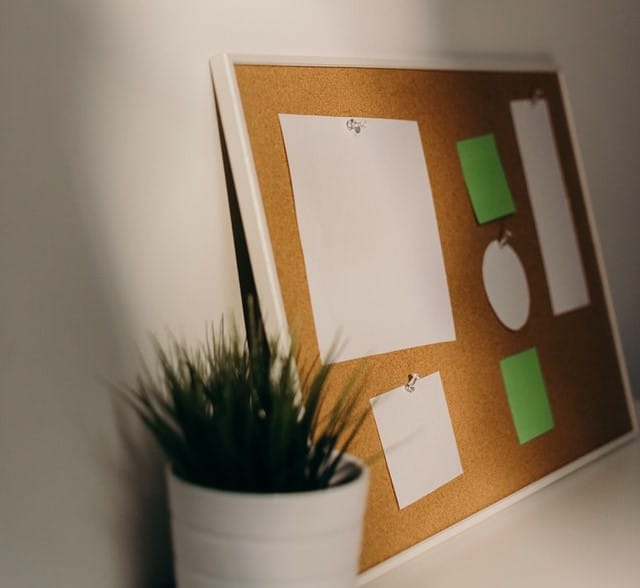
Corkboards are common, mainly when children live in the home. All of my siblings and I owned one and we decorated them with photos back when we were in school. We don’t use them any more. I actually turned mine into a world map. But if you find yourself with a corkboard that is no longer in use, this could be an option for blocking your knit or crochet pieces.
Since corkboard is made for pinning things to it, this makes it attractive for blocking. Lay the corkboard flat on the ground. Cover it with a trash bag (although this is optional) to keep it from getting soaked. Then place the damp fabric onto the cork, pin into place and let dry.
9. Couch Cushion
Home décor is different for everyone and if you have a leather couch (or something of the like) don’t use this suggestion. I have an old couch, however, where the cushions are removable and I don’t mind sticking pins into it. The material is super durable and will not show any marks from pins. Take a look below.
To use couch cushions as blocking mats, lay them flat on the ground. I suggest removing the couch cushions so that no one accidentally sits on your drying project. Next, place a trash bag over the cushion. Place your damp fabric onto the trash bag and pin it into the correct size and shape. Leave it to dry.
10. Ironing Board
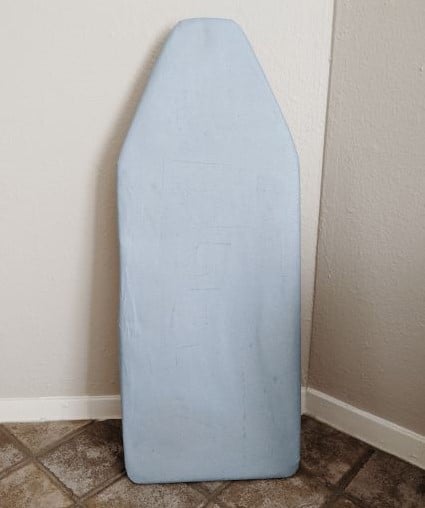
I will chance it and say that nearly everyone should own an ironing board. The already padded surface will work for blocking as well as ironing. The only downside is the size of the item that can be blocked is directly related to the size of your ironing board.
Just as the other methods I covered, place your fabric onto the ironing board. Pin or just press into shape. Let the piece dry. If you want, place a trash bag over the ironing board to help with dry time and keep it from getting soaked.
11. Towels
I used towels and only towels for the longest time before I got blocking mats. I would lay a towel on a flat surface, such as the floor, concrete, table, etc. Then pin my pieces in place and let them dry to complete the blocking process. I always use old towels just in case the dye from the yarn bleeds.
What I like about towels is that they are thick enough for a pin to stick to on its own. If I placed the towel on carpet, I could pin straight down and the pins would stick to the towel and carpet. But if the surface was hard (i.e. concrete), I could stick the pins diagonally into the towel and they would stay put. Basically, all I am saying is that if you use towels to block, you are not limited to a soft surface to use pins.
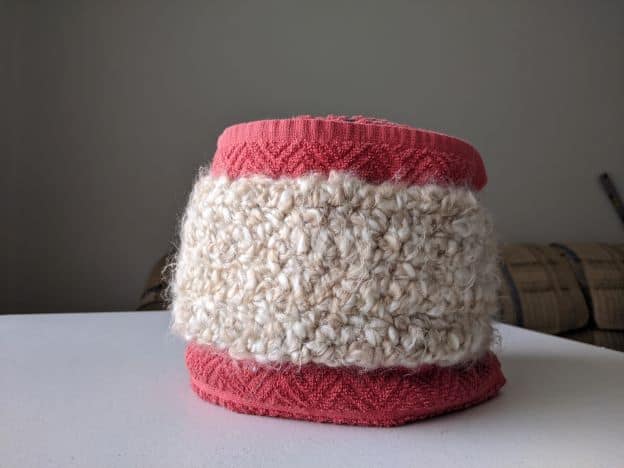
Round items, such as cowls or headbands, can also be blocked using towels. Roll up a towel(s) into the circumference needed. Then place the item, for example a headband, over the rolled up towels, pin and leave to dry. This is useful because:
- The fabric won’t take as long to dry since it’s not doubled up.
- There won’t be any creases where the object was laying flat.
My hope is that you found at least one item that you already own that could be used for blocking. Fancy tools are not required. If you have any other suggestions on materials to use for blocking mats, please let me know in the comments. I’m always curious how others like to block (without mats).
2 thoughts on “11 Ways to Block Knitting Without Blocking Mats – Using Materials From Home”
Comments are closed.
Recent Posts
The Sole Hat: A Classic Knit-Look Hat Crochet Style | Free Pattern + Tutorial
If you're a crochet enthusiast looking for a timeless, cozy hat pattern with a unique twist, you're in the right place! Introducing Sole, the crochet version of the classic, chunky 2x1 knit ribbed...
Twofold is the Sew Homey take on a classic, chunky knit-ribbed hat with a folded brim. It features the same unique stitch combination and short rows as the Sole hat, but with a modification of stitch...
Great info and examples. I’m a beginner who likes to practice stiches intermittently. Looking forward to learning more from you in the future.
Thank you, so glad to have you stop by!