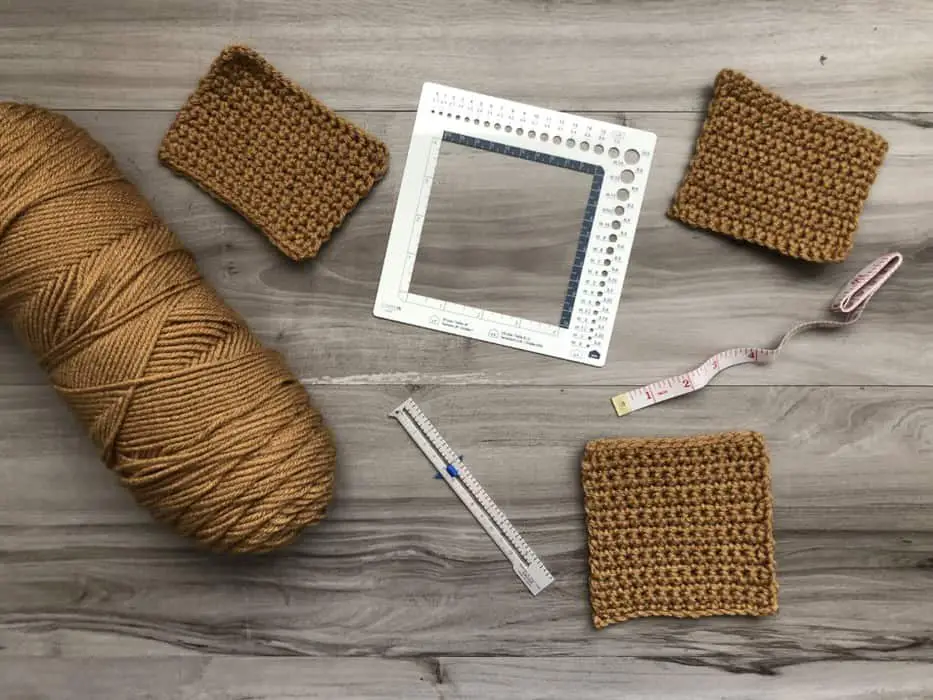
This is part 2 of a two part series. See Crochet 101: What is Pattern Gauge? for part 1. In the article, I discuss what gauge is, why it’s important and how to match it. If you haven’t read it yet, I knidly urge you do that now. When you are done, please meet me back here for the second part to learn how to measure gauge.
Measuring gauge is the most important step of following a pattern if you don’t want any surprises at the end. The size, fit and amount of yarn used will all be predicted by the tiny swatch you measure. So you must measure the rows and stitches carefully to obtain accurate numbers for an accurate prediction.
I have taken out all the guesswork for you. I compiled all that I have learned about gauge throughout the years into one giant tutorial. There are also several pictures which makes it easy for you to follow along with me. So grab your yarn, crochet hook and a ruler and let’s get started.
Materials
- Washed and/or blocked swatch. Unless the pattern states otherwise, or you don’t ever plan on washing your project, make sure to wash or block the swatch then let it air dry.
- Ruler. This can be any old household ruler you have on hand. A tape measure, a sewing gauge, a wooden ruler, etc. Or you can purchase an inexpensive swatch ruler (from Amazon) especially designed for measuring crochet and knitting gauge.
How to Make a Gauge Swatch
First things first. We need a swatch to work with before we can measure gauge. A swatch is a small piece of fabric made from the hook size, yarn and stitch pattern intended for the actual project.
Look at your pattern and grab the hook size it recommends and the ball of yarn you want to use. Then crochet a square using the same stitch pattern stated in the directions. It should measure approximately 5-6 inches. Below is the swatch I made special for the tutorial. If you need more assistance on how to make one, please continue.
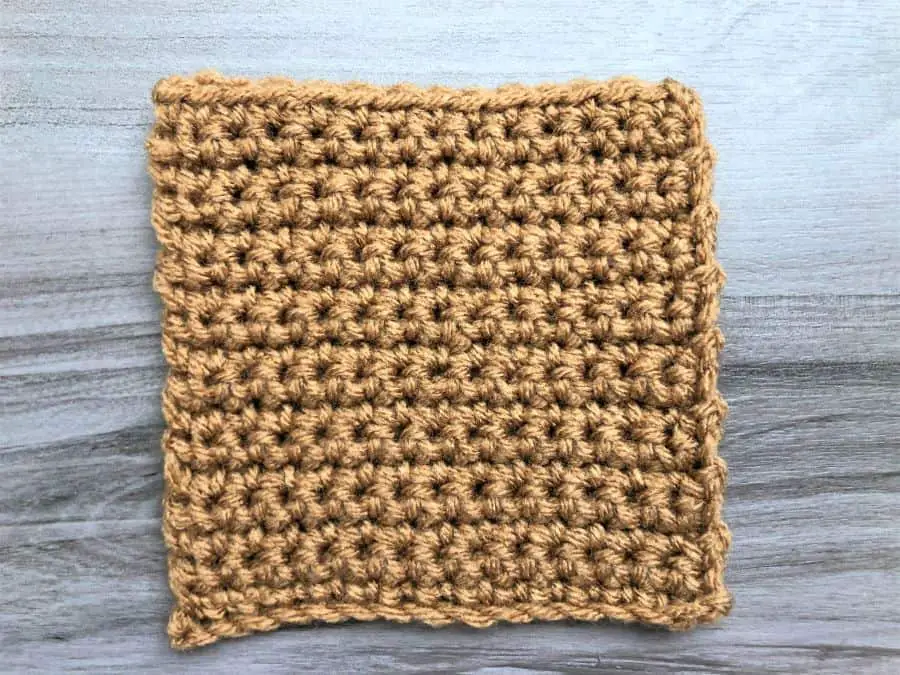
You can use the pattern gauge as a starting point for how many stitches to chain. Gauge is oftentimes measured across 4 inches, so start with that number of chains and add several more so the final swatch will measure an inch or two bigger. Do the same thing for the number of rows. When you are done, fasten off.
For example, gauge could say this: 24 st and 16 rows = 4″. In this case, there are 6 stitches per inch (24 stitches / 4″) and 4 rows per inch (16 rows / 4″). So I would start by chaining 30-36 stitches because 24 chain stitches should yield 4 inches and I need to add an extra 1-2 inches, or 6-12 stitches. Do the same thing for the rows. Start by crocheting 16 rows plus about 4-8 more.
By this point you should have a square that measures about 6″x6″. Your swatch should look something like the picture I have included above. I will be working with this swatch for the rest of the tutorial.
Preparing the Gauge Swatch to Measure
The gauge swatch still has one step to go through before you can measure gauge. You must treat the swatch as you would the final product. Some swatches need to be washed and others need to be blocked. The reason is simple: the stitch definition will change. Natural fibers are more likely to change after washing and blocking compared to synthetic fibers. This can drastically alter the results if you measure gauge before washing and blocking.
I won’t go into any details on blocking in this article, but you should definitely know the care instructions for your project. A good rule of thumb is if you will wear the project you are making, you will need to wash it. Sweaters, hats, and cardigans are good examples of this. So you need to wash your swatch in the same manner as you would the garment. Take a look at the yarn label for suggested care instructions.
Another example would be if you want to crochet a shawl. This type of project would require blocking to stretch out the stitches and set them into the desired shape. Therefore, you would want to block the swatch first. This is of course unless the pattern tells you otherwise.
After washing and/or blocking the swatch, place it on a flat surface and let it air dry. Since it is a small piece of fabric, the drying process should take only a few hours.
Now grab your dry swatch and measuring device and get ready for the next section.
How to Measure Gauge
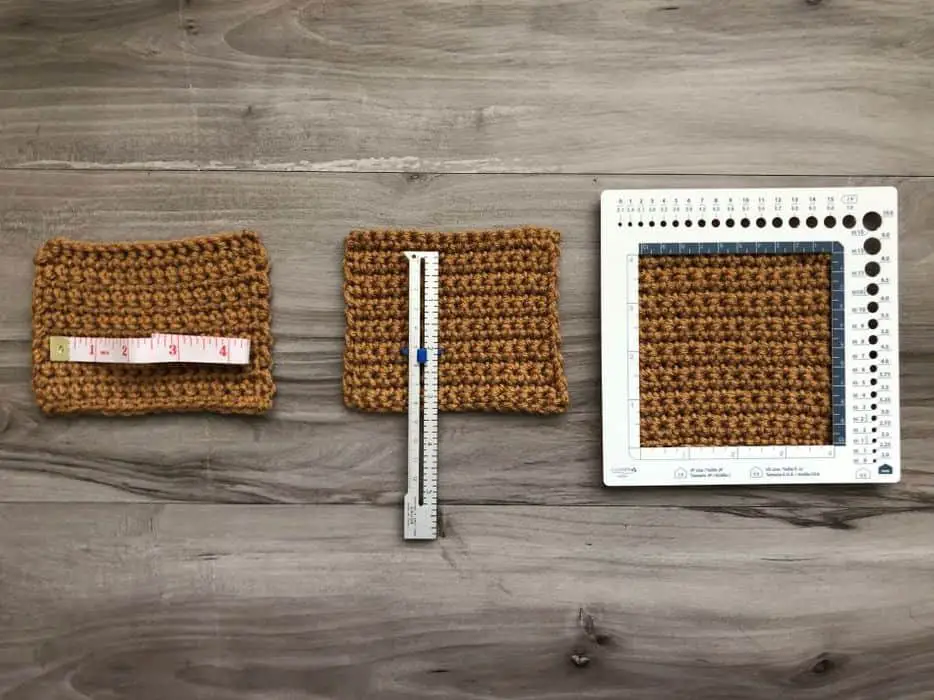
Step 1. Lay the Gauge Swatch on a Flat Surface.
Make sure you have good lighting. It will make the following steps a little easier.
Step 2. Grab the Ruler and Lay it Across a Row on the Swatch.
A row represents the line of horizontal stitches. The ruler should be placed on the swatch parallel to the way you would crochet.
This picture illustrates exactly what I mean. I am using a Sewing and Knitting Gauge ruler similar to the one that I have linked to Amazon. If you don’t have one of these, feel free to use another type of ruler.
Now it’s your turn, put the ruler across a row towards the top of the swatch.
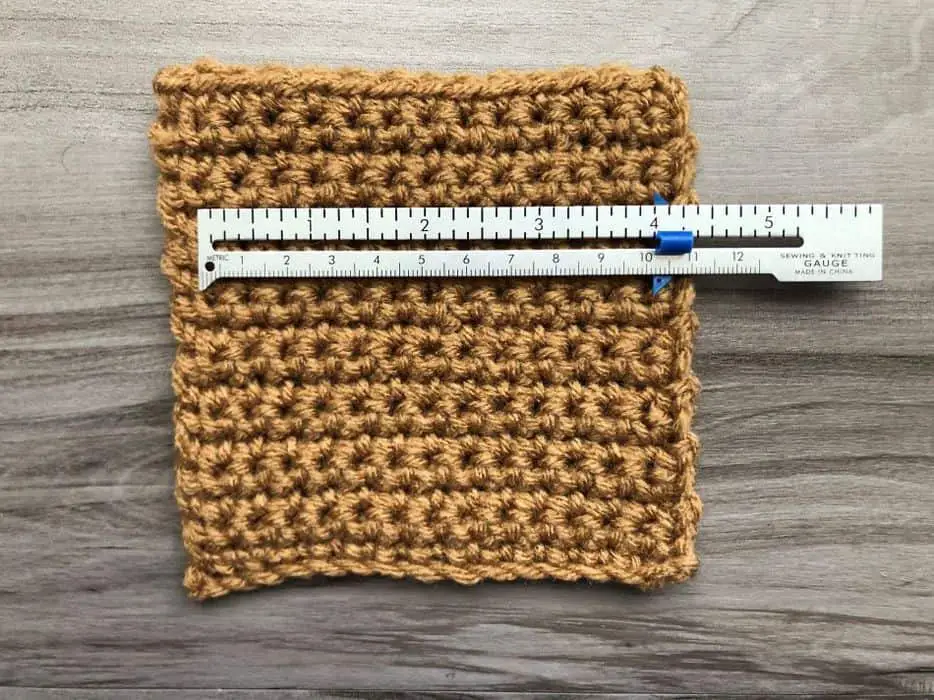
Step 3. Count the Number of Stitches in a Row for the Length Given in the Pattern Gauge.
The most common length is 4 inches or 10 cm, but that is subject to change depending on the designer. So always check.
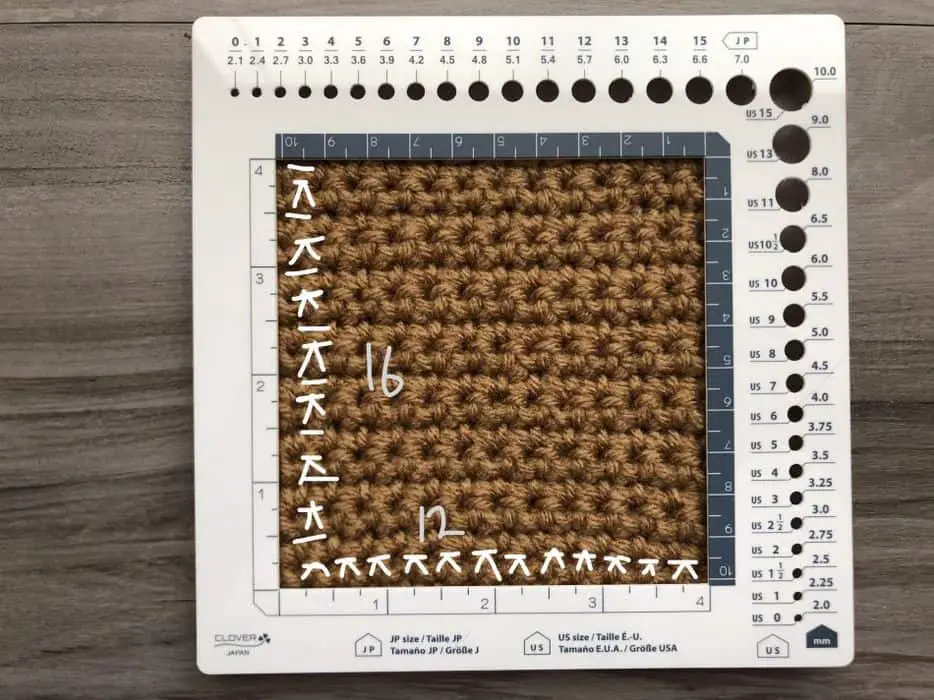
For my example swatch, I am using 4 inches for gauge. So I look at the stitches along the top of my ruler and count how many stitches are in 4 inches. I highlighted every other stitch in the row so that you know what I mean by “stitch.” Then you count them. In my swatch, I have 12 single crochet stitches in 4 inches. This is the stitch gauge.
Now it’s your turn. Count the number of stitches in the length specified in your pattern. Be sure to remember or write down your stitch gauge. You will need it later.
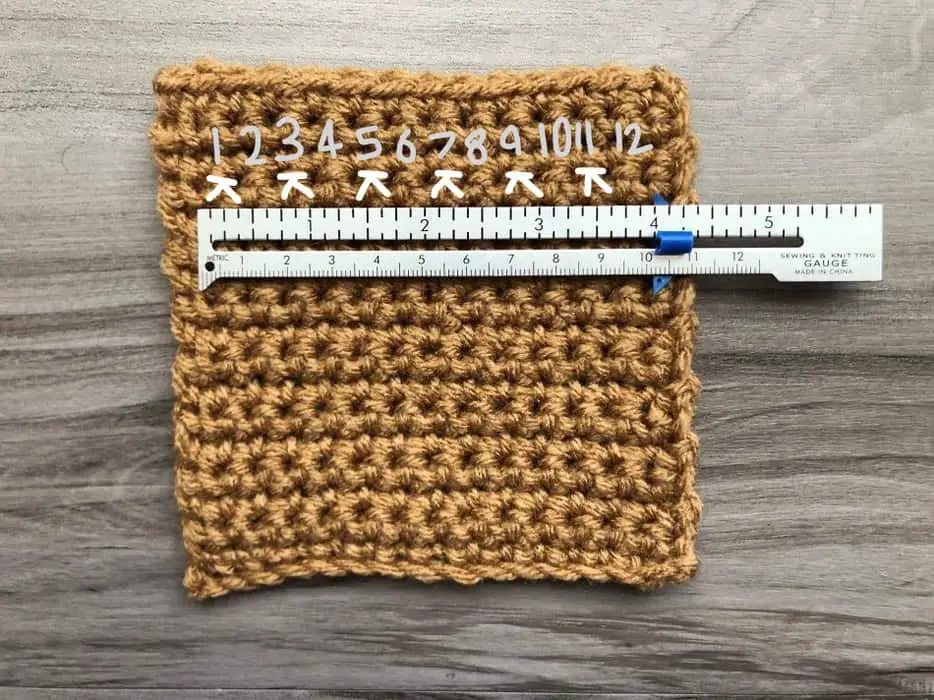
Step 4. Take the Ruler and Place it on the Swatch Vertically.
The vertical stitches represent the rows of the swatch. The ruler should now be perpendicular to the way you would crochet.
Now you place your ruler just like I have mine in the photo.
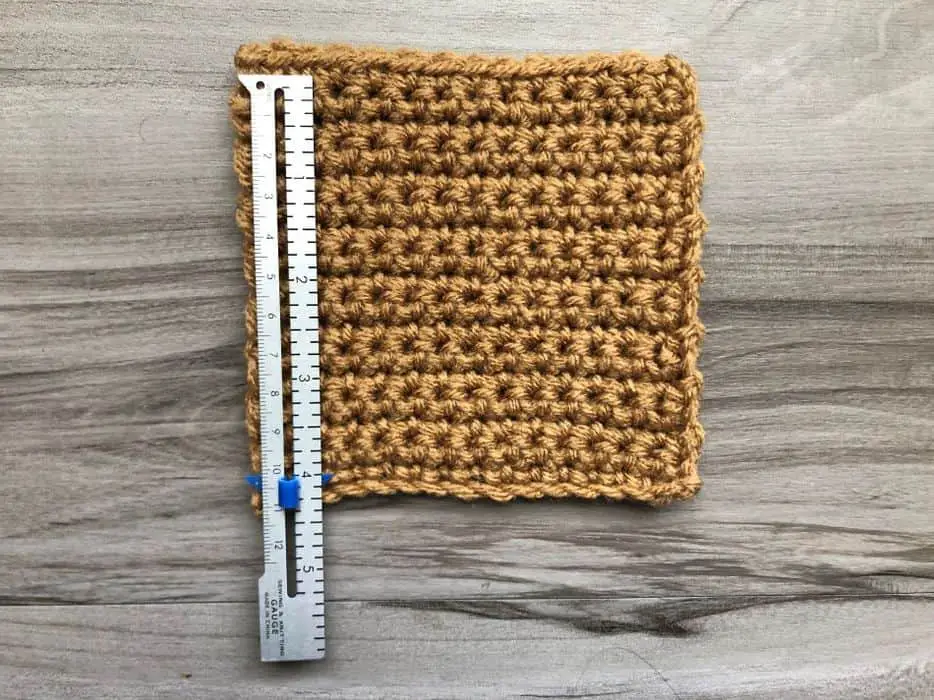
Step 5. Count the Number of Rows for the Given Length in the Pattern Gauge.
Again, the most common length is 4 inches or 10 cm, but that can vary. The number of rows should be counted within that 4 inches. This is called row gauge.
Rows are bit more difficult to determine than stitches. So I have highlighted the rows here in this photograph. This swatch is made up of single crochet stitches.
The “pi” symbol, or stitch, indicates one row. The dash also means one row. Those rows are just more difficult to identify, especially in the picture. So together, “pi” and a dash mean 2 rows. Then I count them over 4 inches for my row gauge. I have 16 in total.
Now it is your turn. Count the number of vertical stitches on your swatch over the specified length. Remember to write it down so you can use it later.
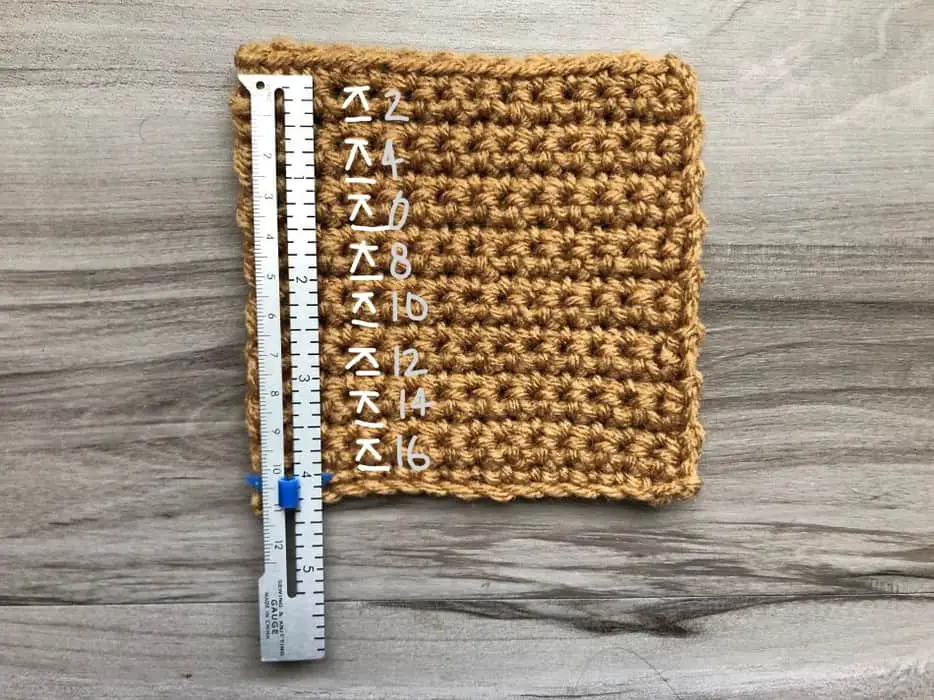
Step 6. Compare Your Gauge Measurements to the Pattern Gauge.
Are your stitch and row counts the same as the pattern gauge?
Check your gauge numbers against the ones given in your pattern. My gauge is 12 stitches x 16 rows. I would then compare those numbers to what is on the pattern.
Make sure to pay attention to stitches and rows in the pattern. They can sometimes be switched depending on the pattern.
Step 7. Move On or Adjust Your Work.
If your gauge numbers matched the numbers given in your pattern, congratulations! You get to move on and start your project.
If your numbers did not match, there are a few things you can try.
- Go down a hook size if you have less stitches or rows per inch.
- Go up a hook size if you have more stitches or rows per inch.
- Adjust the yarn.
- Try a hook made of a different material.
- Block the finished item if gauge is just slightly off.
- Modify the pattern for your gauge measurement.
If you want more details about these suggestions, go back to my previous article, Crochet 101: What is Pattern Gauge?, and find the in depth description in the third section.
Once you find the adjustment that works and you meet the gauge listed in the pattern, you can move ahead and start your project.
How to Use a Swatch Ruler to Measure Gauge
I realize that not everyone has the luxury of a swatch ruler. So I decided to provide a separate section for those of you interested. I just bought my very first one this week. I found it on Amazon and it was inexpensive. It will definitely come in handy for many of my projects to come. If you are interested, I’ll put the link here for you.
Swatch rulers make measuring gauge super easy. They come with the inside cut out to the exact measurement of 4″ x 4″. This is great because most pattern designers, for knitting and crochet, use 4″ as a standard gauge.
Some also come with bonus features! The one I found has a few. The ruler has both metric and imperial measurements. This is great if I choose patterns that use centimeters or inches. Also, the ruler has the capability of measuring knitting needle and crochet hook gauge. I just put the needle in the holes provided or hold the hook up to the notches and it tells me the exact size I am holding.
Let me stop talking about it and just show you.
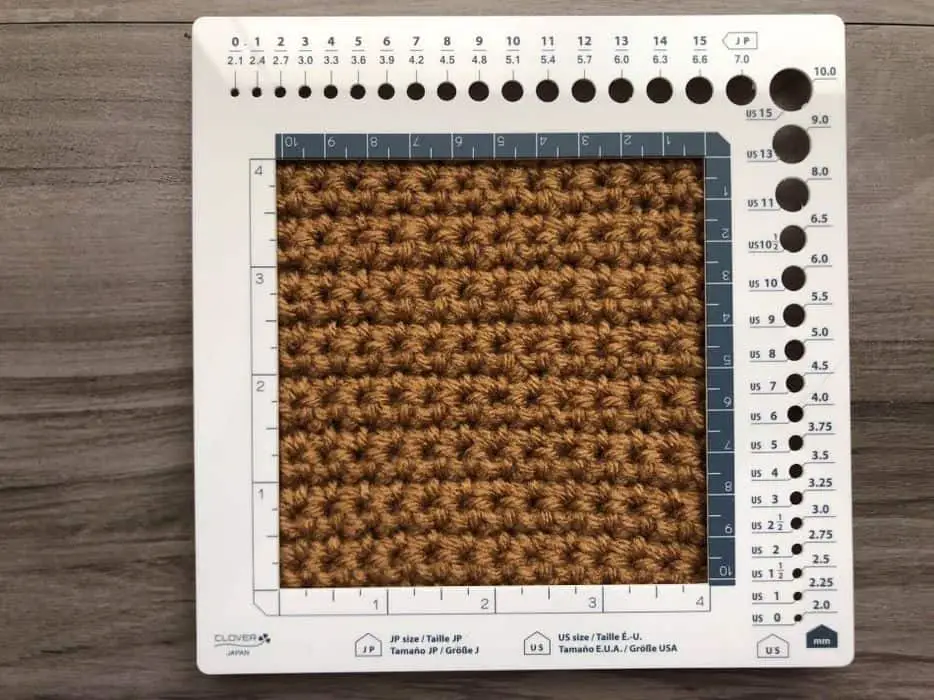
The bottom left corner has the imperial system, but if I ever needed the metric system, I could flip it and use it just as easily. Those holes on the sides are the knitting needle gauge. And a separate piece includes the crochet hook gauge.
Now how to use it. All you do is count the number of stitches across the bottom and up the left side. Then you have your stitch and row numbers to compare to the gauge given in the pattern. See my example in this picture.
How to Measure Gauge for Crocheting in a Circle
Certain crochet projects don’t require you to crochet back and forth in a straight line. There are projects that you want to be round, such as hats, amigurumi, coasters and doilies. It is called crocheting in the round. Gauge must be measured differently compared to what is above since the project starts with a circle, not a square.
There are two ways to measure gauge for crocheting in the round. It just depends on how you make your rows. Both methods start with creating a swatch. Go ahead and make yours according to your pattern then you can follow along with me.
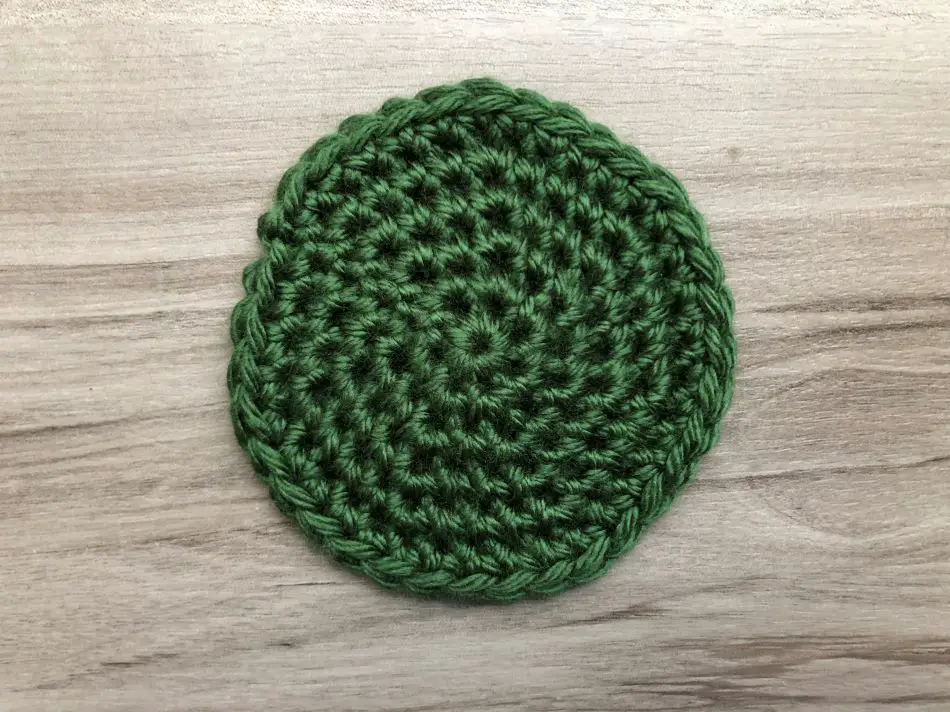
The first method is for projects crocheted in the round. This means you are crocheting in a spiral. You start with a small circle of chains that grow until the circle is the size you want. Similar to what I have in the picture.
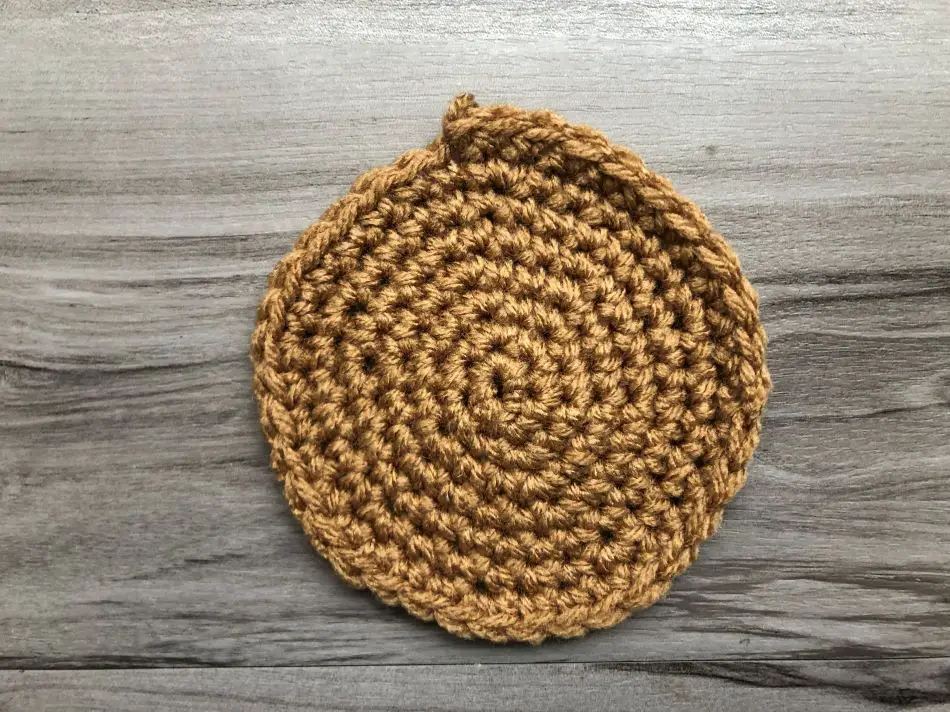
If you’ll notice, the top of my swatch is bigger than the rest. The very top part is a stitch length taller than the rest of the outer edge. This is how you can tell if the circle was crocheted in the round. It’s like a spiral getting bigger and bigger.
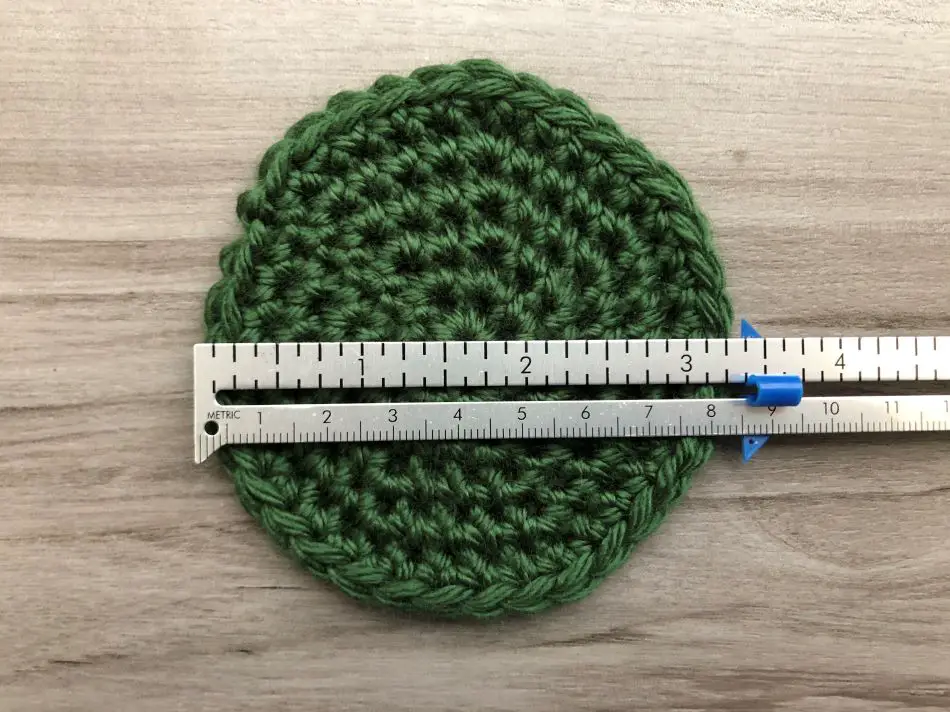
To check gauge for this type of project, you must measure two parts. Refer to the pictures below for a better understanding.
- First, you measure the circumference of the circle starting with the last stitch made. This is the biggest portion of the swatch.
- Next, measure the narrowest portion of the swatch.
- Compare your numbers to the pattern.
- Move on if your gauge matches the pattern. If not, make a new swatch with the suggestions from Step 7 above and try measuring gauge again.
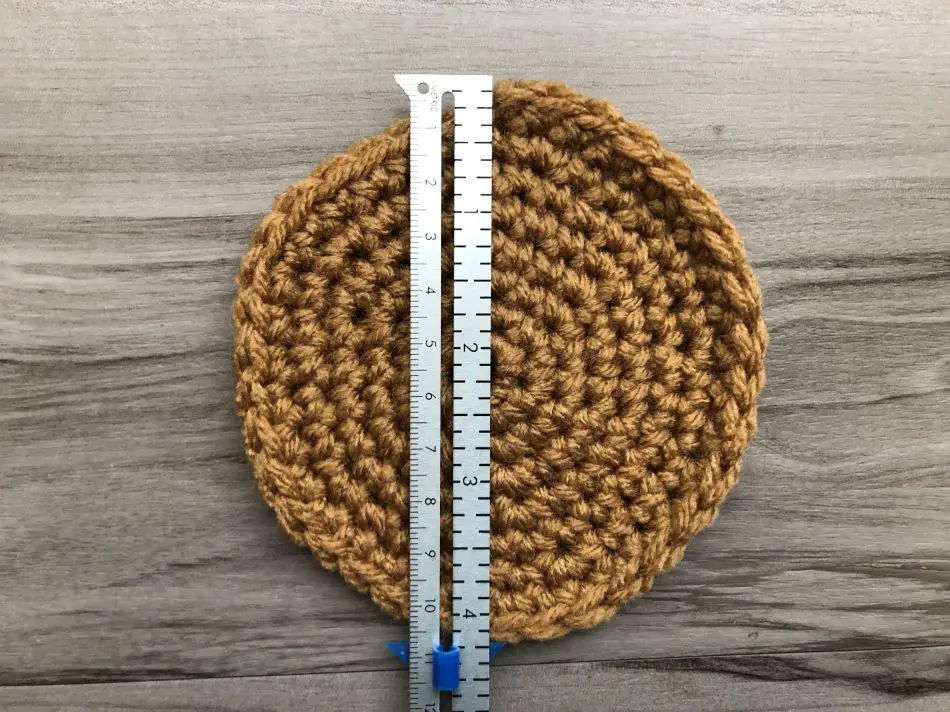
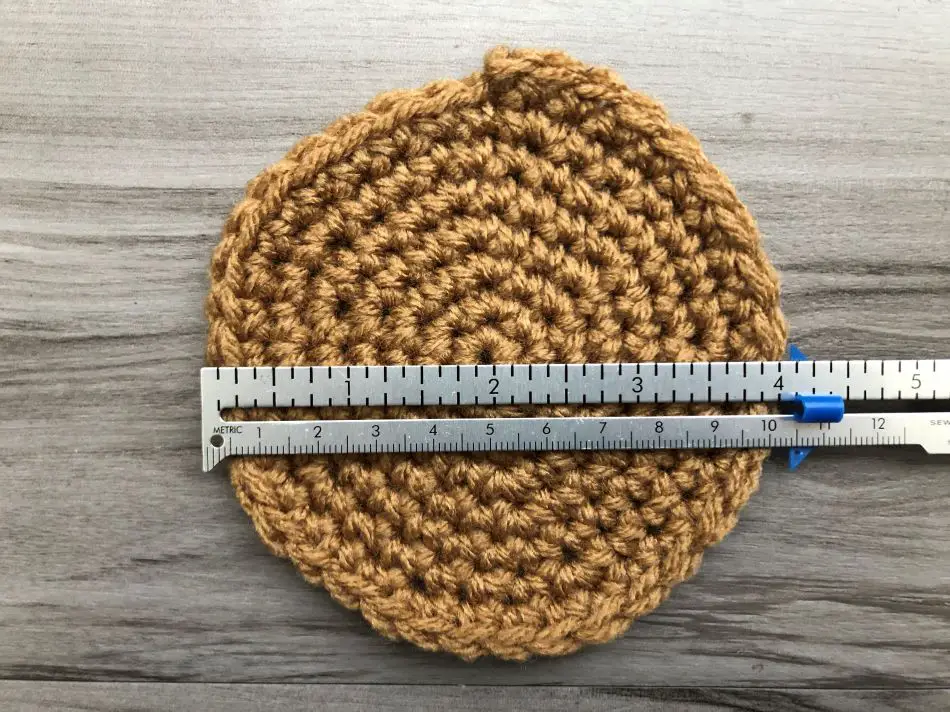
The second method is for projects that have joined rounds. The circle will be uniform and made up of several rows. All you need to measure is the circumference of the circle. Then repeat the same steps 3-4 from above. Take a look here.
That about wraps up gauge. If you have any questions, please leave a comment below. Until next time, happy crocheting y’all!
Recent Posts
The Sole Hat: A Classic Knit-Look Hat Crochet Style | Free Pattern + Tutorial
If you're a crochet enthusiast looking for a timeless, cozy hat pattern with a unique twist, you're in the right place! Introducing Sole, the crochet version of the classic, chunky 2x1 knit ribbed...
Twofold is the Sew Homey take on a classic, chunky knit-ribbed hat with a folded brim. It features the same unique stitch combination and short rows as the Sole hat, but with a modification of stitch...
