
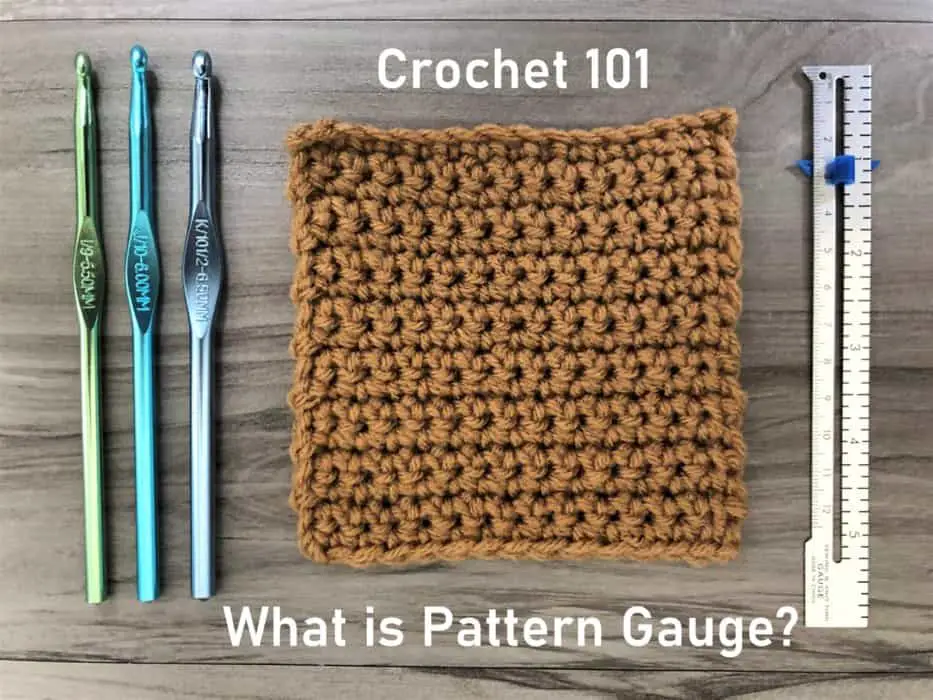
One of the first crochet patterns I ever made was a pair of slippers I found in a book at Hobby Lobby. I followed that pattern exactly as written, but they fit my feet a little more snug than anticipated.
Come to find out, there was a slight detail I was missing that impacted the fit, and that was pattern gauge. Gauge is how a crochet designer standardizes their pattern so that everyone, from the loosest to the tightest crocheter, can achieve the same finished look, size and fit of any project. Some call this tension, but it really just means how many stitches and rows are crocheted per inch.
I was a total beginner and had no clue what gauge was. I was just excited to start a project that I didn’t even notice that tiny section at the top of the pattern. I feel silly admitting this, but I actually quit making items from that book because I thought the patterns were written incorrectly. Gasp!
I’ve learned a lot since then, and I want to share it all with you. I’ll cover everything you could possibly need to know about pattern gauge. Don’t make my mistake. Gauge can have a HUGE impact on the final result.
What is Gauge?
We all crochet differently. Some crochet loosely while others crochet tight stitches. Like I said above, gauge is how a crochet designer standardizes their pattern so anyone can achieve the same finished look and dimensions of their project.
There is a little more to gauge though that you should know before we continue. Gauge is made up of two parts, rows and stitches. Every crochet project starts as a single line of stitches that stretch horizontally. Then more stitches are added on top until the piece of fabric grows to be the length you want. The stitches that build on top of each other are called rows.
For gauge to be effective, the pattern designer calculates the number of stitches and rows there are within an arbitrary length that they choose. This is the gauge you will see on the pattern. When you test gauge for your own project, you count the number of horizontal stitches and vertical stitches (rows) within the specified length from the pattern. You then compare your two numbers to the pattern’s.
It is your goal to match the pattern gauge so that you can recreate the pattern just as the designer intended.
Don’t worry if gauge doesn’t make the most sense right now. I cover a couple of examples that will bring gauge to life for you in a couple of sections. So hold tight for minute while we first learn why we should even bother to measure gauge.
Important Reasons to Crochet a Gauge Swatch
The first step of starting any new pattern is to create a gauge swatch. A gauge swatch is a small sample of the pattern that usually measures a 5 or 6 inch square. The swatch uses the same yarn that will make up the actual project and the same hook size stated in the pattern.
This important step of creating a gauge swatch is often skipped by many crocheters, including me at times. We just get so excited that we want to dive into the project without taking the time to make a swatch. Or we don’t see the necessity to use up our good yarn and “waste” it on a small gauge swatch for fear that we will run out of yarn.
But put your feelings against gauge swatches aside for now. There are several important reasons for taking a little extra time to create them.
1. A gauge swatch predicts if you will get the same finished measurements as those listed on the pattern.
This is probably THE MOST IMPORTANT reason to make a gauge swatch. If you make garments, you NEED to make a gauge swatch. Measuring gauge will ensure that your project will have the expected size and fit when you finish.
Even if gauge is off by just a 1/2 inch, the results can be significantly different. I want to go through a simple example to illustrate this. Please bear with me, there is a little math involved, but I promise it will make sense.
For this example, we will be crocheting a sweater that measures 30 inches around when finished. The gauge is given as 5 stitches per inch (if you measured 1 inch across, you would count 5 stitches). This means we would need to chain 150 stitches to begin the pattern (5 stitches per inch x 30 inches).
This table will summarize what happens if we go off the assumption that we can start with the same amount of chain stitches as the pattern states because a 1/2 inch off doesn’t matter.
Example Gauge Swatch 1/2 Inch Off Results
| Example Sweater | Less Stitches Per Inch than Given Gauge | More Stitches Per Inch than Given Gauge | |
| Gauge | 5 stitches/inch | 4.5 stitches/inch | 5.5 stitches/inch |
| Starting Chain | 150 stitches | 150 stitches | 150 stitches |
| Final Measurement* | 30 inches | 33.33 inches | 27.27 inches |
| What Happens? | Should be the expected 30 inches. | Over 3 inches off, much BIGGER than expected. | Over 2 inches off, much SMALLER than expected. |
*The final measurement is calculated by: chain stitches / gauge.
As you can see, even the slightest bit off from the gauge on a pattern can have detrimental affects.
2. A gauge swatch allows you to test whether or not you like the fabric.
Patterns will have photos of the project and state what yarn was used to create the fabric. But oftentimes, we substitute the yarn from the pattern for a yarn of the same weight that we have in our stash. The yarn and hook combination can create tight stitches, which yield a more dense fabric, or it can create loose stitches, which yield a lighter fabric with more drape.
The gauge swatch lets you play with the fabric to see if it will yield the same result you had in mind. No one wants to spend hours on a project just to get halfway through and not like it. If you make a sample, you can look and feel the fabric before committing to the rest of the project. If you don’t like it, you can experiment with another yarn or hook size.
3. A gauge swatch predicts if you will have enough yarn to complete the project.
The yardage given on the pattern is calculated based on the gauge. Therefore, if your gauge swatch matches gauge given, then you will know how much yarn is expected to complete the project. This is important so that you don’t unexpectedly run out.
4. A gauge swatch tells you about your personal crochet style.
I’ve stated this already, but I’ll say it again, we do not crochet the same. Everyone learns to crochet differently, and with practice, we develop a method that is comfortable for us.
That means the pattern you follow was written for the designer’s own crochet style. So the gauge listed is for how tight or loose they make their stitches. You might crochet with looser stitches than that of the designer. But that does not mean you should change your crochet style to compensate.
It is more important to know your own gauge because there are techniques (which I will get to shortly) to help you match tension without you sacrificing your comfort.
How to Read Gauge on a Pattern
Gauge listed on a pattern looks different than what I have described above. I gave you a general definition of what gauge is and why gauge swatches are necessary. But let me now walk you through what you will encounter on a pattern.
The gauge section is located at the top of the pattern. Usually it is listed after the yarn weight and hook size suggestions. For illustration purposes, I pulled a pattern from the first pattern book I ever bought, Hooked on Crochet! Slippers by Annie’s Attic. It does not appear that the book is in print any more so I can’t link to it. But it was a great beginner crochet pattern book.
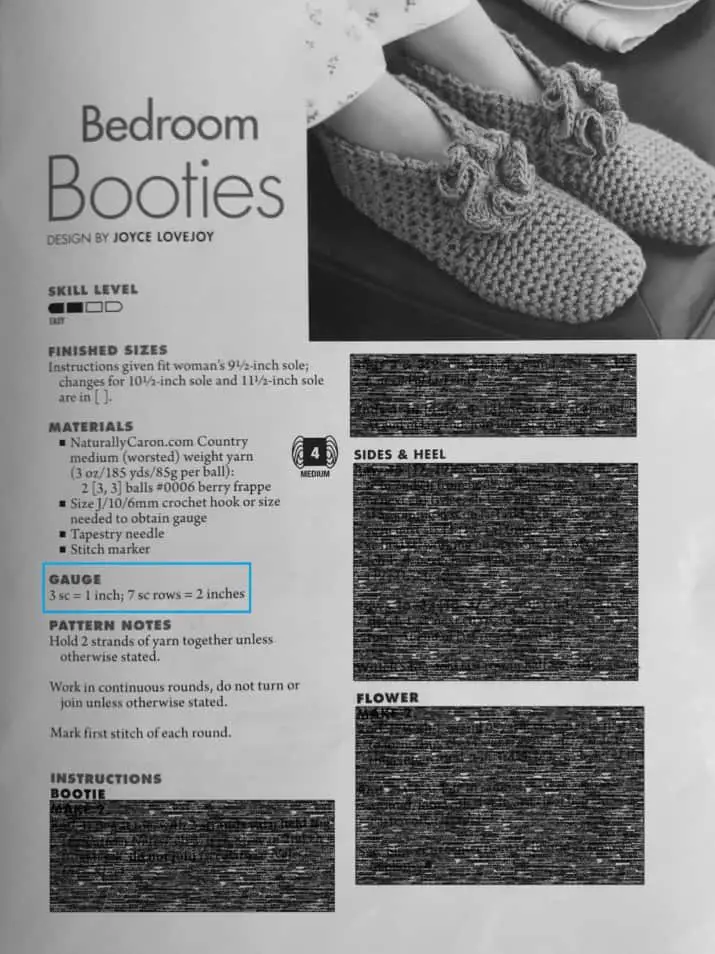
As you can see, the blue box indicates the “Gauge” section. It can easily get lost at the top. And it looks like gibberish if you don’t know what the notation means. So let’s break it down.
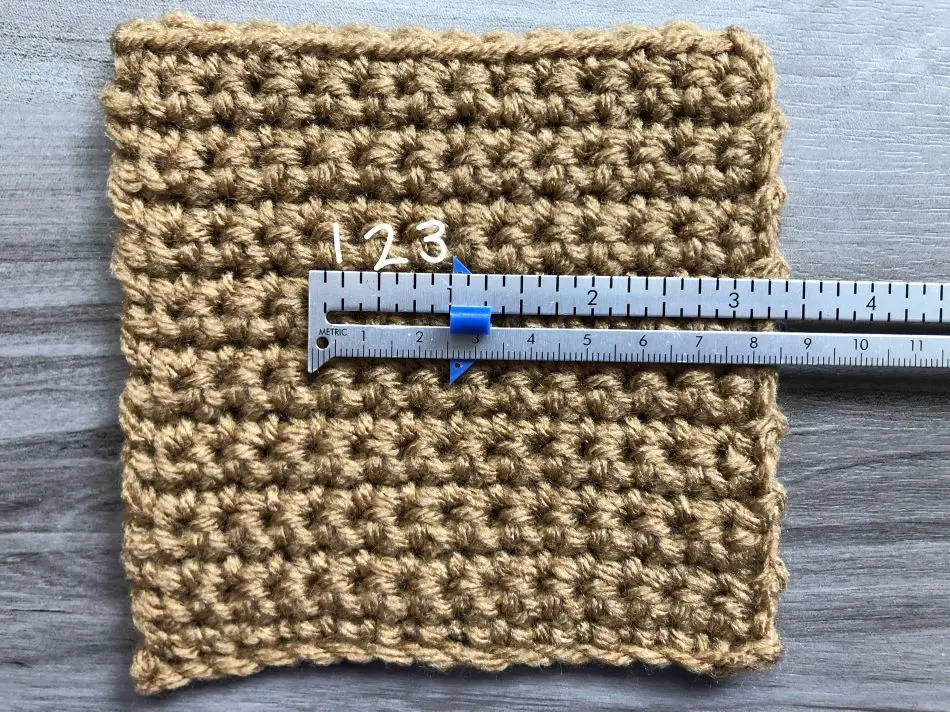
The first part of the gauge says “3 sc = 1 inch.” This represents the width of the fabric and is measured along the same path that you crochet. The designer is saying that if you were to measure 1 inch across the fabric you should count 3 single crochet stitches within that length.
Let’s see an example of this. The picture on the left is how you would measure the stitches across 1 inch of the fabric. The picture on the right is to help you identify the stitches so you can count them. There are 3 stitches in 1 inch, just as I should expect for using the recommended hook and yarn weight for the above pattern.

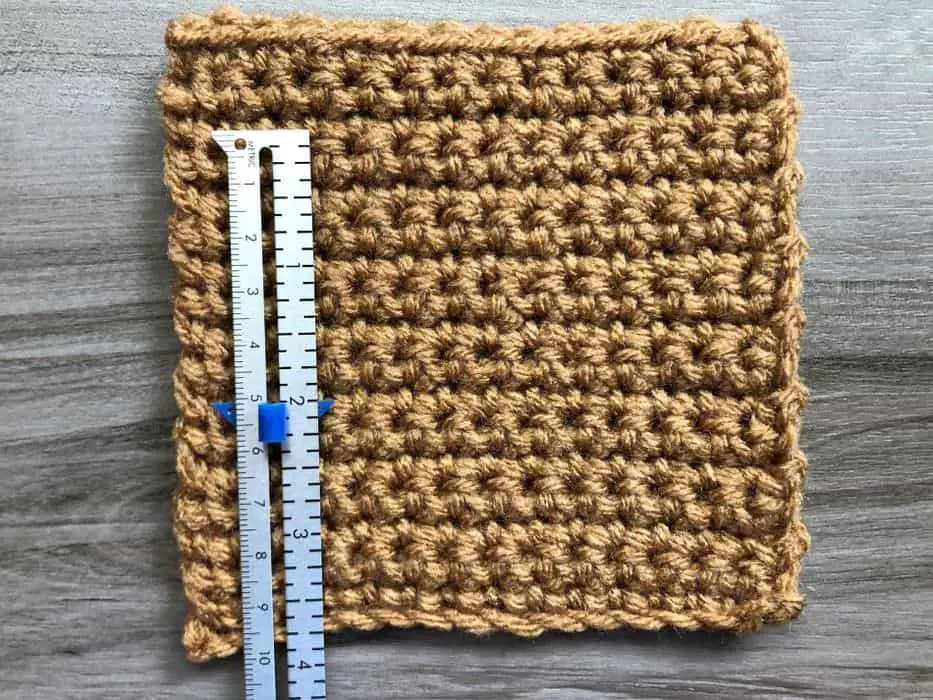
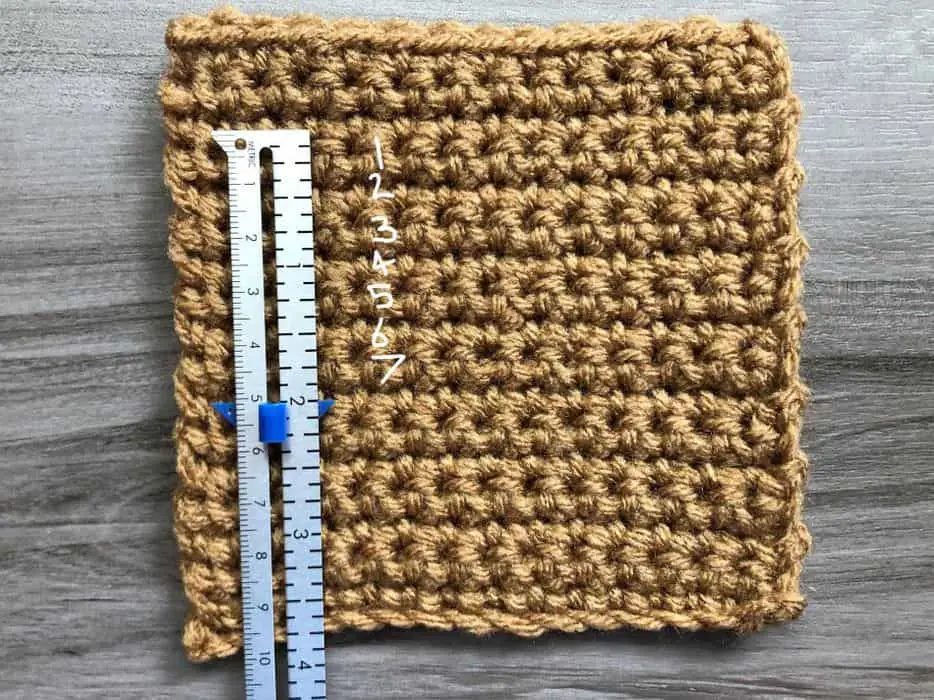
The second part says “7 sc rows = 2 inches.” This portion of gauge refers to the vertical height of the stitches or rows. The designer means that if you measured 2 inches vertically on the fabric you should count 7 single crochet rows.
I have included a couple more photos to illustrate what this means. You would take a ruler and measure 2 inches vertically and count how many rows there are. The first picture shows that. The second picture is to help you count the number of rows. Again, I got the same as the gauge in the pattern. Therefore, I could begin my slipper pattern with the yarn I used for the swatch and the same hook size.
Example #2
Unfortunately there is no one standard for writing gauge. Different designers may write gauge differently. So I pulled a different pattern from online to show you another notation for gauge. The pattern can be found on Ashleigh Kiser’s blog and it is called the Easy Crochet Cardigan. It’s a good spring pattern if you are interested in making it, but from now on I will only be using the gauge from the pattern.
On many of Ashleigh’s patterns, the gauge is listed after the materials and the size inclusion sections. Let’s take a look at what her gauge looks like. I pulled this straight from the pattern that I linked above.
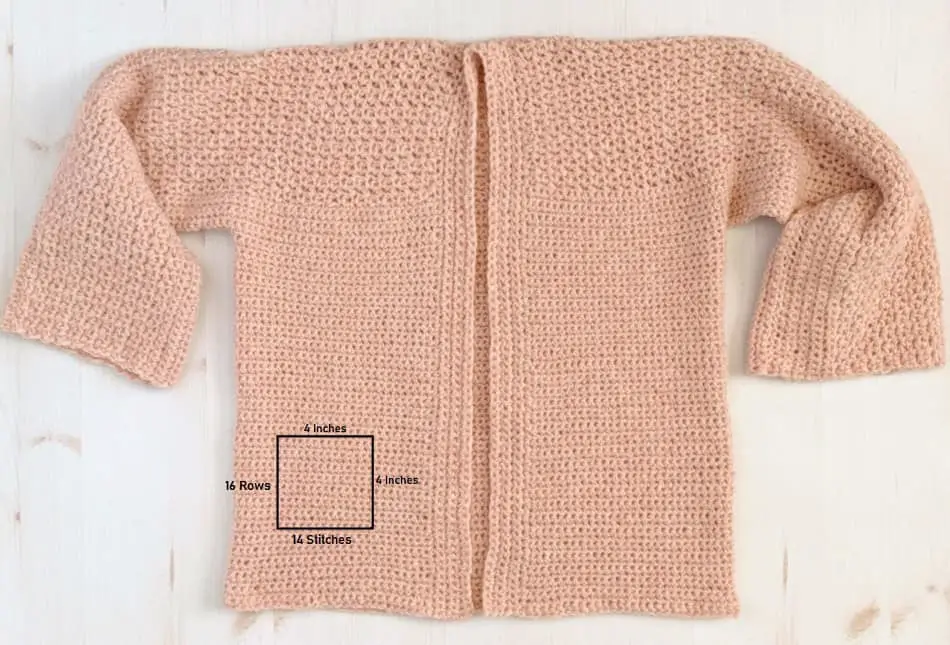
Gauge (after blocking) 14 sts x 16 rows = 4″ in sc
The gauge itself means the same thing as the first example I showed, it just is denoted differently. Let’s summarize the information and abbreviations she has for a quick recap.
- “after blocking”. This informs you to measure after you block the swatch.
- “sts” = stitches. This represents the horizontal measurement, which is measured along the same path that you crochet.
- “rows”. These are the stitches stacked on top of each other, or the vertical measurement.
- 4″. This represents the number of inches you measure for the gauge rows and stitches.
- “sc” = single crochet. The only stitches used for the pattern.
Now we put that all together. The designer is saying that 14 single crochet stitches should be counted in a 4 inch length and 16 rows should make up a 4 inch vertical height.
I did not have any weight 3 yarn that would work to make this same gauge, so I pulled a photo that Sewrella posted for her Easy Crochet Cardigan. I highlighted a chunk that would measure a 4 inch square to help you visualize gauge on a larger piece of fabric.
As the two examples illustrate, not every designer writes gauge the same way. So pay attention to what stitches to crochet because they will not be the same for all patterns. You may even need to make two swatches. For example, one for the body of the sweater and one for the ribbing. The order of stitches and rows can also switch, so be sure to pay close attention to those numbers.
What to do if Gauge Does Not Match the Pattern
It is completely normal if the gauge you measure is different from that in the pattern. So don’t worry. You will have to go through an extra step or two to meet gauge, but keep in mind, it is important.
Remember the example I went through about being 1/2 inch off? These are the 5 things I recommend you try if your gauge does not match the pattern gauge.
1. Choose a different hook size. Easiest to try.
The hook size listed on the pattern or the yarn label is the size the designer used to create their gauge. It is a starting point to determine if you can achieve the same result. If you can’t, go up or down a hook size. Here are a couple tips.
| Gauge | Implication of Gauge | How to Meet Gauge | Why Does Solution Work? |
| LESS stitches or rows than pattern gauge | Stitches are too BIG and will yield a larger than expected project | Go DOWN a hook size | Stitches will be smaller and give you more per inch |
| MORE stitches or rows than pattern gauge | Stitches are too SMALL and will yield a smaller than expected project | Go UP a hook size | Stitches will be bigger and give you less per inch |
2. Adjust the yarn.
Yarns fall into different weight categories. But even the yarns within the same weight class don’t always work up to the same gauge. If you choose a yarn that does not meet gauge and you don’t have to use it for the particular project, select a different one. Try different fiber content, brands and weights to see if that makes a difference for your gauge.
3. Try a different type of hook.
This sounds crazy, but sometimes the slightest change can make the biggest difference. Fibers all work differently with the material that the hook is made of. Experiment with plastic, metal and bamboo hooks.
4. Block the finished item.
Blocking can help, but it is not always the answer. If your gauge is slightly smaller than the pattern’s gauge, then you might be able to block the finished project to size. But, if the project ends up too big because gauge was off, then blocking won’t help, at least in my experience. So I wouldn’t bet on this solution every time.
5. Modify the pattern to meet your gauge.
I don’t suggest this unless you know what you are doing. The numbers in a pattern can be re-worked to fit your gauge, but you must be careful with the conversion. Some stitch patterns require a certain number of repeats and it could become more complicated.
But for a general idea of how this could be done, I’ll pretend we want to make a pillow. You want the pillow to measure 20 inches wide. The pattern gauge is 4 stitches per inch so you need to chain 80 stitches (20 inches * 4 stitches per inch). Say your gauge is 20 stitches per 4 inches.
To modify the pattern, you divide 20 over 4 to get 5 stitches per inch. Then you would multiply that by the length to get the number of stitches for your starting chain. So 5 stitches per inch times 20 inches gives you a total of 100 stitches to chain.
When to Measure Gauge
I know you are probably still asking yourself, “but do I really have to take the time and resources to check gauge every time?” The simple answer is, yes, you should always measure the gauge. You will never have to worry about the size or fit or make a last minute run to the craft store because you ran out of yarn. However, there are some projects where you can get away with not measuring gauge beforehand. Let me explain.
| When to Measure Gauge | Reason to Measure Gauge | Examples |
| Always | If size and fit matter for the project. | Sweaters, cardigans, shirts |
| Never | If size is small enough you can measure the project as you go. Ripping out small things and starting over is less of a hassle. | Gloves, hats |
| Sometimes | If the project’s final dimensions don’t matter as much. Gauge can always be measured as you go. | Blankets, shawls, pillows, scarves |
Practical Tips for Meeting and Maintaining Gauge
The whole point of making a gauge swatch is to see if your crochet style, yarn and hook combination will work for the pattern. And you need it to be accurate so you don’t have a false sense of security that your pattern will turn out as expected.
Also, you need to have the capability of maintaining gauge throughout the project. That can be more difficult because we often don’t finish a project in one sitting. The starts and stops can cause inconsistencies in the fabric that can affect the final outcome.
Since meeting and maintaining gauge is so important, I have put together a list of “Do’s” and “Don’ts” that you should keep in mind when you make a gauge swatch.
| Do’s | Don’ts |
| Make a gauge swatch at the time of day you would normally crochet. Otherwise, tension can change with mood, the time of day, etc. | Don’t crochet a gauge swatch when you are in a hurry, stressed or anxious, unless these are the times you normally crochet. |
| Swatch long enough to get into your groove, usually about a 5-6 inch square is good. | Don’t crochet the swatch the exact measurements of the gauge. This won’t give you enough stitches to obtain an accurate result. |
| Treat the swatch as you would the finished item. Wash and/or block the swatch and let it dry before measuring gauge. | Don’t crochet the swatch and measure immediately afterwards. |
| Measure the parts of the swatch more towards the top because these are the better parts for measuring gauge. | Don’t measure from the bottom, where you started crocheting, because those stitches are more inconsistent with the top. Remember, you typically have to work up to your normal rhythm. |
| Finish the row or round you are working on before putting your project down for the time being. Inconsistencies are less noticeable when you pick up from the beginning of a new row or round. | Don’t stop in the middle of a row because inconsistencies are easier to see. |
| Measure gauge as you go. | Don’t wait until the end of the project to check your measurements. Sometimes the weight of the yarn can cause a change in gauge. |
Useful Projects for Gauge Swatches
Gauge swatches are a necessary step to make sure your project will turn out the way you want. But what do you do with them when you are done? I came up with a few ideas for old gauge swatches so your good yarn does not go to waste. Check them out!
- Make a decorative pillow. Combine swatches into a nice color combo for a decorative pillow. You just need enough swatches for the front side. The back can be made of a different yarn or even fabric.
- Make a blanket. If you have enough swatches, you can make a granny square blanket out of your old swatches.
- Make a book of samples to keep record. This would be for an avid crocheter who wants swatches to reference later. You could attach swatches together with a metal ring. Make sure to pin a paper or mark the swatch somehow so you know what yarn it is, what hook was used and the pattern. An easy way to keep track of hook size would be to add holes to the edge of the swatch (4 holes for a #4 hook size). I’ve seen knitters do this and the same could apply here.
- Use them as coasters. If the swatch is made of an appropriate material and thickness, a mix and match of coasters would be a cute and homely addition to any household.
- Make pot holders. You could seam two swatches together to make a double thick pot holder. Just make sure the swatches are made out of wool or cotton and have a dense enough stitch pattern to keep out the heat.
- Make a bag. Similar to the pillow and blanket, if you have enough gauge swatches lying around, you could make a cute little project bag or purse.
*Just remember, it is probably best to make these items with swatches made of yarn that have similar care instructions.
Related Questions
Is gauge supposed to be measured before or after blocking? Usually, pattern gauge is based off of a blocked swatch or a blocked final project. So unless the pattern states otherwise, operate under this assumption. Meaning, block (or wash) your swatch before taking the gauge measurement.
How is gauge measured? Crochet a swatch into a square of 5-6 inches. Lay the swatch on a flat, hard surface. Take a ruler and measure 4 inches across. Count the number of stitches in that 4 inches. Then take the ruler and measure vertically. Count how many rows are in 4 inches. Those two measurements combined are the gauge.
Please stay tuned for the second part of this series. I will cover how to measure gauge correctly. In the meantime, happy crocheting friends!
Recent Posts
The Sole Hat: A Classic Knit-Look Hat Crochet Style | Free Pattern + Tutorial
If you're a crochet enthusiast looking for a timeless, cozy hat pattern with a unique twist, you're in the right place! Introducing Sole, the crochet version of the classic, chunky 2x1 knit ribbed...
Twofold is the Sew Homey take on a classic, chunky knit-ribbed hat with a folded brim. It features the same unique stitch combination and short rows as the Sole hat, but with a modification of stitch...