
Wait for it……
Haha sorry for my Psych reference. I’m kind of a fanatic for that show and frankly, I’m excited for the 2nd movie to come out! In honor of that, I created these fun, summer-y earrings that can be paired with nearly anything (I wore them to Christmas last year…).
The pineapple earrings are super simple to make, take less than an hour and are very inexpensive. Stick around to see a full photo tutorial and watch me assemble the earrings in the video I created at the end of the post.
If you want the inexpensive, printable PDF version, head over to my Ravelry page and snag yourself a copy.
Materials
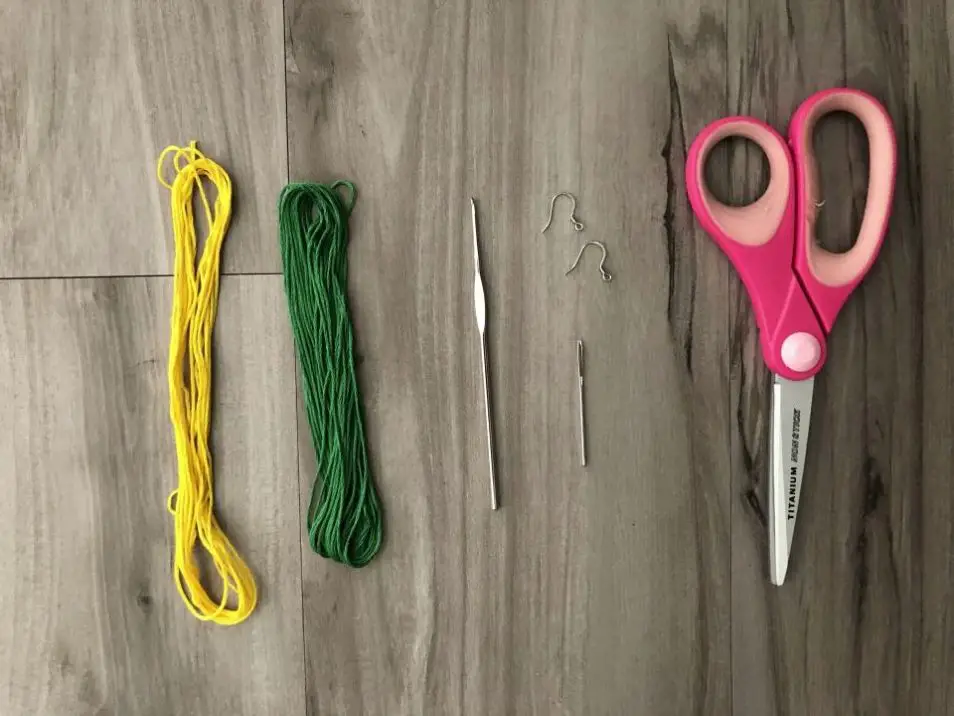
- DMC floss yellow (400 or 725)
- DMC floss green (700)
- Crochet hook size 2.25mm
- Tapestry needle
- Fishhook earring wires
Abbreviations
ch – chain
dc – double crochet
sl st – slip stitch
Notes
- US terms are used throughout.
- Numbers within () indicate the stitch count at the end of the row.
- The pineapple measures approximately 1 inch (3 cm) from leaves to bottom of pineapple.
- Yarn substitutions can include any lace weight yarn (0) such as crochet thread. Colors may vary.
Pineapple Earring Pattern
Main Part of the Pineapple
YELLOW (Make 2)
ch 13; leave a tail long enough to weave in the end
Row 1: In the 4th ch from hook 3 dc; 3 dc in each ch across (27)
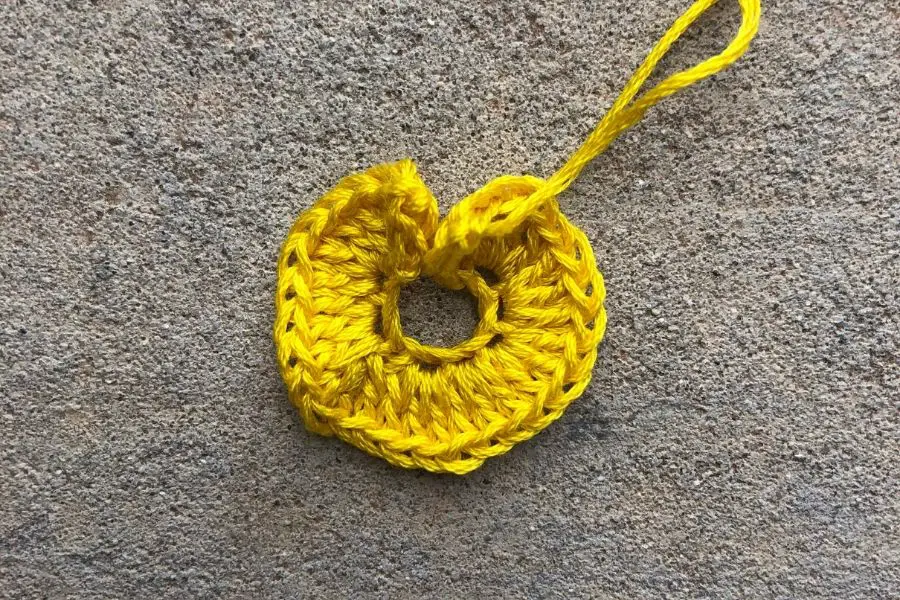
Cut a long tail. Approximately 4 inches long.
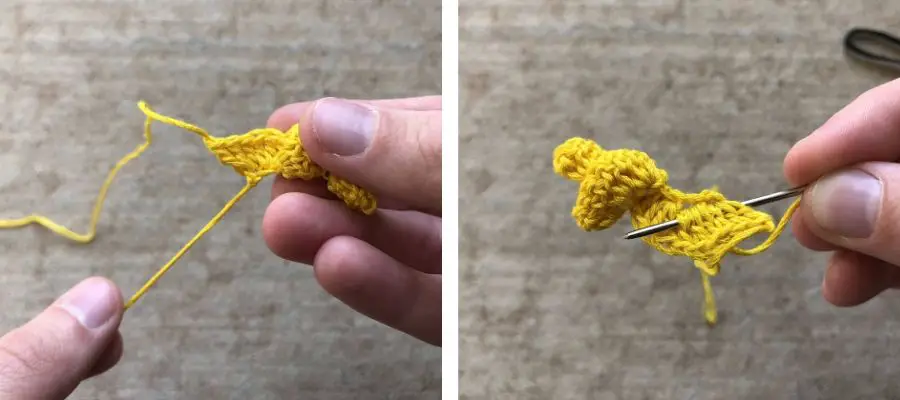
This is what your pineapple should look like right now. A small, open circle with ends that curl upward.
Set aside and repeat for the 2nd pineapple.
We will work on shaping the pineapples after you are done with the leaves.
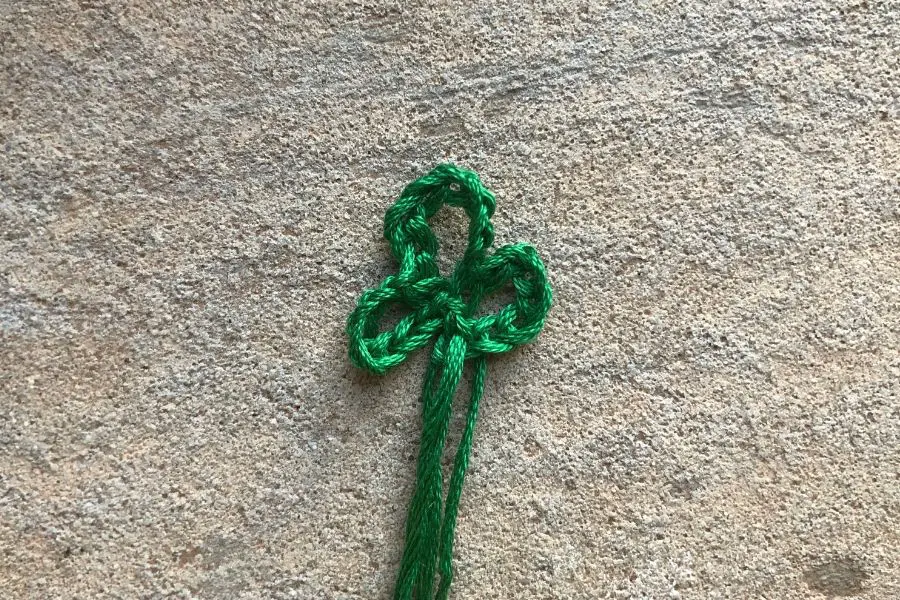
Leaves
GREEN (Make 2)
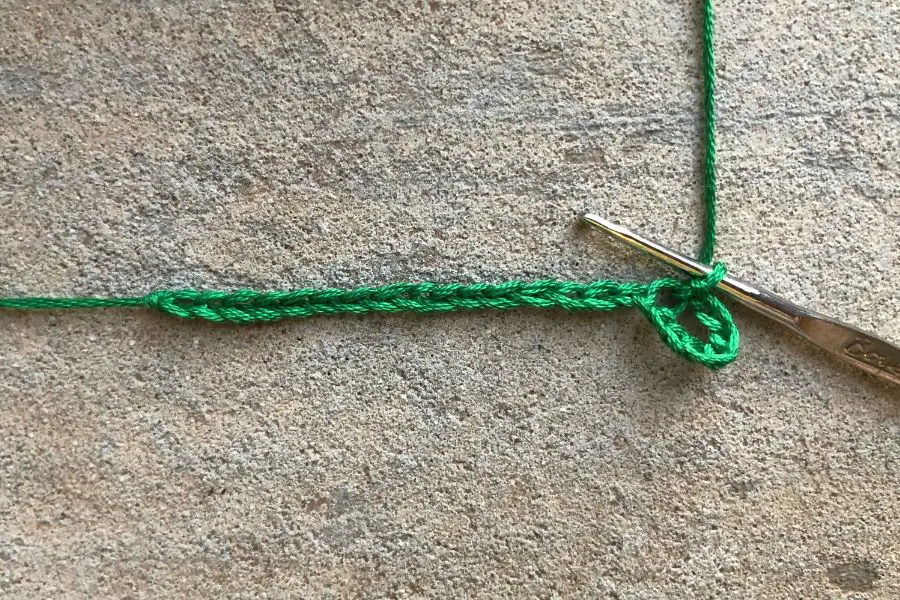
Ch 24; leave a tail approximately 3 inches at the end
Row 1: In the 8th ch from hook, make a sl st; repeat for the 16th and 24th ch spaces
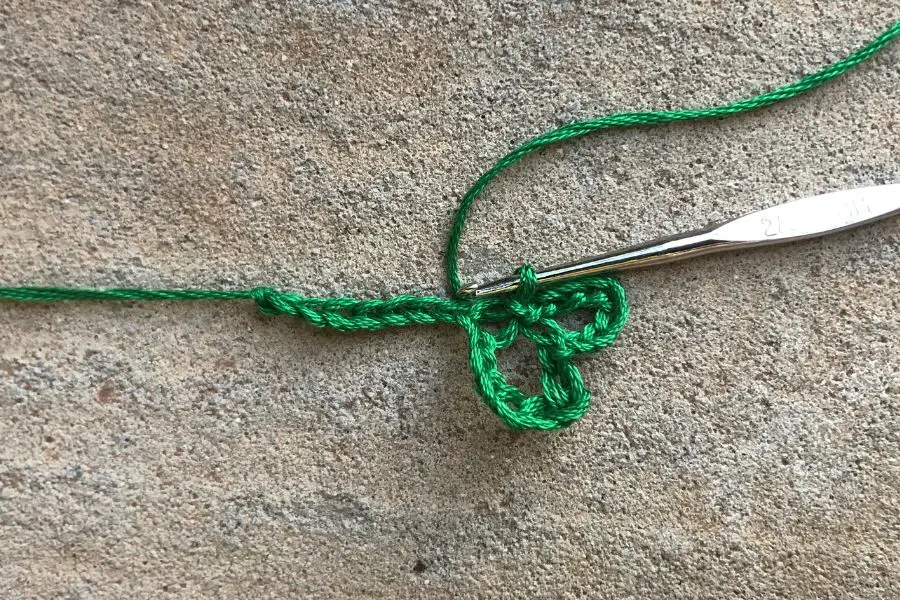
Cut a long tail.
Set aside and repeat for the 2nd set of leaves.
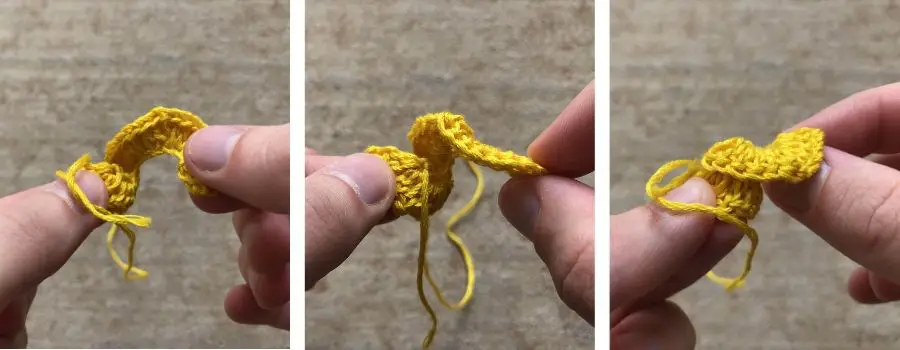
Shape the Pineapple
Grab one of your pineapple parts, but keep the other close because you will go through the same process for it.
First, you want to grab the tips of the open circle with the curling edges facing you. Then start twisting the left side counter-clockwise until you get a spiral shape. The pictures below will help guide you to get the desired shape.
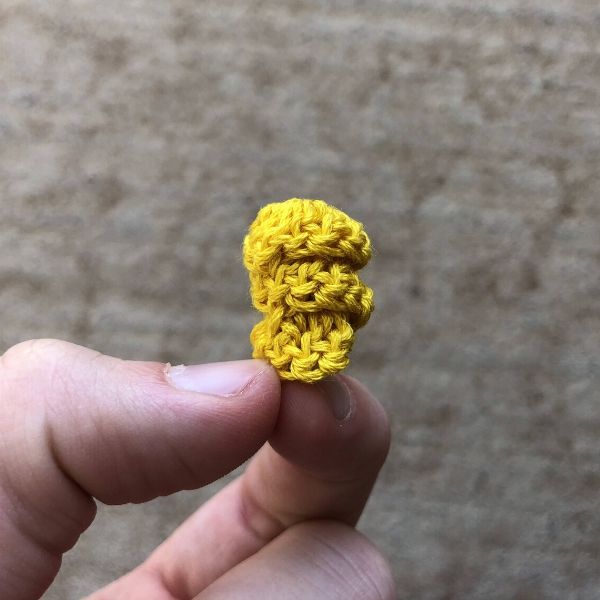
And finally, you should have a beautiful pineapple shape. Let me show you what mine looks like!
Assembly
At this point in the process, you should have 2 pineapple shapes and 2 sets of leaves. Grab your tapestry needle and 2 ear wires and we are going to assemble these into earrings.
Secure the Pineapple Shape
We want the earrings to hold their shape over time after many wears. You probably noticed that the spiral doesn’t maintain its shape completely.
In this part, we are going to sew the edges of the spiral together to keep the pineapple shape. Follow along with the photos.
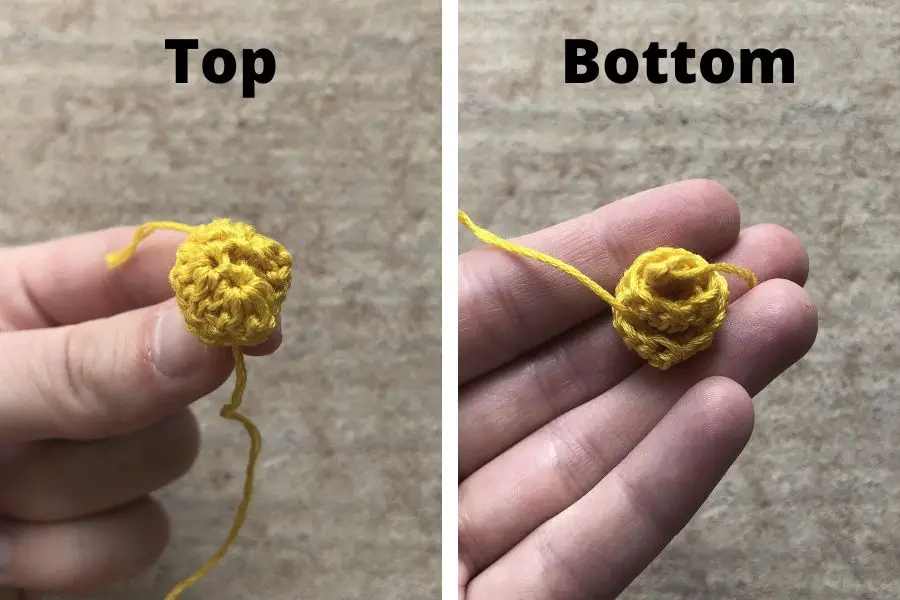
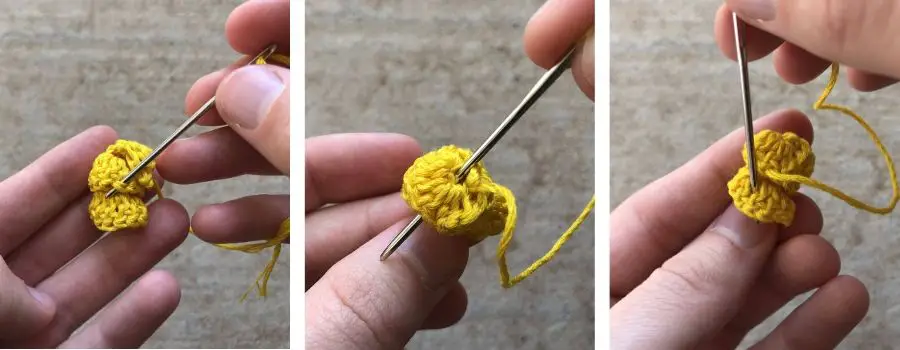
We will sew along the top of the pineapple first. I differentiated between the top and bottom of the pattern so that you would know what side I used for the pattern. Although, the top and bottom don’t matter. You get similar results.
You should have two strings of yarn at this point. Go ahead and weave in the end on the inside of the pineapple, just like I’m doing in the photo.
Next, you want to sew down the flap that is at the top of the pineapple. Start sewing from the bottom of the flap and go up.
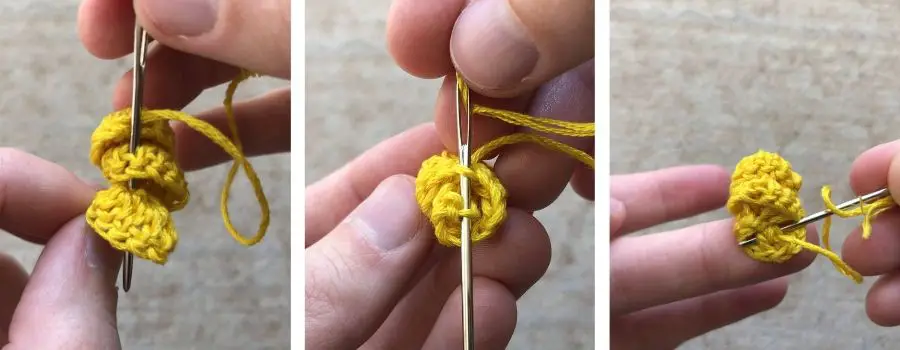
After the flap is sewn, go through the top of the pineapple and out to one side. Sew that side down so it doesn’t move. You will want to do the same on the opposite side.
Then take the needle down the center, to the bottom. You want to sew the bottom of the spiral to the edge. Once you are done, weave in the end on the inside of the pineapple.
Go through the same steps for the other pineapple.
Add the Leaves and Ear Wire
Now we will attach the leaves to the top of the pineapple along with the ear wire. Let’s finish these things!
First, you want to thread the needle with one of the green yarn tails. Take the needle and go through the center of the pineapple. Pull tightly so the leaves touch the pineapple.
Next, go through the center again with the other yarn tail. Pull tightly.
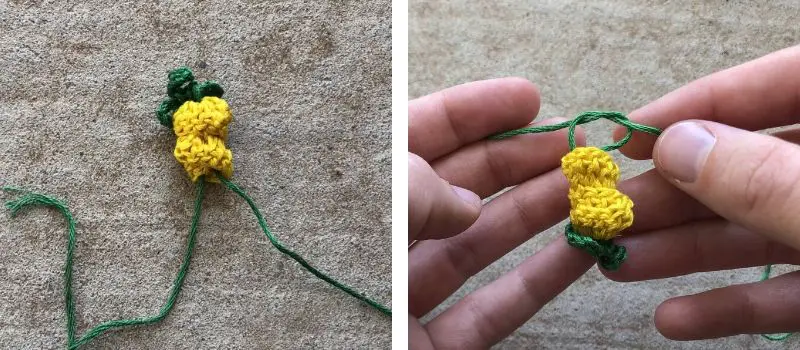
These two steps look something like this:

Now you should have two threads poking out of the bottom. Tie the two threads together to secure the leaves in place like so:
Now thread the needle with the longest yarn tail. Go up through the center to the top of the pineapple. I suggest going through a different part of the leaves to help secure them further.
With the green yarn tail at the top, thread the ear wire through. Take the tail back down to the bottom of the pineapple.
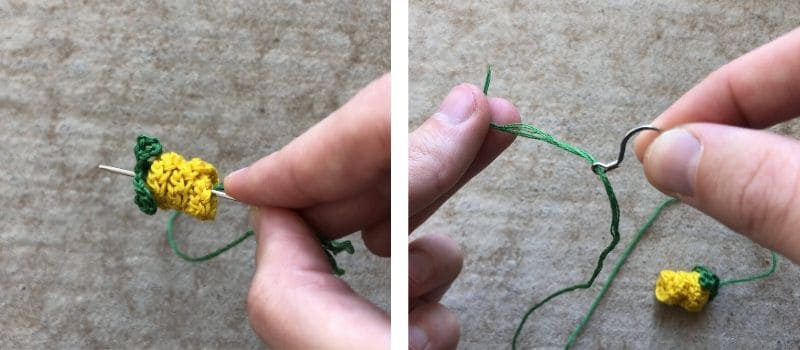
I like to give the ear wire a tug so that there is a little space between it and the pineapple. This helps the earring dangle better. You can see about how much room I like to leave in the picture below.
Both yarn tails should be at the bottom of the pineapple again. Go through the same process of tying the two strings together, pulling snugly so the knot is hidden on the inside. I like to make a few knots for good measure.
Now it’s time to weave in both of the yarn tails. Make sure you weave them on the inside so they don’t show outward. When you’re done, trim the string.
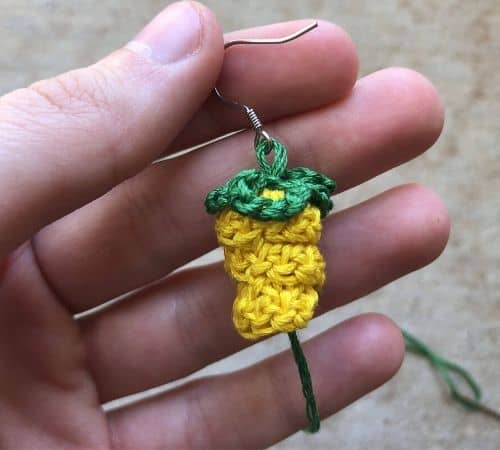
Don’t worry if a little bit of the green shows through. It’s like a real pineapple!
Video Tutorial
I love this pattern so much I decided to make a video tutorial as well. I walk you through the same exact process as what I covered above. But I know we all learn differently.
I learned to crochet through YouTube, so I know how valuable a video can be. Follow along with me and make yourself these adorable pineapple earrings!
I hope you love these as much as I do! Let me know what you think. If you make these, please post to Instagram and tag me @sew.homey! I want to see them on you!
Thanks everyone, until next time.
Recent Posts
The Sole Hat: A Classic Knit-Look Hat Crochet Style | Free Pattern + Tutorial
If you're a crochet enthusiast looking for a timeless, cozy hat pattern with a unique twist, you're in the right place! Introducing Sole, the crochet version of the classic, chunky 2x1 knit ribbed...
Twofold is the Sew Homey take on a classic, chunky knit-ribbed hat with a folded brim. It features the same unique stitch combination and short rows as the Sole hat, but with a modification of stitch...