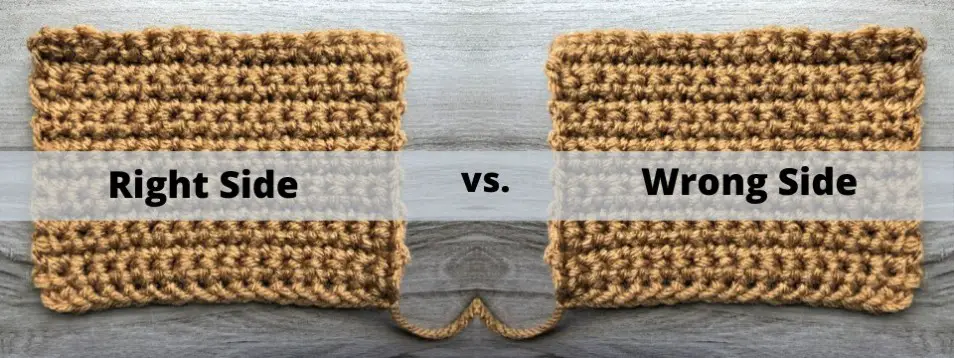
When I first began to crochet, I could not tell the difference between the right side and the wrong side of crochet fabric. I generally made the outside the side I thought looked best. Since then, I have discovered there is a better way to tell which side of the fabric should face outward.
There are four ways to determine the right side of crochet fabric.
- The position of the chain tail is on the left side.
- The row count is odd.
- Single crochet stitches have a “v” shape.
- The top row stitches are sideways v’s.
Some projects don’t matter which side shows. But there are certain stitches that will impact the final look of the project. It is best practice to be able to identify the right and wrong side of the fabric so that your final pieces look flawless.
4 Methods to Determine the Right Side of Crochet Fabric
The right side of crochet fabric is the side intended to face outward. It is considered “right” because the stitches look cleaner and more defined. To an untrained eye, the difference is minimal. However, if you want to up your game and have stellar looking projects every time, you will want to learn how to identify which side is right or wrong.
There are a few different methods that can determine which side of the fabric you want to face out. Just pick one and stick with it. But if the pattern specifies the right and wrong side of the fabric, follow the designer for the best results.
1. Check the position of the chain tail.
You know the tail that you leave at the end of your first chain row? The pesky one that must be woven in at the end? Well that can become your best friend when it comes to telling right from wrong side of crocheted fabric.
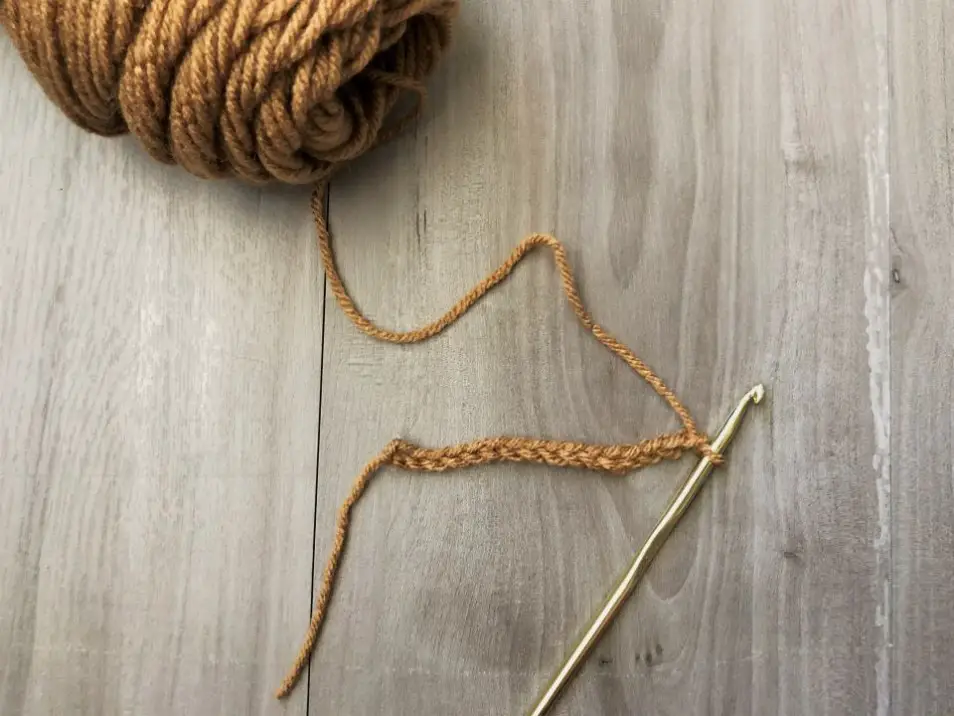
When you begin a project with a traditional chain, the right side always has the tail on the bottom left. This is because the first row of single crochet (or other stitch specified in the pattern) is stitched onto the beginning row of chain stitches without turning. Then when you flip to the other side to continue crocheting, you are making stitches on the wrong side.
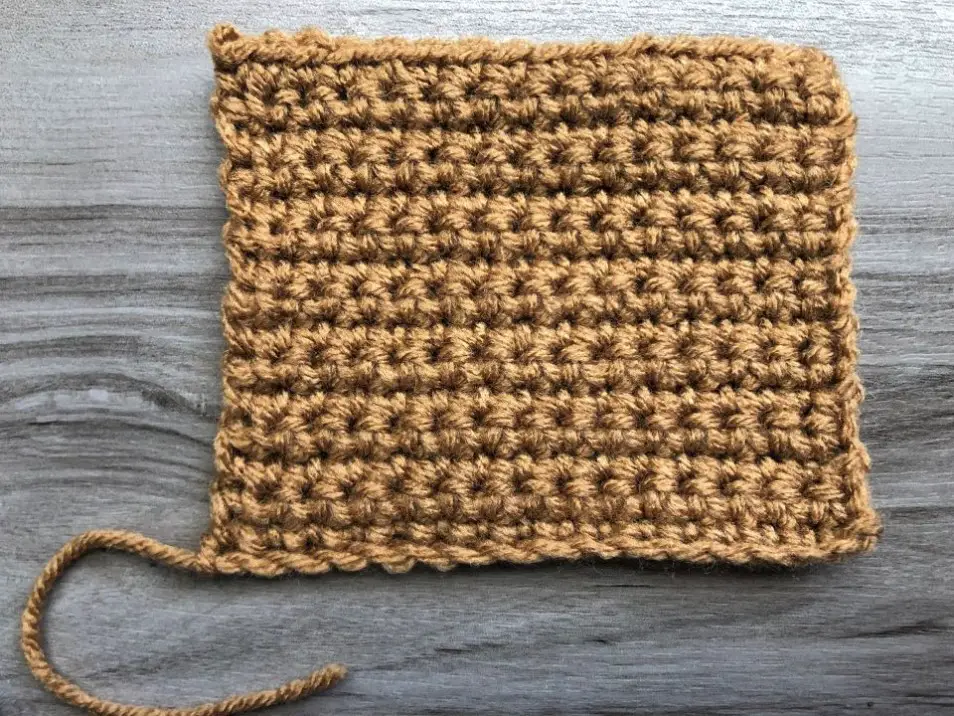
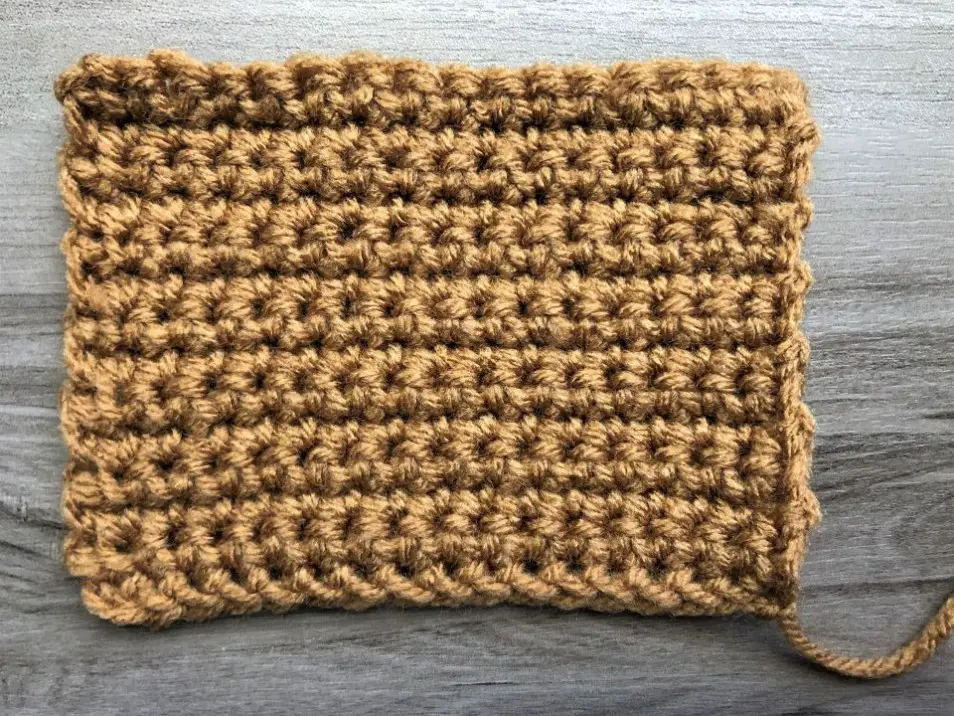
Take a look at the images below. The picture on the left illustrates a traditional chain, the starting point for any crochet project. Notice that the yarn tail is on the left side. This indicates the side of the fabric you want to face outward. Once you start adding rows, like the photo on the right, the sides can get jumbled and you can quickly forget what side is the right side. I’ve already told you the answer, but let’s think about why the tail being on the left side always indicates the right side of the fabric.
If I were to pick up the crochet hook and make the first row of single crochets (the chain doesn’t count), I’d be crocheting from right to left. I’m still on the right side of the fabric according to the way I defined the “right” side. Then to make the second row, I’d have to turn the piece over (the wrong side), which moves the position of the tail, and crochet to the end of the row. Then I’d flip the piece to continue the next row and so on. So the yarn tail can tell you a lot.
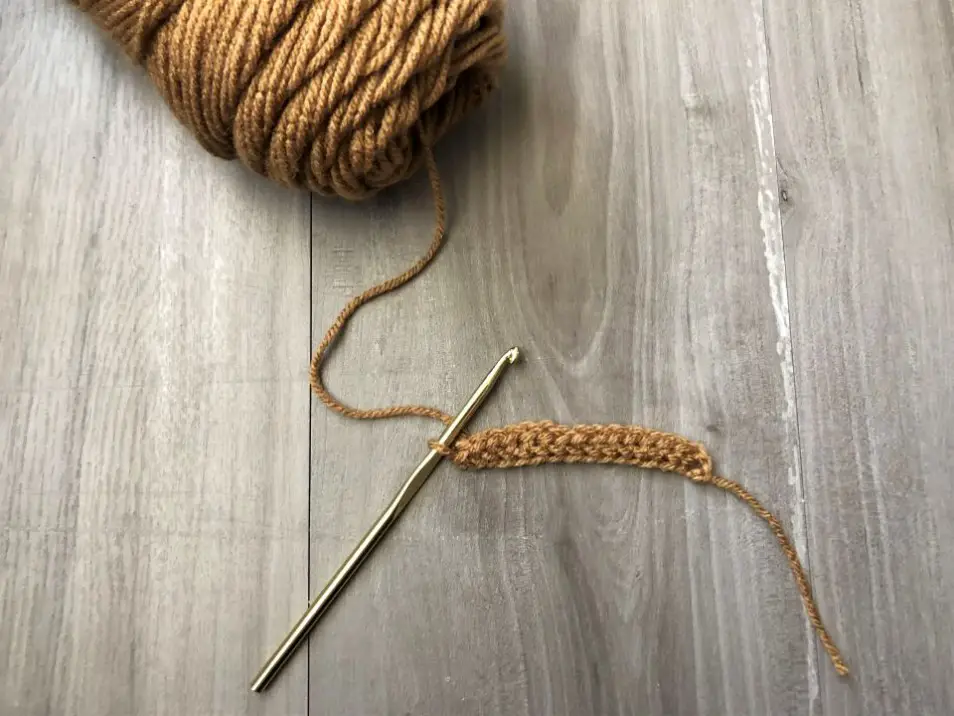
The opposite is true if you use a foundation chain stitch. In crochet, the foundation chain combines the first string of chains (like what you see above) with a single crochet into one stitch (it can be other stitches too). The stitches build on each other until the first row of single crochet, or foundation, is the length the pattern calls for. The tail is located on the bottom right side of the foundation chain which indicates you are working on the right side of the fabric.
Let’s take a look at the photos below. See the difference between a traditional and foundation chain? The way the first row of single crochets is worked differently than a traditional chain. As I build the first single crochet row, I leave the yarn tail on the right side.
Once I get to the end of the first row, I flip to the wrong side (yarn tail would be on the left) and continue crocheting the second row and so on. Eventually, I would end up with a piece like what is in the photo on the right. I know it is facing the correct way because the yarn tail is back to its beginning position, the right.
2. Row count.
Another method is to keep track of the row count. When following a pattern, you will have to count the rows any way, so this won’t be difficult.
The right side of the fabric will always be an odd numbered row. This does not matter whether you use a traditional chain or foundation chain. The reason is because the chain never counts as the first row. The row of the main stitch is the first row.
This is probably the easiest method to use. Just remember odd numbered rows equal the right side. Easy peasy.
3. Shape of the stitches throughout the fabric.
The third method of identifying the right and wrong side of crochet fabric applies to single crochet stitches made in the round. Each stitch has a certain shape that looks cleaner, straight and overall better on the right side. Let’s look at two examples below. Can you tell which is the right side and which is the wrong side of the fabric?
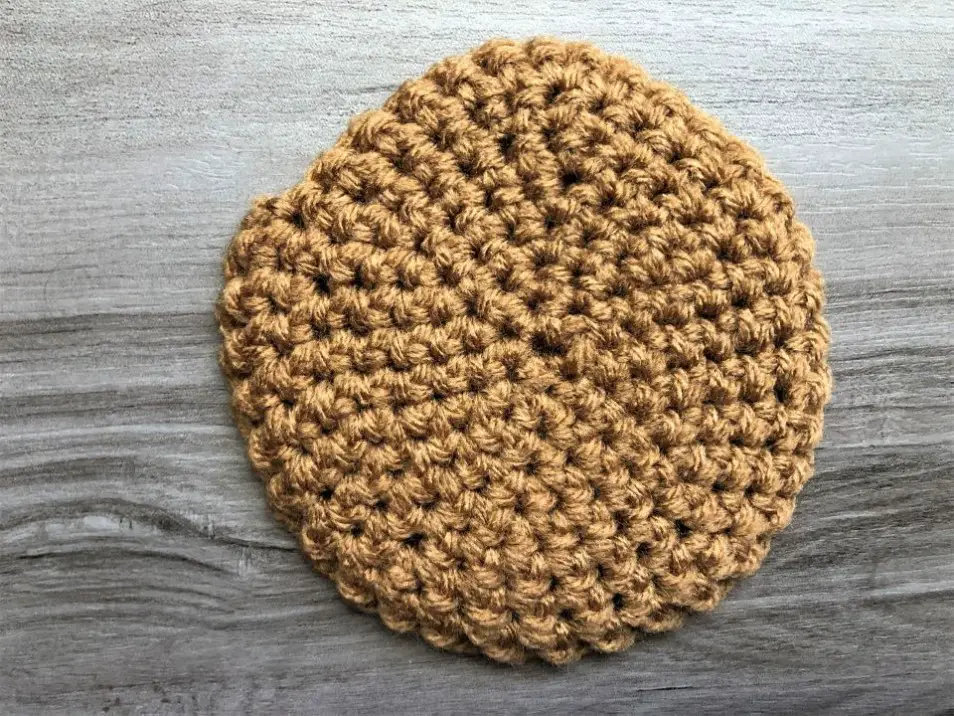
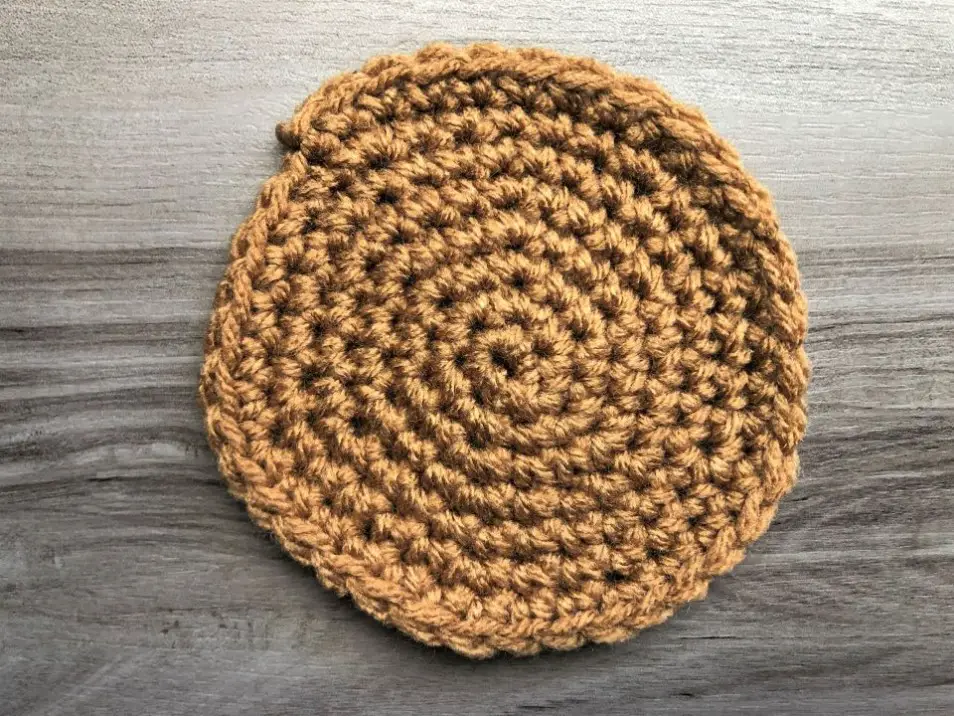
The correct answer is the photo on the right illustrates the right side of the fabric. Let’s continue and understand why this is.
When working with single crochet in the round, the right side of the fabric will be made up of stitches that look like v’s. This is illustrated in the image below. I marked several stitches in white so you would know how to identify them. I encourage you though, to make your own swatch and take a better look at the shape of the stitches. It will be easier to see compared to what is in the photo.
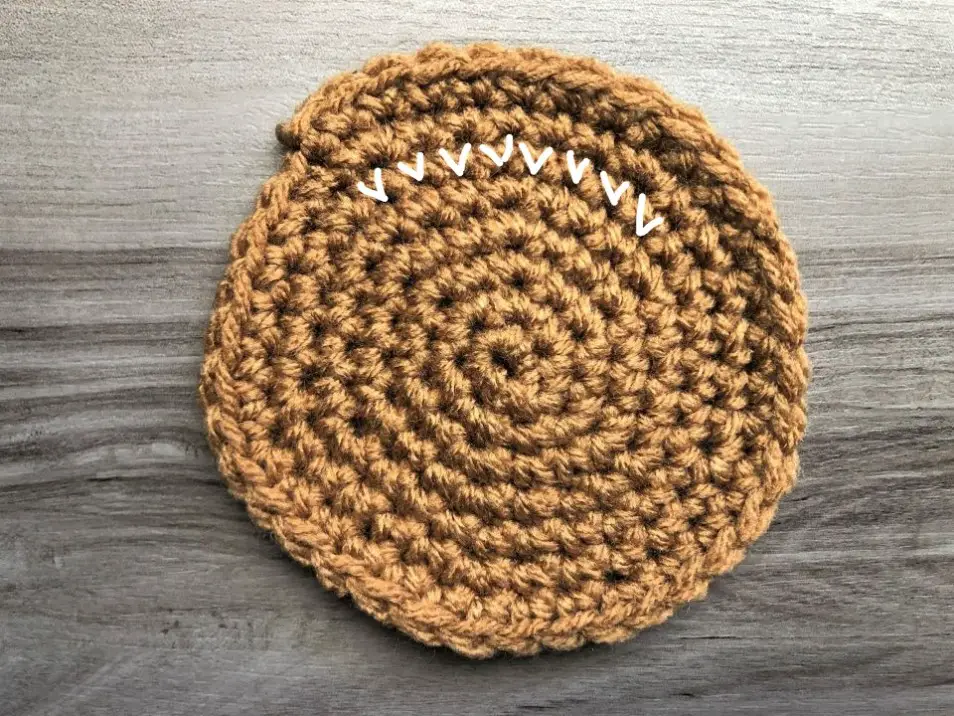
The flipped over side is the wrong side and will look like the Greek pi symbol, π. I highlighted a few stitches for you so you would know what I am talking about. Again, look at a swatch you made so you can see this better.
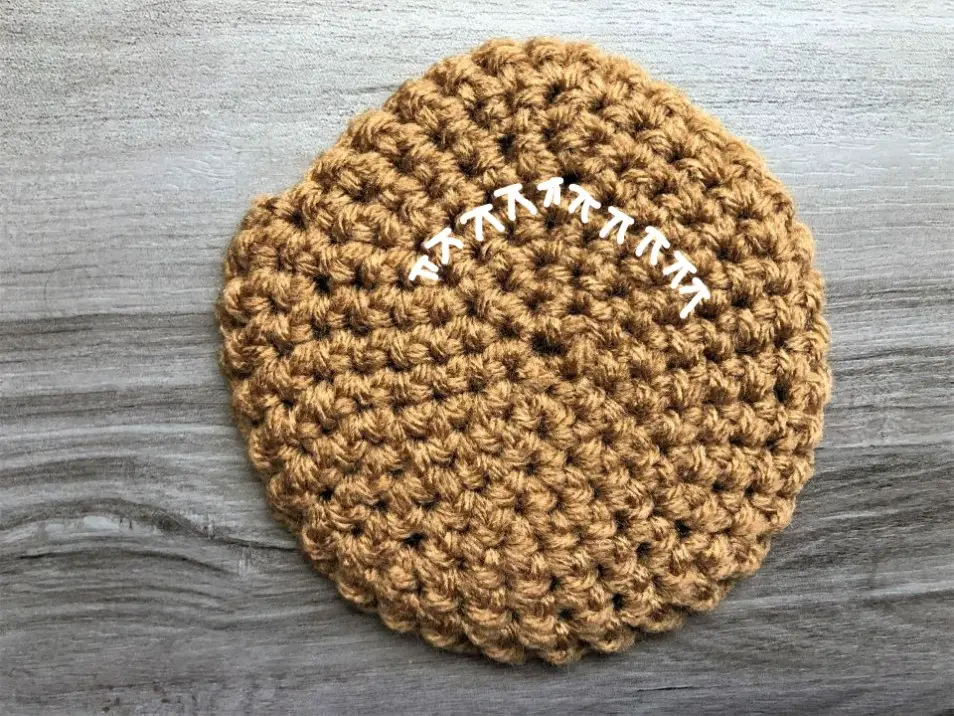
In my experience, it is much easier to tell the right and wrong side of crochet when you are working in the round. The wrong side always looks fuzzier and messy. Just compare the two photos above and you will see what I am talking about.
4. The visibility of the top row of stitches.
Another method exists to check the right and wrong side of crochet. This will ONLY work for stitches made in the round. Look at the top stitches of the row that were just completed. This is the row that has the working, or “live”, stitch on it.
If the fabric facing you is the right side, the top row of stitches will look like sideways v’s. Let’s get a better look at what I mean here. Have a look at the image below. On the rop row, you can clearly see the stitches, which look like sideways v’s. And just as we learned above, the stitches in the middle resemble v’s, which also indicates the right side of the fabric.
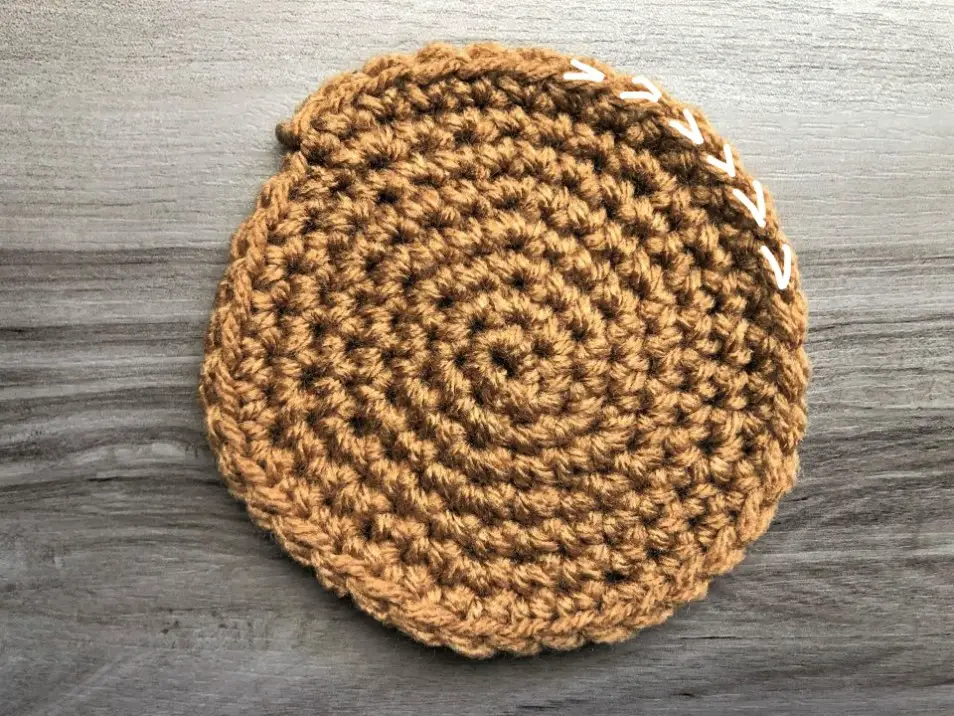
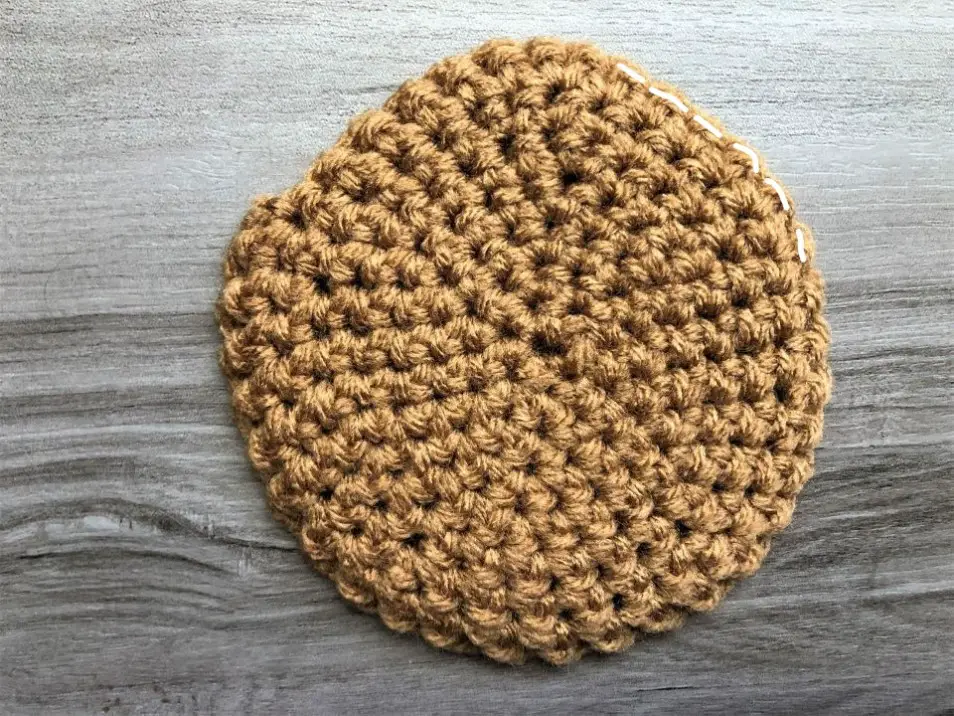
If the stitches are hard to see and there are no defined stitches at the top, you are looking at the wrong side. All you can see is a faint line of the top stitches. This is not the side you want facing outward. Also, as we just learned, the stitches here look like “π”, which means you are looking at the wrong side.
Right vs. Wrong Side for Left Handers
For those of you lefties, I did not forget about you! Determining the right and wrong side of crochet fabric does change slightly for y’all. Let me explain.
The chain tail method is actually the only one that is opposite for left handed people. For anyone that crochets, the chain tail begins in the non-dominant hand. Then you build off of that and eventually drop the tail. Since a left handed individual holds the tail in reverse, the opposite is true for identifying the right and wrong side of crochet.
The chain tail is always on the bottom right when the right side of crochet fabric is facing a lefty. If you use a foundation chain, the opposite is true though. When using a foundation chain, the chain tail will be on the bottom left for the right side of crochet fabric.
The other three methods work for right handed people and left handed people alike. The shape of the stitches will not change. The sideways v’s at the top won’t change. And an odd row will always indicate the right side of the fabric.
Stitches where Right and Wrong Side Matter
There are certain instances where the right and wrong side of crochet do matter. If the pattern calls for colorwork, there will definitely be a side that looks better than the other.
A few examples of stitches that matter include working front post or back post only, invisible decreases and the puff stitch. There are other combinations of stitches that will matter as well. The best way to know if the front side matters is if the right side is mentioned in the pattern. If it is, the designer took the time to inform you. And you should pay attention so that your project turns out as expected.
There are also certain projects, such as amigurumi, that need a certain side to face out. I will cover this in the next section.
Right Side Matters for Amigurumi
The reason amigurumi is mentioned here is because many beginners struggle with determining the right and wrong side of the fabric. What happens is, since most amigurumi are circular and tube shaped, the fabric curves so that the right side faces inward. It is a natural occurence and you won’t even notice if you don’t know the difference.
When you are a beginner, it is best if you use one of the last two methods I mentioned earlier. Check if the top row has the sideways “v” shape. If those v’s are facing inside the circle, you should flip your work right side out. Or you can check the shape of your stitches. Do the stitches facing out look like a “v” or ” π” ? If they are v’s, keep your work as it is. This applies for single crochet stitches.
There are a couple of reasons right or wrong side matters with amigurumi. The first applies if you are using an invisible decrease. The whole point of an invisible decrease is so that you can’t tell from the right side of the fabric. It will all look uniform. But when you use this stitch, the wrong side of the fabric will get these little ridges. If you get the sides flipped, the ridges will show where you don’t want them.
Another reason right and wrong sides matter to amigurumi is for the finished look. If the wrong side shows, the stitches look messy and they form a sort of spiral. The right side stitches will have equal rows that line up nicely.
The first stuffed animals I made were gifts, so I actually couldn’t tell you if I made the right sides show or not. And it has been years since I made them. But I guarantee you I did not on many of them because I was not aware of the right and wrong sides. I probably even mixed this up and had one arm showing the right side with a leg turned inside out. I was happy with the results though. Only an experienced crocheter would have known the mistake.
Conclusion
Ultimately, if you are following a pattern, it is up to the designer to choose which is the right side. You ought to pay special attention if the pattern specifies the right side because it will affect its final appearance.
If the designer does not specify, there is some debate whether or not the right side matters. Some say you should choose which side faces out based on the look. While others go at it with a more methodical approach.
Whichever way you choose, it does not matter. All that does matter is that you know the difference and how to identify them. Now you can decide which is the right or wrong side of your crochet pieces.
Video Answers
The answers are in order of appearance: 1, 2, 2, 2, 2, 1
Recent Posts
The Sole Hat: A Classic Knit-Look Hat Crochet Style | Free Pattern + Tutorial
If you're a crochet enthusiast looking for a timeless, cozy hat pattern with a unique twist, you're in the right place! Introducing Sole, the crochet version of the classic, chunky 2x1 knit ribbed...
Twofold is the Sew Homey take on a classic, chunky knit-ribbed hat with a folded brim. It features the same unique stitch combination and short rows as the Sole hat, but with a modification of stitch...
