
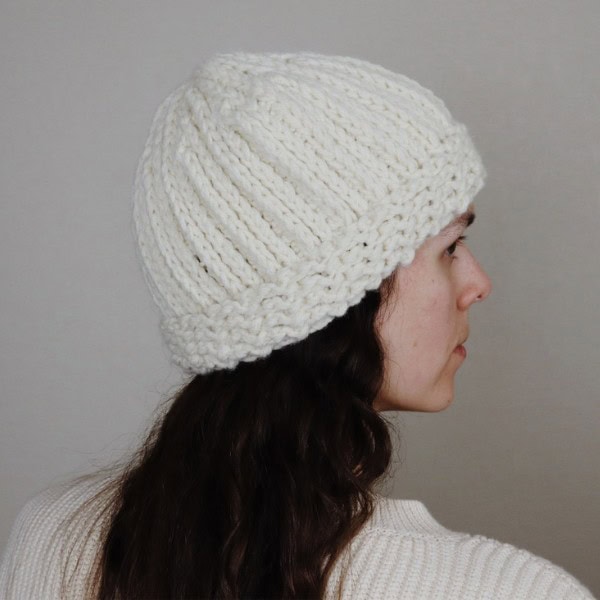
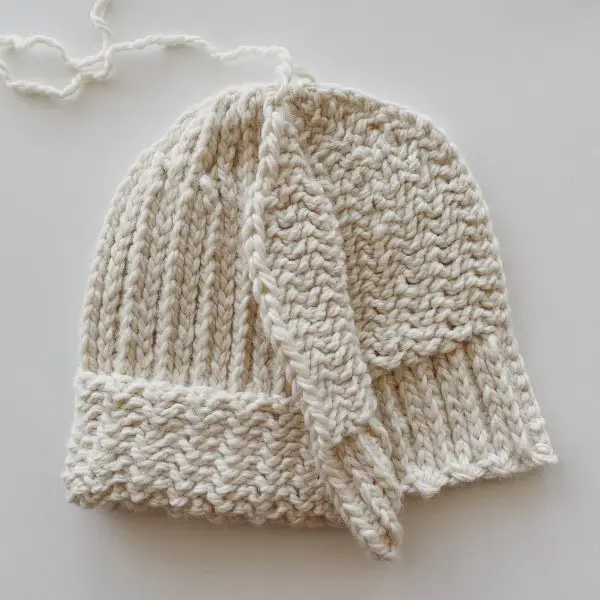
If you’re a crochet enthusiast looking for a timeless, cozy hat pattern with a unique twist, you’re in the right place! Introducing Sole, the crochet version of the classic, chunky 2×1 knit ribbed beanie. This hat combines a beautifully textured ribbing with a contrasting pattern at the brim to create a stylish accessory perfect for cold weather days.
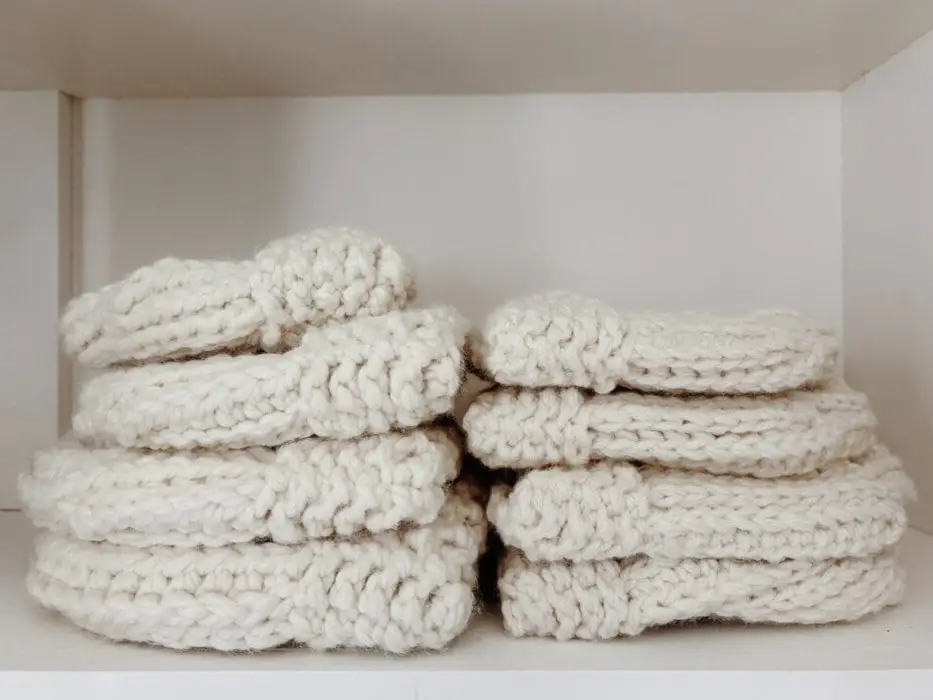
The Sole hat is simple, versatile, and is sure to become your go-to project. I’ve crocheted over a dozen of these hats… that’s how much I like this pattern. Its addictive nature is precisely where the name “Sole” comes from. If I could only crochet one hat pattern for the rest of my days, it would undoubtedly be this one.
In this post, I’ll share why the Sole hat should be your next crochet hat project, the construction, and the detailed instructions you need to make your very own. Let’s dive in!
Why You’ll Love This Pattern
The Sole hat is a thoughtfully designed piece that combines aesthetics, functionality, and simplicity. Here’s what sets it apart and why you’ll love this pattern too:
- Skill Level: Intermediate (beginners, don’t be scared… you can do it too)
- Time to Complete: a few hours
- Perfect For: the cold months, the family, gifting
- Key Features: knit-like texture, tailored crown, two yarn weight options, 4 sizes
This pattern also pairs beautifully with the Twofold hat, giving you more options to build a personalized collection of handmade accessories.
The Construction
Despite its intricate look, the Sole Hat’s construction is refreshingly simple. Here’s how it comes together:
- Lengthwise Crocheting: The hat is worked in turned rows.
- Short Row Shaping: To achieve the gently curved dome at the top, short rows are used.
- Assembly: Once the rows are complete, the edges are seamed together, and the crown is cinched closed with a magic circle for a professional finish.
Materials You’ll Need
Here’s what you’ll need to bring this pattern to life:
- Yarn: Super bulky weight yarn OR worsted weight yarn (held double). Below are the yarns used for the samples in the pattern.
- Lion Brand Wool-Ease Thick & Quick, fisherman (170 g = 106 yds)
- Lion Brand Wool-Ease held double, fisherman (85 g = 197 yds)
- Hook Size: 6.5mm / K
- Other Tools: tapestry needle, scissors
Pattern Notes
- The ad-free, printable PDF version is available on Etsy HERE.
- The ad-free, printable PDF version is available on Ravelry HERE.
- Pattern is written using US standard terms.
- Four sizes are available. The final measurements and yardage amounts are listed in a table below.
- The model is wearing the size medium and has a head circumference of 22″ and length of 8.5″ (measured from crown of head to ear lobe).
- The hat is designed to have 1-2″ of negative ease.
- The hat is worked in turned rows, so while the placement of the hdc 3rd loop remains consistent, its appearance may vary depending on the direction of the work. Additionally, the contrasting brim requires some stitches in each row to be worked below the front loop and others below the back loop. The pattern specifies loop placement for “body” and “brim” stitches.
- The top of the hat is held together by a magic circle. At the end, the hat will be cinched closed with the magic circle for a nice finish. This is optional, but highly recommended.
- The hat is designed for 2 different yarn weights, super bulky and worsted weight held double. Gauge, stitch counts, yardage, etc. are different.
- Stitch counts are listed as super bulky XS (S, M, L) / worsted held double XS (S, M, L).
- The bold stitch counts at the very end of the rows are the total number of stitches added to the row.
- The brim measures approximately 2″.
- The sl st and ch at the magic circle do not count as a stitch.
Gauge
- Super bulky: 10 sts x 9 rows = 4″ in hdc 3rd loop
- Worsted held double: 12 sts x 10 rows = 4″ in hdc 3rd loop
Abbreviations
Click the links to watch the tutorials for the corresponding stitches on my YouTube channel.
ch – chain
sl st – slip stitch
hdc – half double crochet
hdc2tog – half double crochet 2 stitches together
st(s) – stitch(es)
rep – repeat
back bump
mattress stitch
magic circle
Sizes
| Circumference | Length | Yardage* | # Skeins* | |
| XS | 16″ | 6.5″ | 67 / 179 | 1 / 1 |
| S | 18″ | 7″ | 81 / 217 | 1 / 1 |
| M | 20″ | 8″ | 103 / 275 | 1 / 2 |
| L | 22″ | 8.5″ | 120 / 321 | 2 / 2 |
*Yardage/# skeins has super bulky yarn weight listed first and worsted weight held double listed second.
How to Crochet the Sole Hat
Begin: Make magic circle, leaving approximately a 12 inch tail.
Ch 18 (19, 21, 22) / 20 (22, 24, 26)
Row 1: hdc into back bump in 2nd ch from hook and in the next 11 (12, 14, 15) / 13 (15, 17, 19) chs, leave remaining 5 chs unworked; ch 1, turn. 12 (13, 15, 16) / 14 (16, 18, 20)
Row 2: Skip 1st st, hdc below front loop into the next 6 (7, 9, 10) / 8 (10, 12, 14) sts
Work the brim:
Hdc below back loop in the next 5 sts; ch 1, turn. 11 (12, 14, 15) / 13 (15, 17, 19)
Row 3: Hdc below front loop in first 5 sts
Work the body:
Hdc below back loop in the next 6 (7, 9, 10) / 8 (10, 12, 14) sts
Short row to shape top of hat:
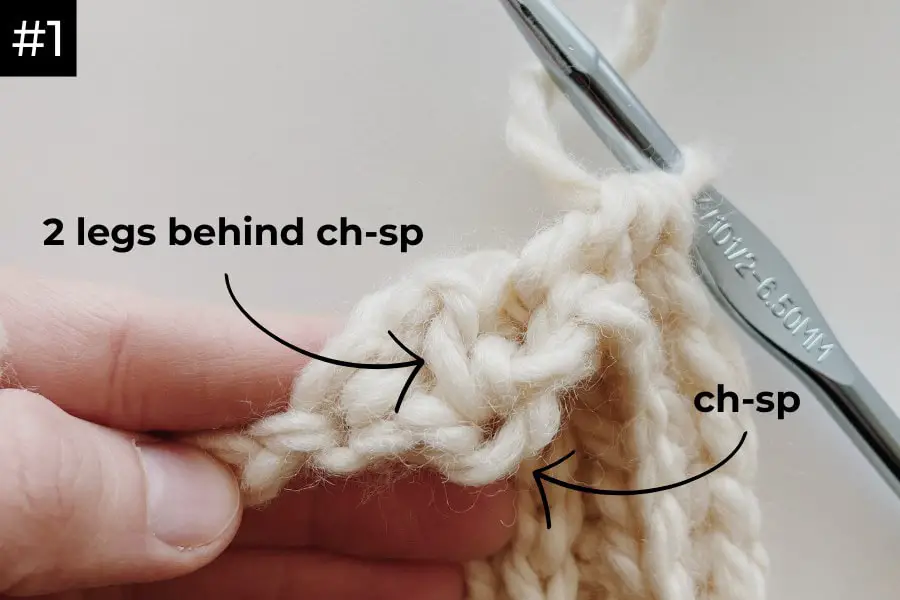
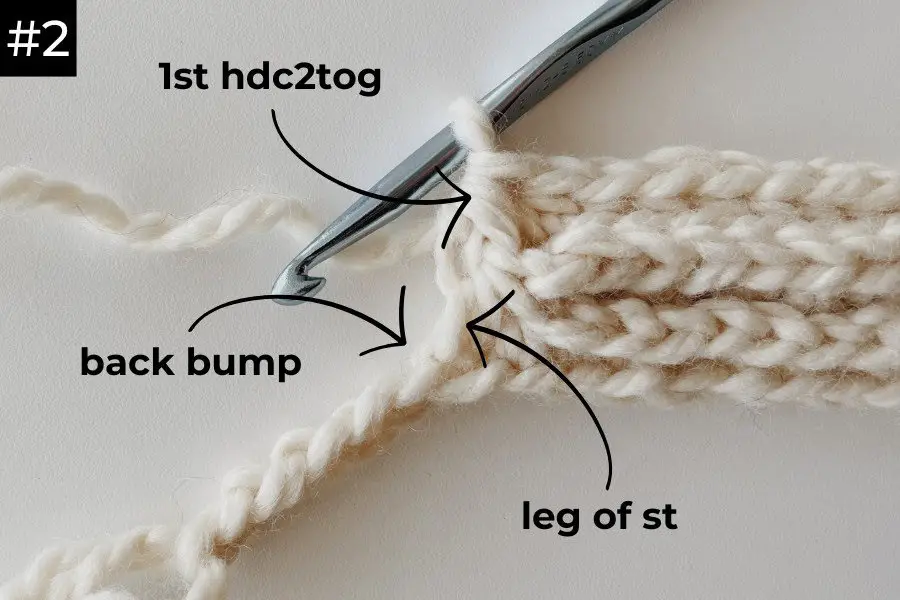
Hdc2tog (reference #1 – yo, pick up loop from 2 legs behind ch-sp, pick up another loop from the ch-sp, yo and pull through all four loops), hdc2tog (reference #2 – yo for hdc, pick up loop from the leg of st directly below and pick up another loop from the back bump of the next ch, yo and pull through all four loops), hdc in next 4 back bumps (reference E.3-E.4), sl st in magic circle, ch 1, turn. 17 (18, 20, 21) / 19 (21, 23, 25)
Row 4: Hdc below front loop into the next 12 (13, 15, 16) / 14 (16, 18, 20) sts
Work the brim:
Hdc below back loop in the next 5 sts; ch 1, turn 17 (18, 20, 21) / 19 (21, 23, 25)
Row 5: Hdc below front loop in first 5 sts
Work the body:
Hdc below back loop in the next 7 (8, 10, 11) / 9 (11, 13, 15) sts, leave remaining 5 sts unworked; ch 1, turn. 12 (13, 15, 16) / 14 (16, 18, 20)
Row 6: Skip 1st st, hdc below front loop into the next 6 (7, 9, 10) / 8 (10, 12, 14) sts
Work the brim:
Hdc below back loop in the next 5 sts; ch 1, turn. 11 (12, 14, 15) / 13 (15, 17, 19)
Row 7: Hdc below front loop in first 5 sts
Work the body:
Hdc below back loop in the next 6 (7, 9, 10) / (8, 10, 12, 14) sts
Short row to shape top of hat:
Hdc2tog (reference #1 from above), hdc2tog (reference #2 from above), hdc back loop in next 4 sts, sl st in magic circle, ch 1, turn. 17 (18, 20, 21) / 19 (21, 23, 25)
Rep rows 4-7 for a total of 35 (39, 43, 47) / 39 (43, 47, 51) rows, or until work reaches 8 (9, 10, 11)” measured when folded in half. End on a Row 7.
Finish: Omit the turning chain after final row. Cut yarn approximately 20″, and draw through loop on hook. Mattress stitch first and last rows together with the yarn just cut. Match the ribbing pattern to the brim and body of the hat when picking up stitches.
Pull the magic circle closed with its yarn tail. Sew the small hole shut. Weave in all ends inside the hat.
Need help? Check out the video tutorial here:
Upgrade to the Premium Version
If you loved the free instructions but want more support, the premium pattern is available on Etsy and Ravelry. The premium pattern includes:
- Detailed, step-by-step instructions
- Photos, stitch guide
- Additional tips for seaming the hat
Share Your Sole Hat Creations
I can’t wait to see how you bring the Sole Hat to life! Share your finished projects by using #solehat #sewhomey and tagging @sew.homey on Instagram. Your projects are the source of inspiration!
Happy crocheting!
Recent Posts
Twofold is the Sew Homey take on a classic, chunky knit-ribbed hat with a folded brim. It features the same unique stitch combination and short rows as the Sole hat, but with a modification of stitch...
The Not Knot Shelf | Easy CROCHET Pattern for a Macramé-Like Wall Hanging Shelf
The Not Knot Shelf was inspired by the texture and geometry of macramé knots. It's mostly made up of single crochet stitches, but the strategic placement of fpst and fp2tog creates the...