No Christmas tree? No problem. Create your own Christmas tree wall hanging to substitute the real deal.
DIY a stunning Christmas tree with minimal materials and effort. Turn spare yarn into tassels. Then use a stick from the backyard to tie your tassels into the shape of a Christmas tree. Next step: hang it on the wall for all to see.
This year Christmas decorations look a little different in my new apartment. There is no tree. What?? It’s okay, I improvised! I came up with the next best thing: a Christmas tree wall hanging. BONUS: it gets rid of left over yarn!!
If you’d like to see the process to make your very own, go ahead and dive in!

DIY Christmas Tree Wall Hanging
The Christmas tree is made up of 7 tassels total. The tassel for the top is made slightly different than the other 6 because the yarn must be attached to something that can hang to the wall. The tassels are then attached to sticks (which only show up on the back) in the shape of a Christmas tree.
The finished dimensions of the tree measure 11 inches tall by 7.5 inches wide. Of course, these dimensions are customizable to fit your wall space.
Follow along, I have detailed instructions for every step of the way, plus a full tutorial on my YouTube channel if you’d prefer to watch the process.
Materials
- Yarn – any kind will do
- Scissors – make sure they are sharp
- Book – any book, just keep in mind the height of the book = height of the tassel
- Stick – grab one from the backyard
- Wooden ring – or something similar so it can hang on the wall
Step 1: Make the Top Tassel
Grab your yarn, book, scissors, and wooden ring for this first step.
Note: if you don’t have a wooden ring, substitute for any other material that will allow you to hang the tree to the wall.
Start by wrapping your yarn around the width of the book approximately 75 times. I am using a weight 3 (DK) yarn, so if the yarn is thicker wrap less times. But the total number of wraps is totally up to you and how thick you want the tassel to be.
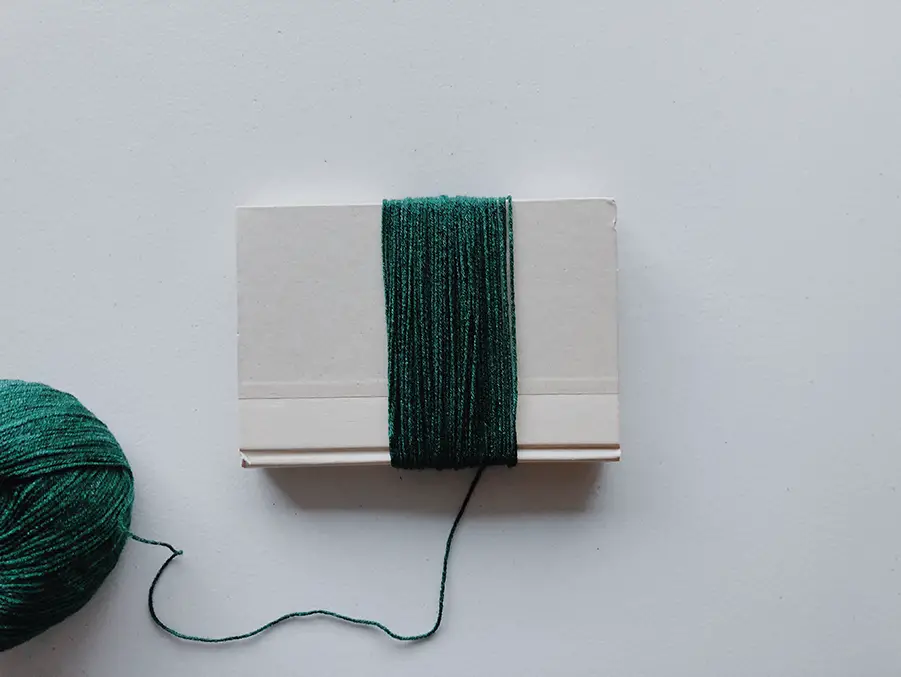
This is the top of the tree and should be the fullest tassel. This is so the tops of the row of tassels underneath will be hidden.
Next, cut the yarn away from the skein. Then cut one side of the yarn wrapped around the book to make long strands.
Place the strands of yarn through the center of the ring. Try to keep the edges even.

Cut a piece of yarn that is about 8 inches long. Tie that around the yarn as close to the ring as possible. This creates the head of the tassel. Clip the yarn ends. For best results, watch this quick video that shows you how to tie the top of a tassel so the knot is hidden.
Trim the bottom for cleaner edges if necessary. Set this tassel aside and move on to step 2.
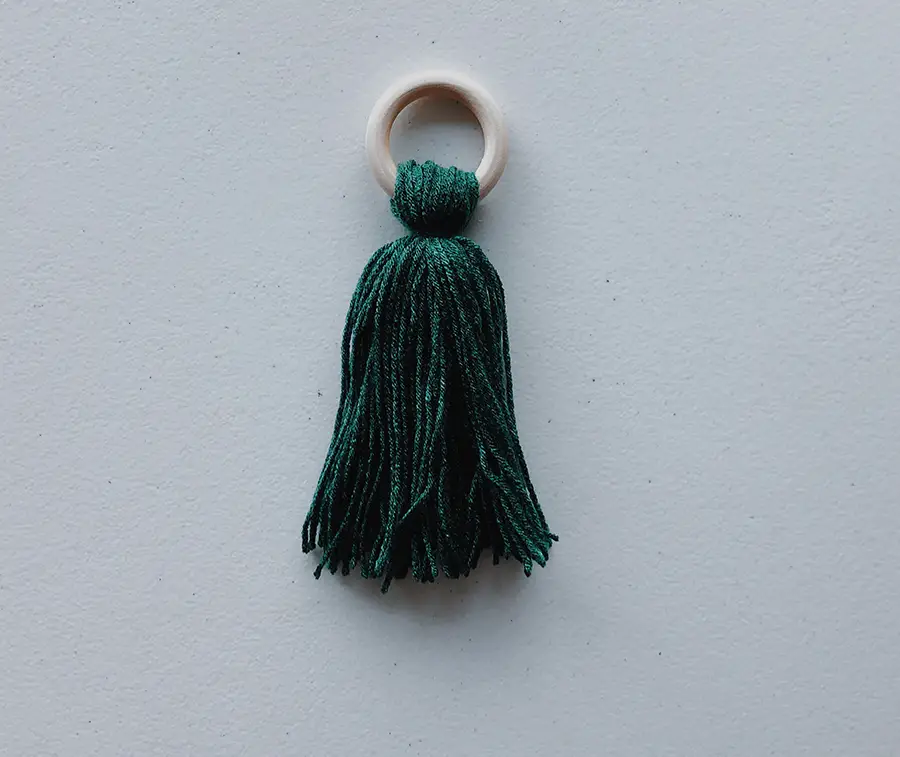
Step 2: Make 6 Tassels
This step is very similar to the previous one. Grab your yarn again, scissors and book.
Begin by wrapping your yarn around the width of the book approximately 60 times. For thicker weight yarns, less times may be adequate.
Next, cut the ends of the yarn to create long strands. Cut a separate piece of yarn about 8 inches long. Place the long strands on top of the new piece of yarn. There should be a cross shape, with the single piece of yarn in the middle of the long strands.

Double knot the single piece of yarn around the strands to keep them all together. Keep those pieces away from the rest of the tassel.

Finally, create the head of the tassel. Cut another piece of yarn approximately 8 inches long. Tie this strand around the top, leaving about an inch or less of yarn at the top. Do so in the same manner to hide the knot, as with the previous tassel. Clip the excess yarn and trim the bottom of the tassel if desired.

Repeat step 2 five more times, or until you have the number of tassels desired.
Step 3: Assemble the Tree
Assembling the tree is the most exciting part. You get to see how the tassels come together to create a Christmas tree.
Grab all 7 tassels and the stick to get started.
The stick will be broken into 2 pieces. The first piece should measure about 2.5 inches and the second one should be about 3.5 inches. Just note, you don’t want these to be too long, otherwise the stick will poke out on the sides.
Once the sticks are the correct size, take the largest stick and 4 tassels to begin with. We will be working from the bottom of the tree up.
Note: I chose 4 tassels for the bottom because I liked it more full. However, you can reduce this number for different results.
Tie each tassel, one by one, onto the stick. Keep them evenly spaced.

Next, grab the smallest stick and 2 tassels. Tie these tassels to the stick, keeping them evenly spaced as well.
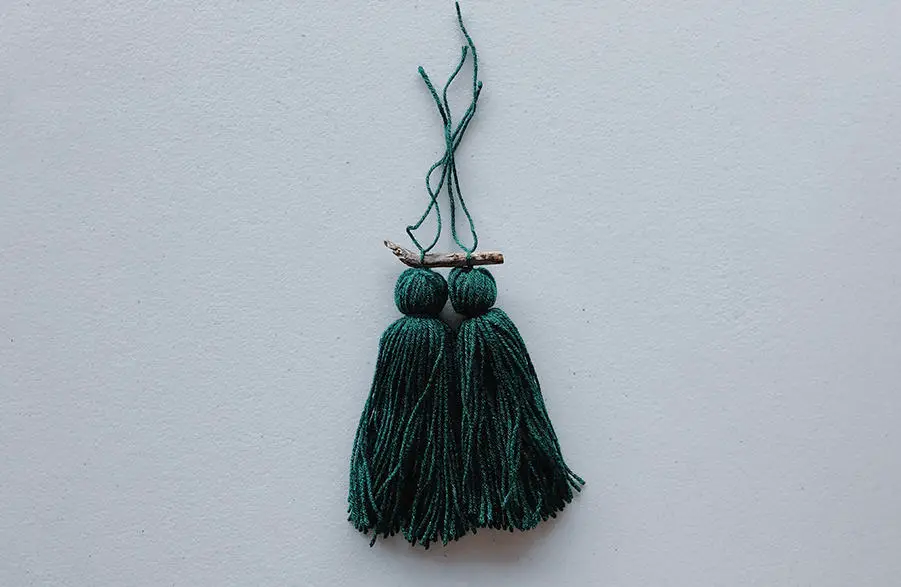
Now, gather all of the top strands of the tassels from the bottom portion. Tie these into a single knot in the middle of the stick that is holding the 2 tassels. Set aside.
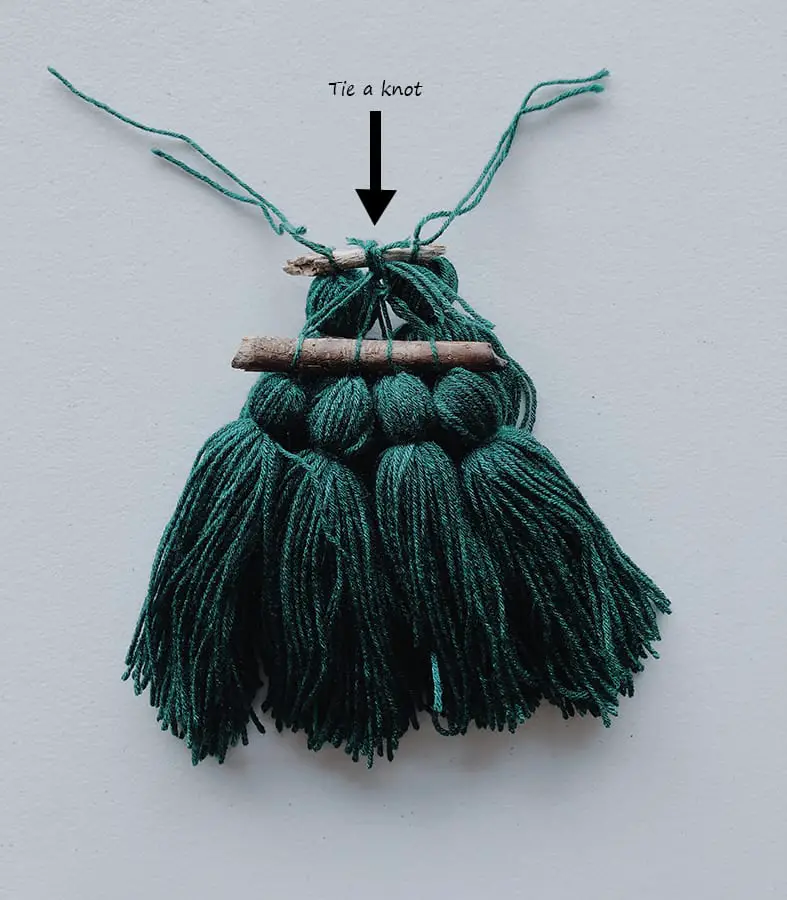
Take the remaining tassel, the one attached to the ring, and find 2 strands from each side. Lay them out horizontally so they don’t get lost.

Now, take the top strands of the tassels that are attached to the small stick and tie them to the strands that are laying out horizontal from the top tassel. This will attach the top tassel to the rest of the tree.
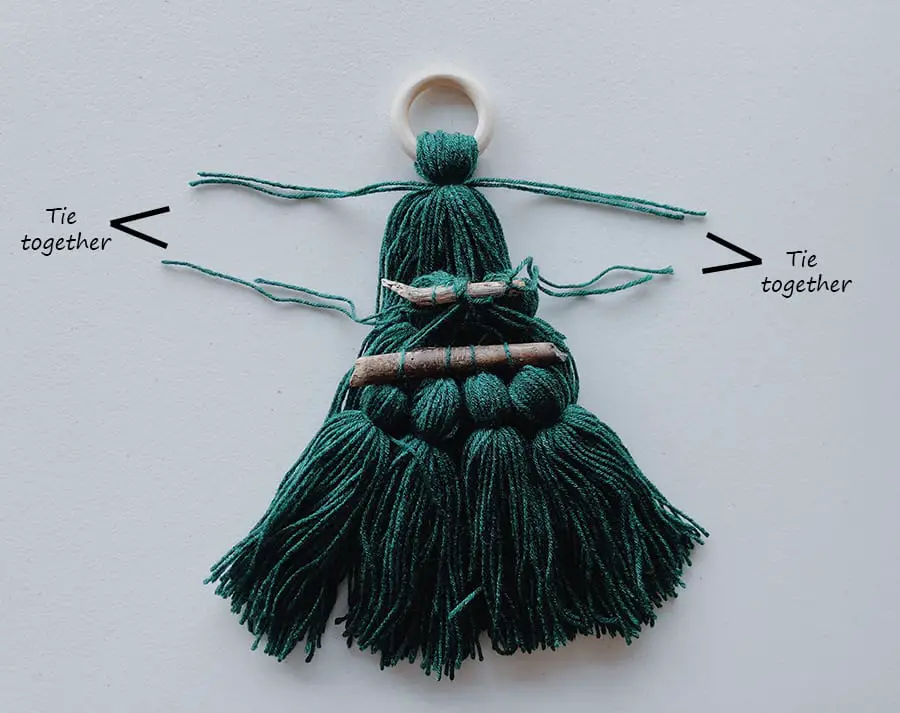
When finished, you should have something similar to this.

Flip the tree over and marvel at your masterpiece.
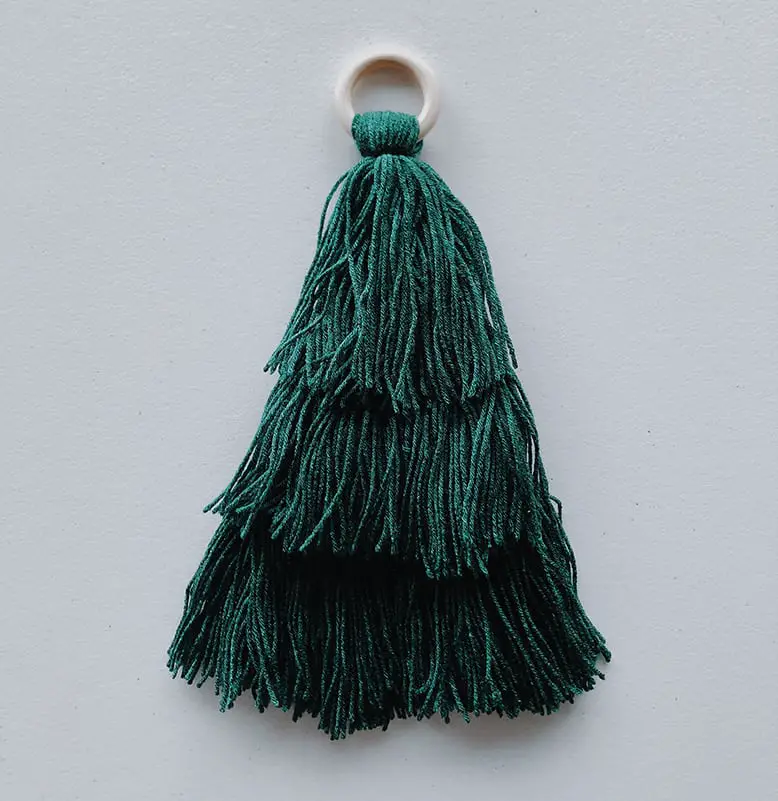
Step 4: Hang the Christmas Tree!
Now you have a finished Christmas tree made from tassels! It’s time to find room for it on the wall somewhere. Mine is currently hanging on my wall in front of my desk. But when I wrap Christmas presents, I may move it to the living room so I have a tree to put the gifts under (lol!).
Thanks for stopping by. Happy making and happy holidays!
Recent Posts
The Sole Hat: A Classic Knit-Look Hat Crochet Style | Free Pattern + Tutorial
If you're a crochet enthusiast looking for a timeless, cozy hat pattern with a unique twist, you're in the right place! Introducing Sole, the crochet version of the classic, chunky 2x1 knit ribbed...
Twofold is the Sew Homey take on a classic, chunky knit-ribbed hat with a folded brim. It features the same unique stitch combination and short rows as the Sole hat, but with a modification of stitch...
