
Blocking knitted projects is dreaded by many novice and experienced knitters alike. Sweaters knit in the round only take longer to dry, but it is an essential step for proper sizing.
How do you block sweaters knit in the round?
- Soak the garment in cool water for 20 minutes.
- In the meantime, measure out the basic dimensions of the garment and mark with straight pins.
- Squeeze out excess water.
- Place garment on blocking mats.
- Press the garment flat and evenly with your hands to the desired dimensions.
- Let dry overnight.
Blocking will improve the look of your finished garment and ensure the sizing is correct. Follow along and you will be on your way to having the perfect knitted garment.
Step by Step Guide to Blocking a Garment Knit in the Round
It is important to note that your garment should be completely finished at this point. All the ends should be woven in before continuing to the next steps.
Also, the fiber of the yarn used is important. This wet blocking method works the best for animal fibers which include wool, alpaca, cashmere, mohair, etc.
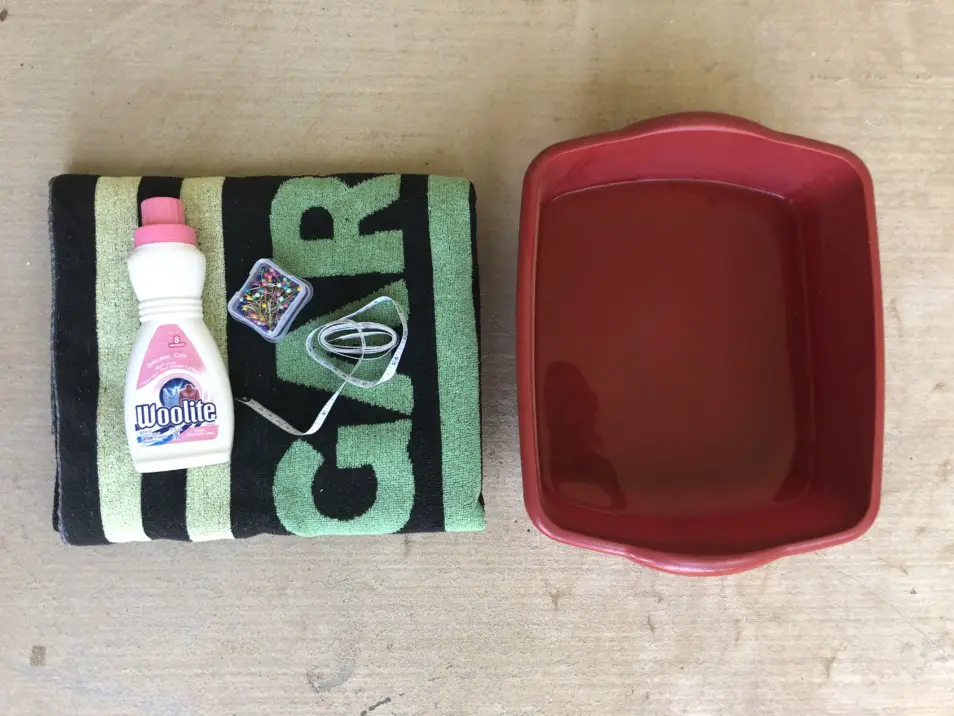
Materials for Blocking
- Blocking mats
- Water
- Wool wash
- Rust proof straight pins
- Measuring tape
- Tub
- Towel
Step 1 – Soak the Garment
To soak your knitted project, choose a tub or bowl and fill it with water. Use anything lying around. The cheap, plastic tubs used for dishes or soaking laundry work nicely. Or clean a sink will also work. Be sure to leave enough room in the tub for the fabric to fit without water spilling over the edges.
You can choose to use a splash of wool wash in your water to gently cleanse and soften the fabric. Most often the popular choice is to use wool wash, but not everyone does. So if you don’t have it, skip it. Water is the most important part of blocking, not the wool wash.
Gently fold your garment to a small piece. An easy way to do so is fold the sleeves (if you have them) across the chest so they criss cross. Then fold in half vertically and once more horizontally.
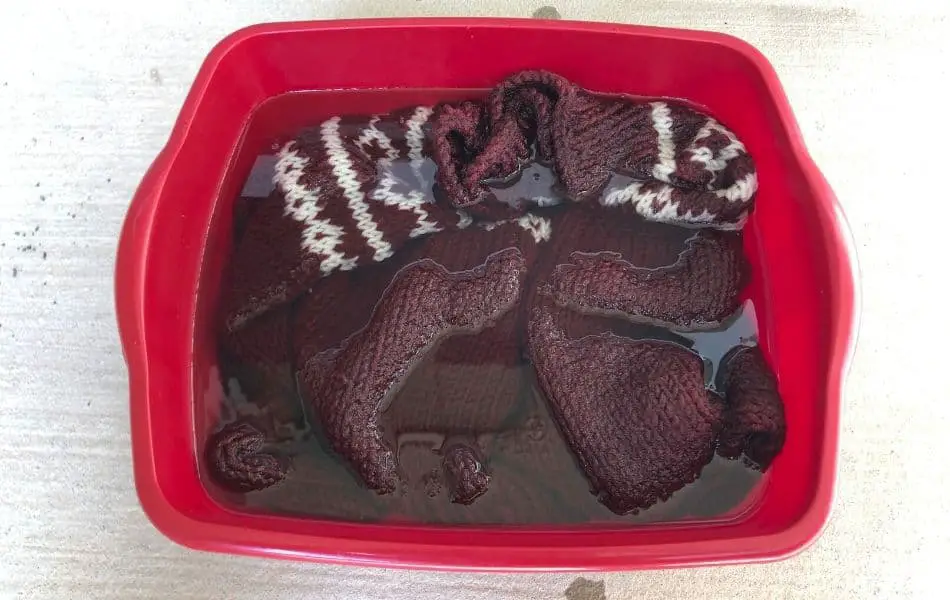
Place the folded fabric into the water and press down until the whole thing is submerged. When air bubbles stop coming to the surface, you can quit pressing down. This is what your garment should look like when it’s soaking.
Let the garment soak for at least 20 minutes. The knitted piece needs time for all the fibers to soak up the water. 20 minutes is a good rule of thumb, but you can keep it soaking longer. Just don’t overdo it and leave the fabric in the water for several hours.
Step 2 – Prepare Blocking Mat
While your fabric is soaking, you can prepare your blocking mat. Refer to your pattern for the finished dimensions of your project. The measurements to take note of include:
- Dimensions from bottom of garment to top of yoke/neckline
- Bottom width of sweater
- Width of the body (armpit to armpit)
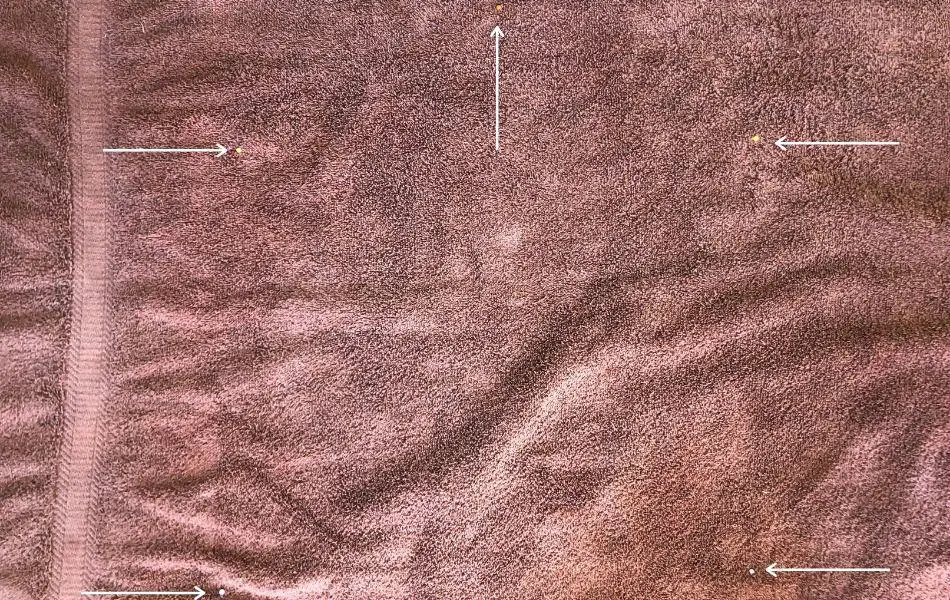
Use a measuring tape to determine the exact dimensions for the garment on the blocking mats and place pins as markers. For example, you should have two pins for the bottom of the sweater, the left and right side. You should have two pins for the width of the body, one for each armpit. And you should have one pin marking where the center of the neckline should be. It is also a good time to mention that you should use pins that are rust proof since they will be around water.
Unfortunately, at this time, I don’t have blocking mats myself. I still use a towel. So the pins are a little hard to see. That’s where the arrows come in. The top arrow/pin represents where the middle of the neckline should line up. The two arrows near the top that point inward represent the spot the armpits of the sweater should go. Finally, the arrows at the bottom illustrate where the bottom of the sweater should line up. I hope this visual helps.
Double check that your pins are the exact dimensions desired before moving on. If not, the measurements of your sweater may be off.
Step 3 – Squeeze Out Excess Water
When soaking time is up and your blocking mat is prepared, grab your dry towel and place it on your blocking mat. Gently pick up your folded garment out of the water. It will be significantly heavier now. Be careful that you don’t let the fabric stretch.
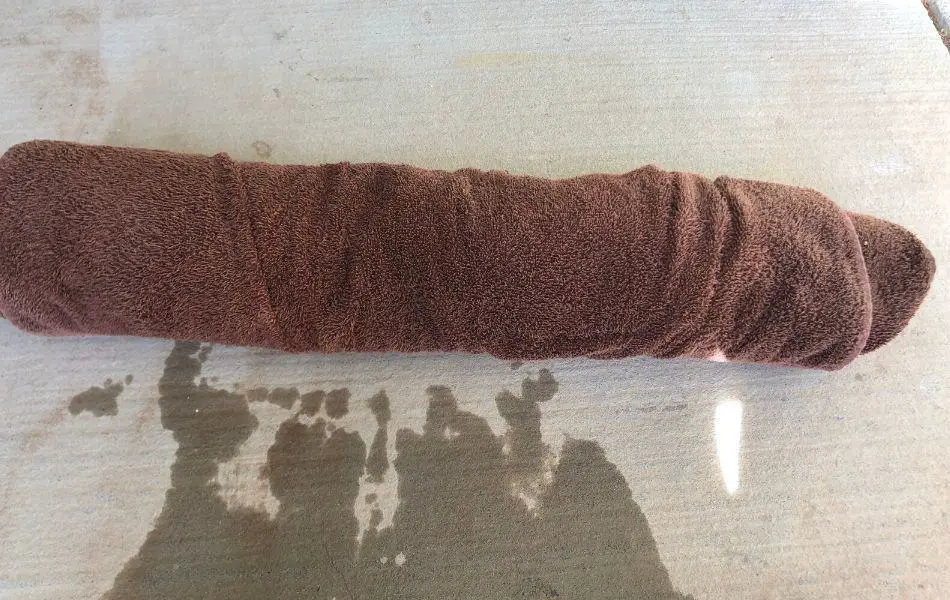
This is what mine looked like when I took it out of the tub.
Squeeze out some excess water with your hands then transfer to the towel. Do not wring or twist the fabric because this will agitate the fibers and give unwanted results. Unfold the fabric, keeping the sleeves close to the body. Then start from the bottom and roll the towel up. The garment will now be on the inside. Press on the towel and squeeze out the water from the knit fabric.
It looks a little funny, but this is how my sweater looked rolled inside the towel. I also pressed down on the top to squeeze out more water.
Unroll the towel. If your piece still feels sopping wet, transfer to a different towel and repeat the same steps above. After enough water has been squeezed out, transfer the garment to your prepared blocking mat. Again, be careful in the transport because you don’t want to stretch the fabric too much. It could be useful to fold it back and transfer that way.
Step 4 – Shape the Garment
Once the garment is on the blocking mat, use your hands to move the fabric to align with the pins. Gently press on your knitted project until they reach the correct dimensions. Pay attention to the edges and make sure they are straight. Also, don’t forget about the back side. Keep the top and bottom pieces together to ensure an even block.
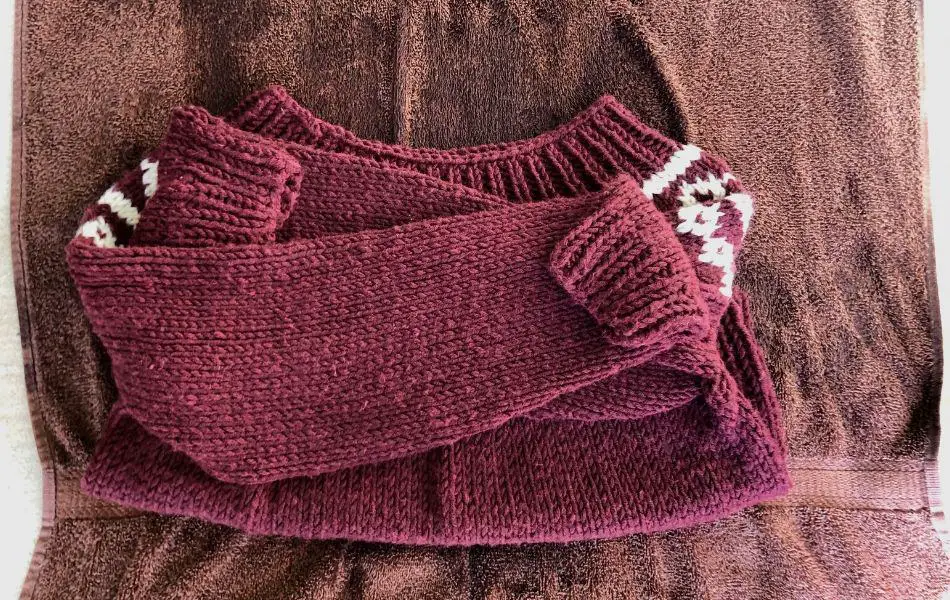
My sweater looked like this spread out on the towel. It is now ready to dry. I can’t wait to see what it looks like when it’s dry!
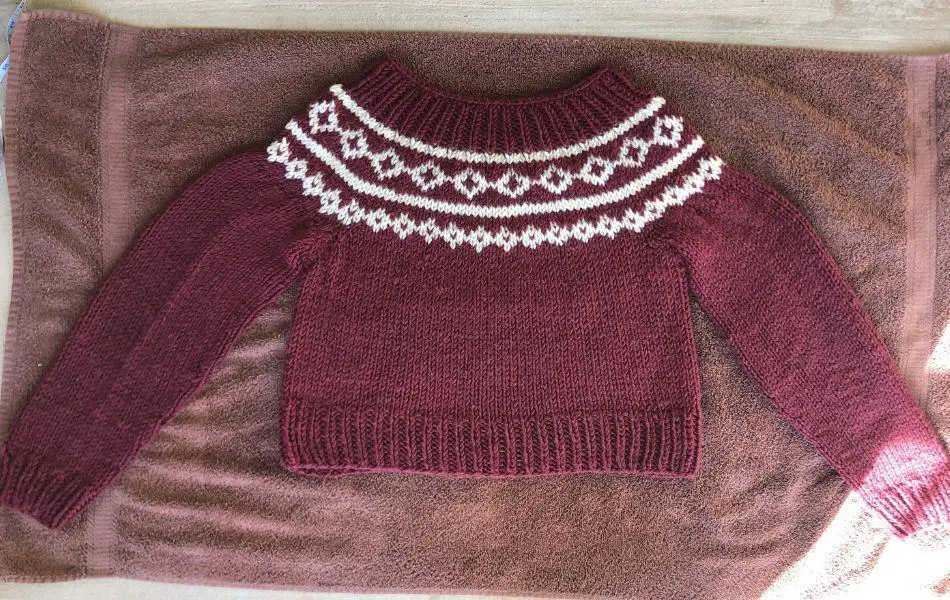
If you have a sweater with a yoke like I do, try to press out any places that have ripples. Same goes for lace worked into the design. Take special care to block them properly so they can bloom when dry.
Step 5 – Let Dry
Now is the time to let it dry. Unfortunately there is no perfect drying time that is accurate every time. The time of year, the humidity, the type of fiber used, etc. are all factors that affect the drying time.
Try blocking in the morning or afternoon and let it dry overnight, approximately 24 hours. You can always check on it periodically during the day. Know that this is the part that takes longest. But be patient with the process.
Admire the Transformed Garment
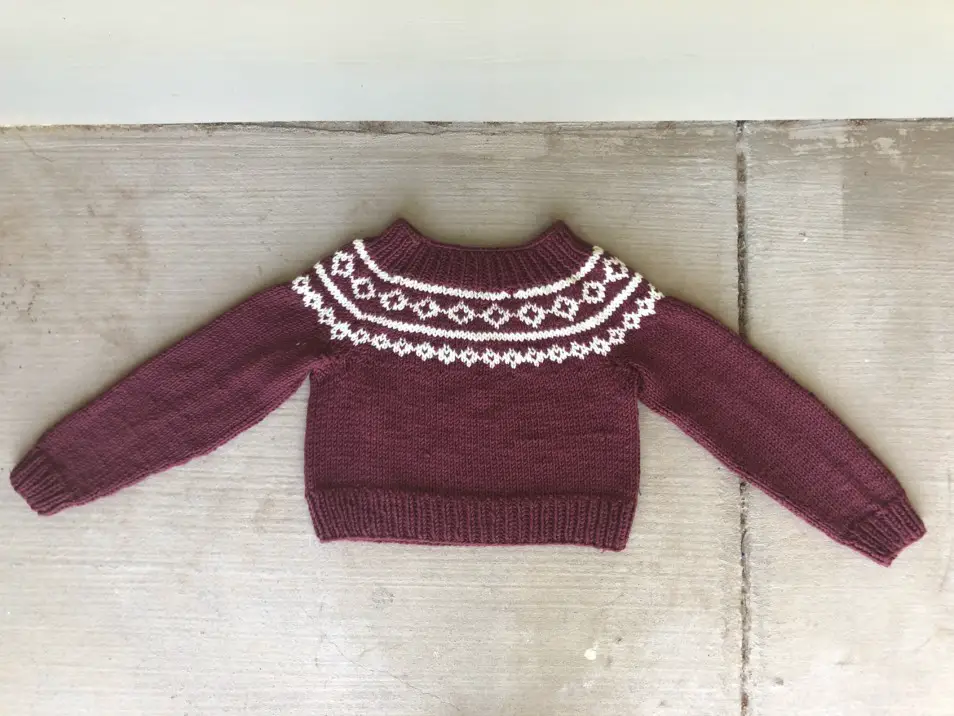
Don’t move the garment until it is completely dry. Once it is though, notice how all the ripples and the puckering are all gone. It is perfect for wearing now! You’ll never understand the true magic of blocking until you try it yourself.
I photographed the finished garment that I chose to block for this post. I forgot to take a before photo, so I can’t compare them visually. However, I can tell you that the yoke relaxed and the puckering it caused is gone now. And the width of the garment is the measurement it should be. This sweater is made from 100% acrylic, so the results are not as dramatic as it would be for other fibers.
Alternatives for Blocking Mats
Whether this is your first experience with blocking, or you don’t have the budget to invest in a good set, there are alternatives to blocking mats.
- Large bath towel
- Kids foam puzzle mats
- Old rug or mat
These are just a few options I thought of. But keep in mind that if you were to use a towel or even a rug as the base, the drying time may take longer since an extra layer of fabric is added. But don’t let that deter you! I use towels all the time. I like to set them in a sunny spot so dry time is faster.
What About Using Pins to Shape the Fabric?
Pins are not always necessary. If there is a lot of shaping to the garment or the edges roll, pins may be needed to secure the fabric in place. This will ensure the curves round in the correct way and that the edges remain straight.
If your garment has ribbing at the bottom, it is not necessary to pin that portion. Pin the top of the ribbing in place, but let the ribbing remain its current shape. Pinning will only stretch out the ribbing and leave it floppy, which is not the goal.
Related Questions
How is acrylic blocked? Acrylic is best blocked with steam. The project should be pinned to dimensions. Then use an iron or a steamer and go across the fabric. Careful not to get too close because you can kill the acrylic and make it lose its shape.
What is a sweater blocking frame? Wooly boards or blocking frames are generally made out of wood. They have the shape of a long sleeved sweater. The sleeves, waist, neck, arms and shoulders can be adjusted to block a sweater to custom dimensions.
Recent Posts
The Sole Hat: A Classic Knit-Look Hat Crochet Style | Free Pattern + Tutorial
If you're a crochet enthusiast looking for a timeless, cozy hat pattern with a unique twist, you're in the right place! Introducing Sole, the crochet version of the classic, chunky 2x1 knit ribbed...
Twofold is the Sew Homey take on a classic, chunky knit-ribbed hat with a folded brim. It features the same unique stitch combination and short rows as the Sole hat, but with a modification of stitch...