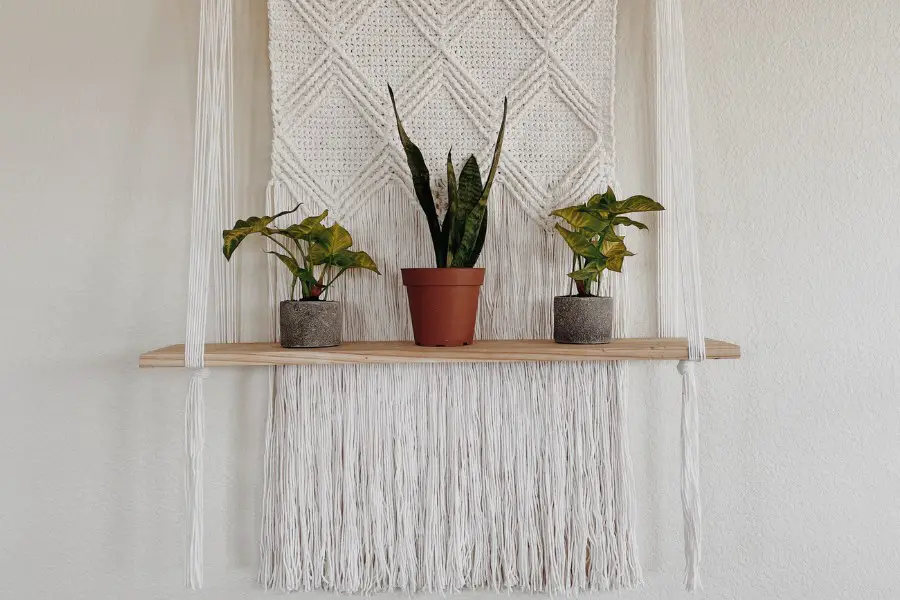
The macramé inspired Not Knot Shelf is a crochet pattern designed to transform your wall space into a decorative shelf. Add plants, knick knacks, yarn, books, etc. And don’t forget to share your projects with #sewhomey so we can all gain inspiration!
Materials
Yarn
Peaches & Creme Ecru
OR
Sugar ‘N Cream Ecru
Hook
5.00 mm / US H
5.50 mm / US I
Dowel Rod
5.00 mm / US H
Wood
26″ Length x 5.5″ Width x 0.5″ Thickness (will need to cut to 26″ length)
*Ask an associate to cut the piece of wood to the length you want. You might have to purchase a piece of wood longer than you need, but they will cut it into pieces for you. Then make your friends a wall hanging to match! I had enough wood for 3 wall hangings.
Video Resources
For the visual learners out there, these videos cover the stitches and techniques used throughout the pattern.
Fundamental Stitches
Review the fundamental stitches on this page. For this pattern, you need to know:
- chain (ch)
- single crochet (sc).
Main Stitch Pattern
The Enlarged Diamond Waffle stitch is a bigger version of the traditional diamond waffle stitch pattern. If you’re familiar with the stitch pattern, I tried to keep the terminology similar. Essentially it is a combination of single crochet stitches and a special version of treble crochet stitches.
This pattern is crocheted bottom up. The pattern is designed to have a multiple of 20 stitches + 3. This is helpful if you want to change the size of your wall hanging so that there are more or less diamonds. Don’t hesitate to reach out if you’d like help this.
In this video, you will learn the definitions of the following stitches:
- fp11tr (fpst in written pattern)
- fp11tr2tog (fp2tog in written pattern)
How to Crochet onto a Dowel Rod
Once you have the crochet piece complete, it needs to attach to the dowel rod to hang. Follow along with the tutorial for this step.
How to Add the Fringe
The fringe is added to 3 different rows to give it the fullness it needs. This short tutorial will walk you through the exact placement of the fringe.
How to Add the Straps and Assemble
The final stage of this wall hanging is to add the straps to the dowel rod, hang to the wall and balance the shelf. After you follow along to this tutorial, you’ll be set to decorate it any way you wish!
What is not shown in this tutorial is adding the hook to the wall to hang the Not Knot Shelf from. I used a clear Command strip since it does not damage the wall. But feel free to use anything you have on hand.
